Overview
Cloudron includes a full-featured mail server out of the box.
Features:
- Multi-domain support
- Webmail - SnappyMail and Roundcube apps pre-configured
- Completely automated DNS setup - MX, SPF, DKIM, DMARC records configured automatically
- Anti-spam - Users train the spam filter by marking mails as spam. Built-in rDNS and zen spamhaus lookup. Admins can add custom spam rules
- Let's Encrypt integration for mail endpoints
- Secure out of the box
- Mailboxes for users and groups on a domain level
- Mailbox sharing amongst users
- Per-user and group mail aliases
- Group email addresses that forward email to members
- Catch-all mailbox to receive mail sent to non-existent addresses
- Email relay via SendGrid, Postmark, Mailgun, AWS SES, or Smart host
- Email account sub-addressing with
+tag qualifier - Mail filters and vacation email using ManageSieve
- Full text search (body and attachments)
- Server-side mail signatures (per domain)
- Domains and IP addresses blacklisting
- Mail queue management
- Event log
- "All Mails" folder
- REST API to add users and groups
Setup
Incoming email
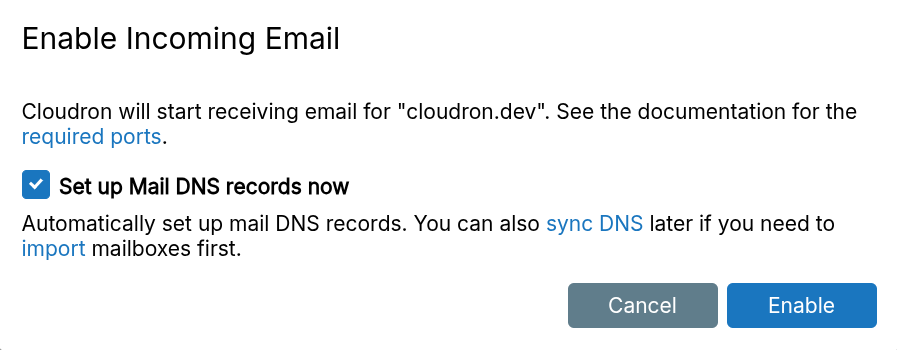
To receive email for a domain, enable Incoming Email under Email > Domains > select domain > Receiving.

When Setup Mail DNS records now is checked, the MX, SPF, DKIM, DMARC DNS records of the domain are automatically updated. See the DNS section for more information.
Cloudflare proxies HTTP only, not email. Disable proxying for the mail server location.
Server location
The mail server (IMAP/SMTP) defaults to the dashboard location (my.domain.com). Change it in Email > Settings.
DNS records are updated and webmail apps are reconfigured automatically. Mobile and desktop mail clients have to be re-configured manually.
Update the PTR record manually to match the server location.
Send test email
Send test email:
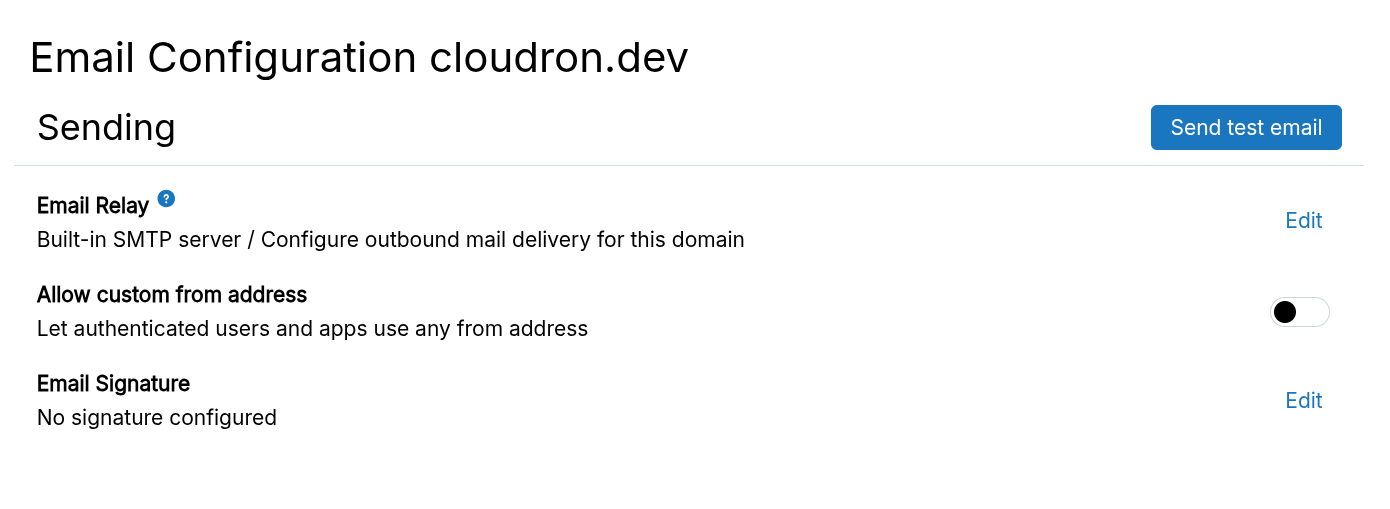
Enter recipient address:
If you are not receiving emails, check the server status and the event log.
Firewall
Email requires specific TCP ports. These are managed in the server firewall automatically.
Open these ports in any cloud firewall (EC2 security group, DigitalOcean/Linode/Vultr Cloud Firewall):
Incoming ports
The following ports are required for receiving mail.
| Port | Notes |
|---|---|
| 25 (SMTP/TCP) | Required for receiving email. When email is disabled, this can be blocked. |
| 465 (SMTP/TCP) | Used for submitting email via TLS from mobile phone or desktop apps. When using only webmail or when email is disabled, this port can be blocked. |
| 587 (SMTP/TCP) | Used for submitting email via STARTTLS from mobile phone or desktop apps. When using only webmail or when email is disabled, this port can be blocked. |
| 993 (IMAP/TCP) | Used for accessing email from mobile phone or desktop apps. When using only webmail or when email is disabled, this port can be blocked. |
| 4190 (Sieve/TCP) | Used for accessing email filters from mobile phone or desktop apps. When using only webmail or when email is disabled, this port can be blocked. |
Outgoing ports
The following ports are required for sending mail.
| Port | Notes |
|---|---|
| 25 (SMTP/TCP) | Required for sending out emails. If outbound port 25 is blocked by your server provider, setup an email relay. You can check if outbound port 25 is blocked by sending yourself a test email . |
Mailbox
Add
Create mailboxes for users and groups per domain in the Mailboxes view.
Select an existing user or group as the owner. Users access email with the new address and their platform password via SMTP and IMAP. Group mailboxes are accessible by any group member using their password.
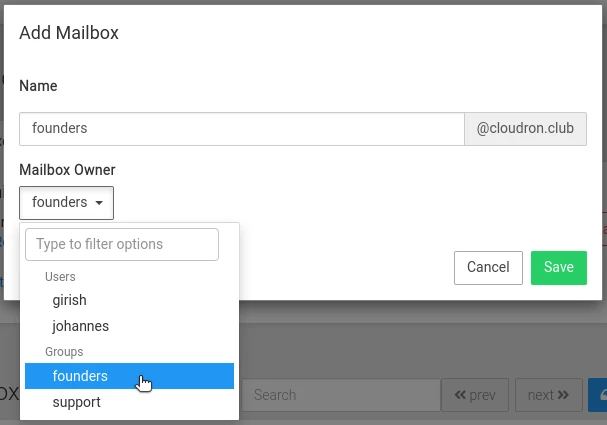
Mailboxes have the following naming restrictions:
- Only alphanumerals, dot and '-' are allowed
- Maximum length of 200 characters
- Names ending with
.appare reserved by the platform for applications - Names with
+are not allowed since this conflicts with the Subaddresses and tags feature.
Remove
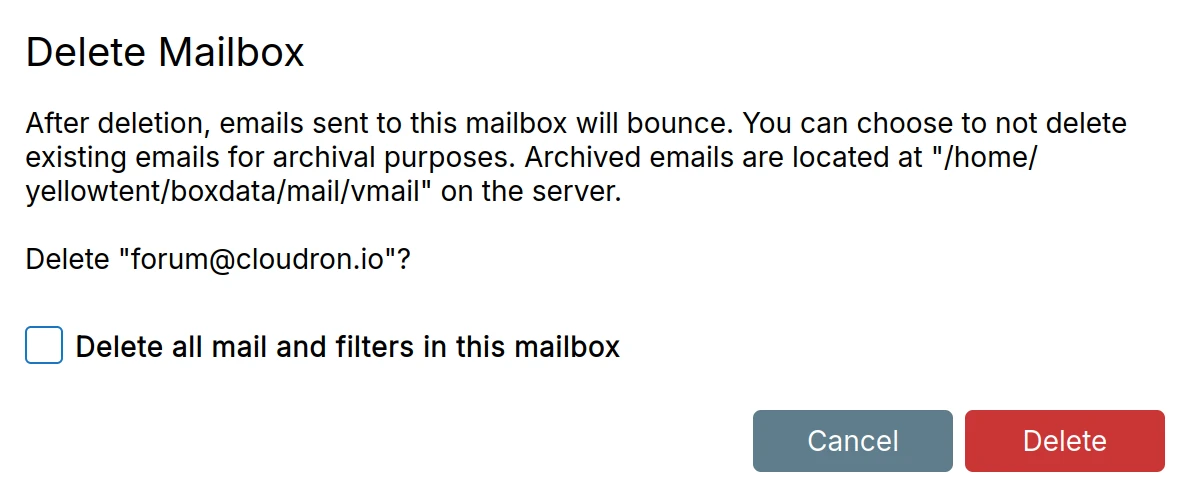
After deletion, emails to this mailbox will bounce. If you have a catch-all address set, then emails will get delivered to that mailbox.
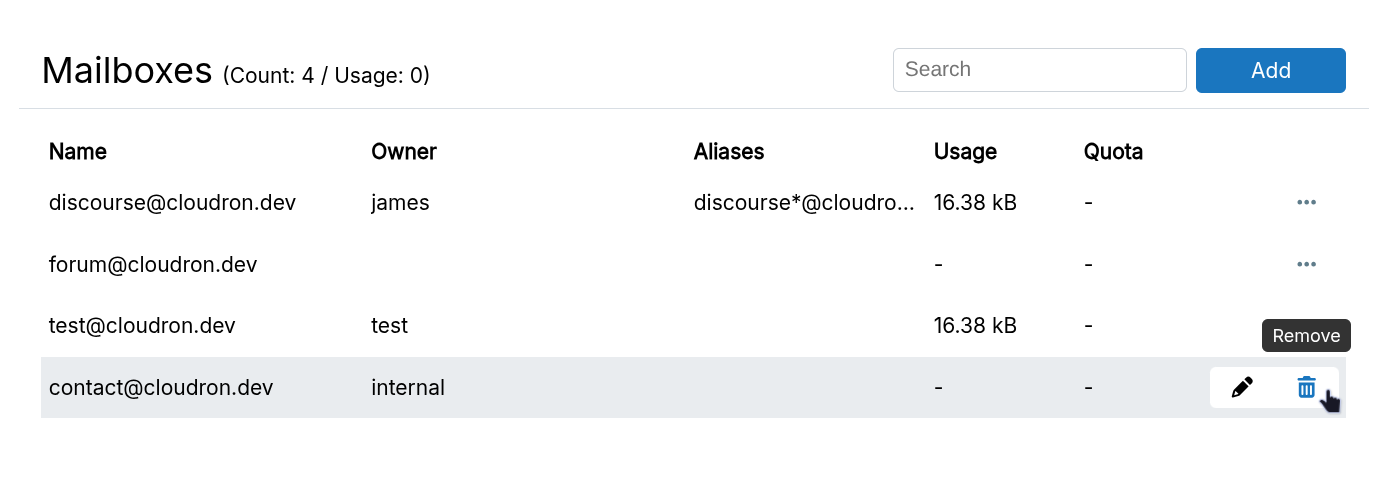
Delete all mail and filters in this mailbox determines if the emails of the mailbox are deleted.
You can remove the emails later by removing the directory /home/yellowtent/boxdata/mail/vmail/<mailbox@domain.com>.
Disable
Temporarily disable a mailbox by unchecking Mailbox is active.
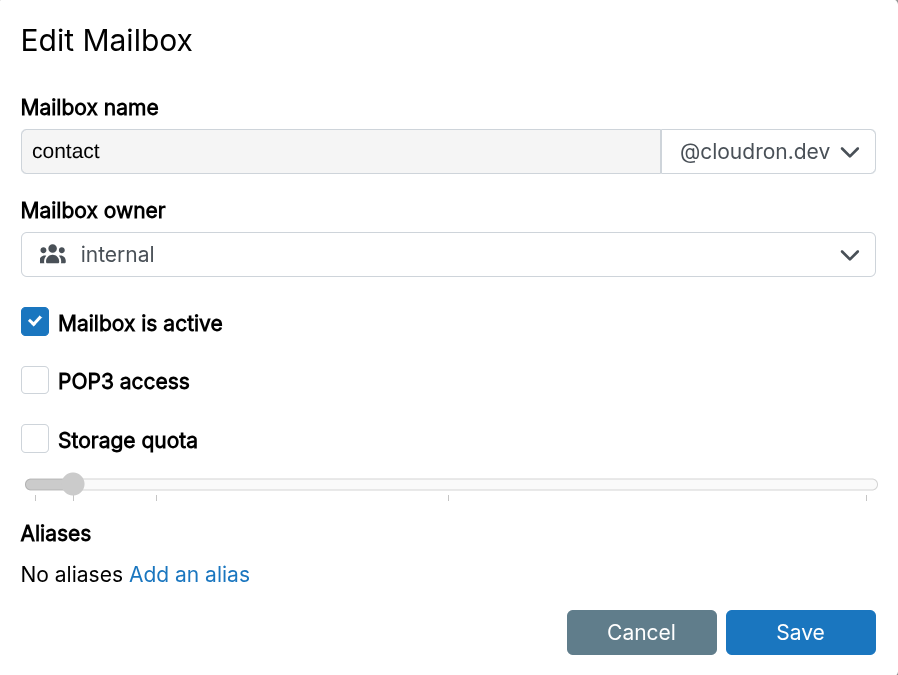
Once disabled, emails to this mailbox will bounce. If you have a catch-all address set, then emails will get delivered to that mailbox.
Mail aliases
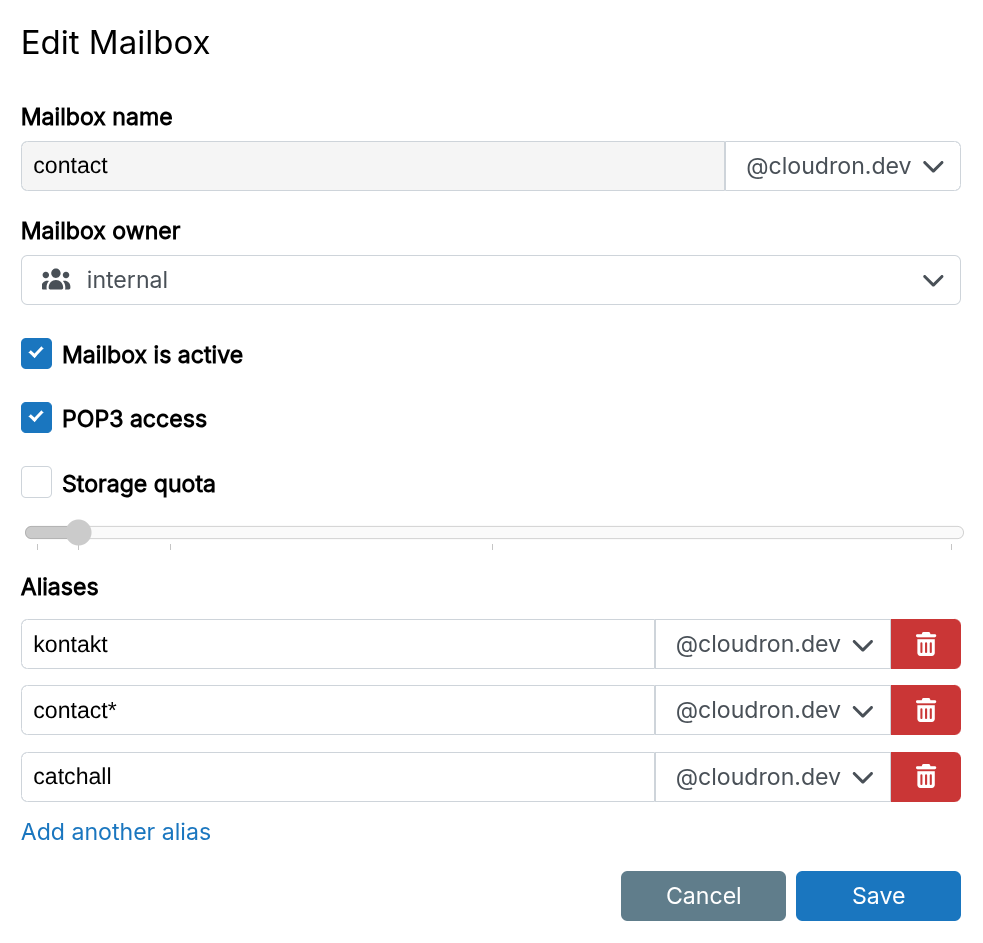
Aliases are alternate addresses that deliver to the mailbox. They can be on any domain and support * wildcard matching.
To send email with the alias as the "From" address, add them as an identity in your mail client. Use the mailbox credentials for authentication when sending email using an identity.
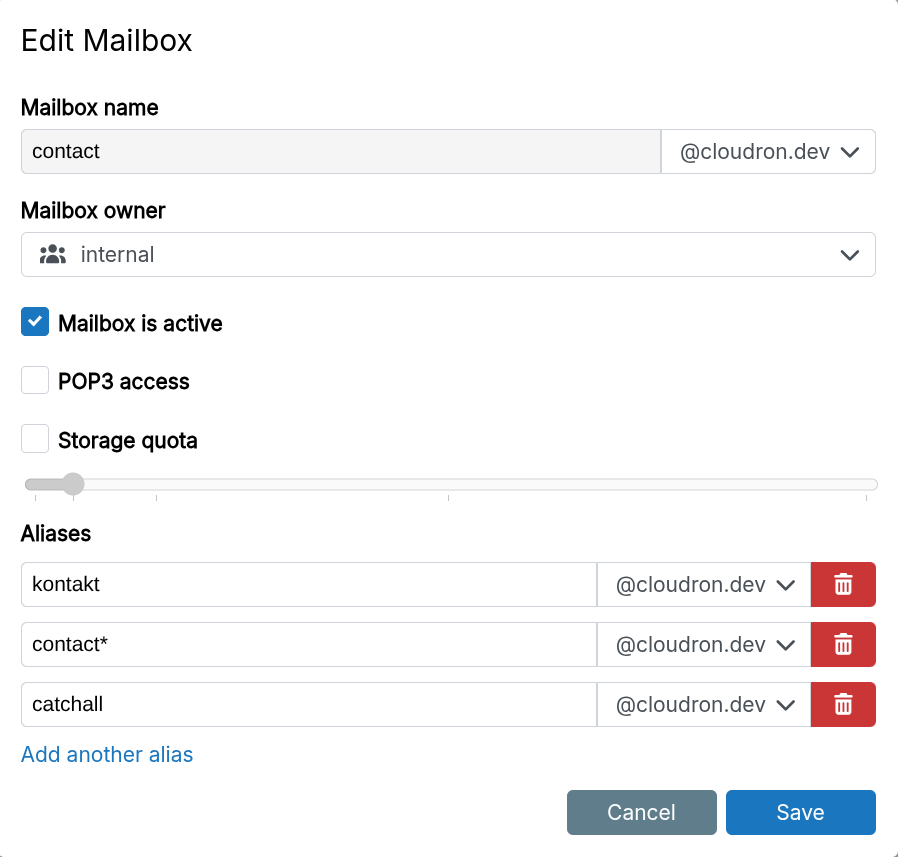
Login with alias addresses is not possible.
Mailing list
A Mailing list forwards emails to one or more email addresses. Create a list in the Mailing Lists view.
Restrict posting to members only limits posting to members — non-members receive a bounce.
Implements SRS for forwarding to external addresses. The server suppresses duplicate delivery by checking To and Cc fields.
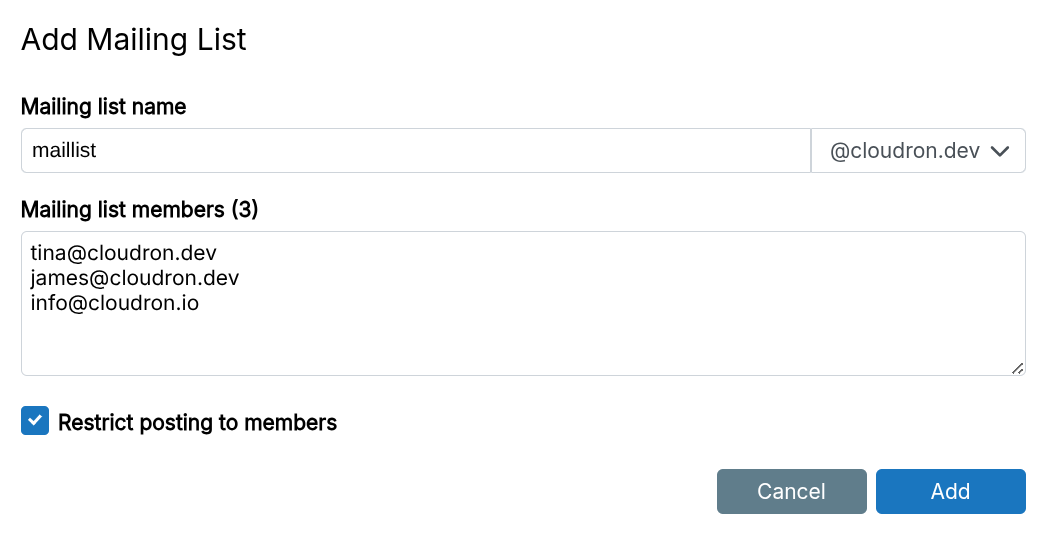
Mailing lists do not support subscribe/unsubscribe functionality.
Catch-all address
A catch-all mailbox receives emails sent to non-existent addresses. Configure forwarding to one or more mailboxes in the Email section. Without a selection, are bounced these emails.

Email client configuration
IMAP
Use the following settings to receive email via IMAP:
- Server Name - Use the mail server location (default:
mysubdomain of the primary domain) - Port - 993
- Connection Security - TLS
- Username/password - Use the email id as the username and the platform password
Use the email id as the username to access different mailboxes. For example, if email is
enabled on two domains example1.com and example2.com, then use user@example1.com
to access the example1.com mailbox and use user@example2.com to access the example2.com
mailbox. In both cases, use the platform password.
SMTP
Use the following settings to send email via SMTP:
- Server Name - Use the mail server location (default:
mysubdomain of the primary domain) - Port - 587
- Connection Security - STARTTLS
- Username/password - Use the email id as the username and the platform password
Use the email id as the username to send email. For example, if email is
enabled on two domains example1.com and example2.com, then use user@example1.com
to send email as example1.com and use user@example2.com to send email as example2.com.
In both cases, use the platform password.
Sieve
Use the following settings to setup email filtering users via ManageSieve.
- Server Name - Use the mail server location (default:
mysubdomain of the primary domain) - Port - 4190
- Connection Security - STARTTLS
- Username/password - Use the email id as the username and the platform password
Use the email id as the username to access different mailboxes. For example, if email is
enabled on two domains example1.com and example2.com, then use user@example1.com
to access the example1.com mailbox and use user@example2.com to access the example2.com
mailbox. In both cases, use the platform password.
POP3
Use the following settings to receive email via POP3:
- Server Name - Use the mail server location (default:
mysubdomain of the primary domain) - Port - 995
- Connection Security - TLS
- Username/password - Use the email id as the username and the platform password
POP3 access is disabled by default and must be enabled per-mailbox.
Subaddresses
Emails addressed to <username>+tag@<domain> i.e mail addresses with a plus symbol in the
username will be delivered to the username mailbox. You can use this feature to give out emails of the form
username+kayak@<domain>, username+aws@<domain> and so on and have them all delivered to your mailbox.
To send email with the subaddress as the "From" address, add it as an identity in your mail client. Use the mailbox credentials for authentication when sending email using an identity.
Relay outgoing mails
By default, email is sent directly. Configure a mail relay (smart host) when the server lacks good IP reputation or the provider blocks port 25 (Google Cloud, Amazon EC2).
The relay must allow sending as any address on the domain ("domain verified" identity). Single-address relays do not work.
Can be configured to send outgoing email via:
- Amazon SES
- Brevo
- Elastic Email
- Mailgun
- Mailjet
- Postmark
- SendGrid
- Office 365
- Sparkpost
- External SMTP server
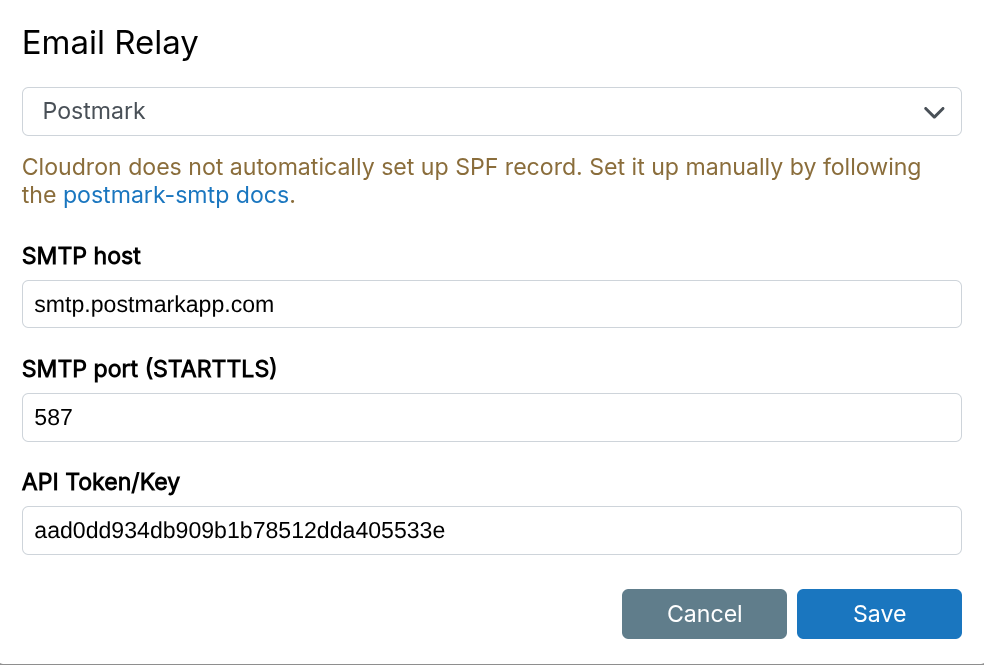
Enter relay credentials in the Email section. Cloudron supports STARTTLS relaying (port 587).
Community Guides:
Amazon SES
To setup Cloudron to relay via Amazon SES:
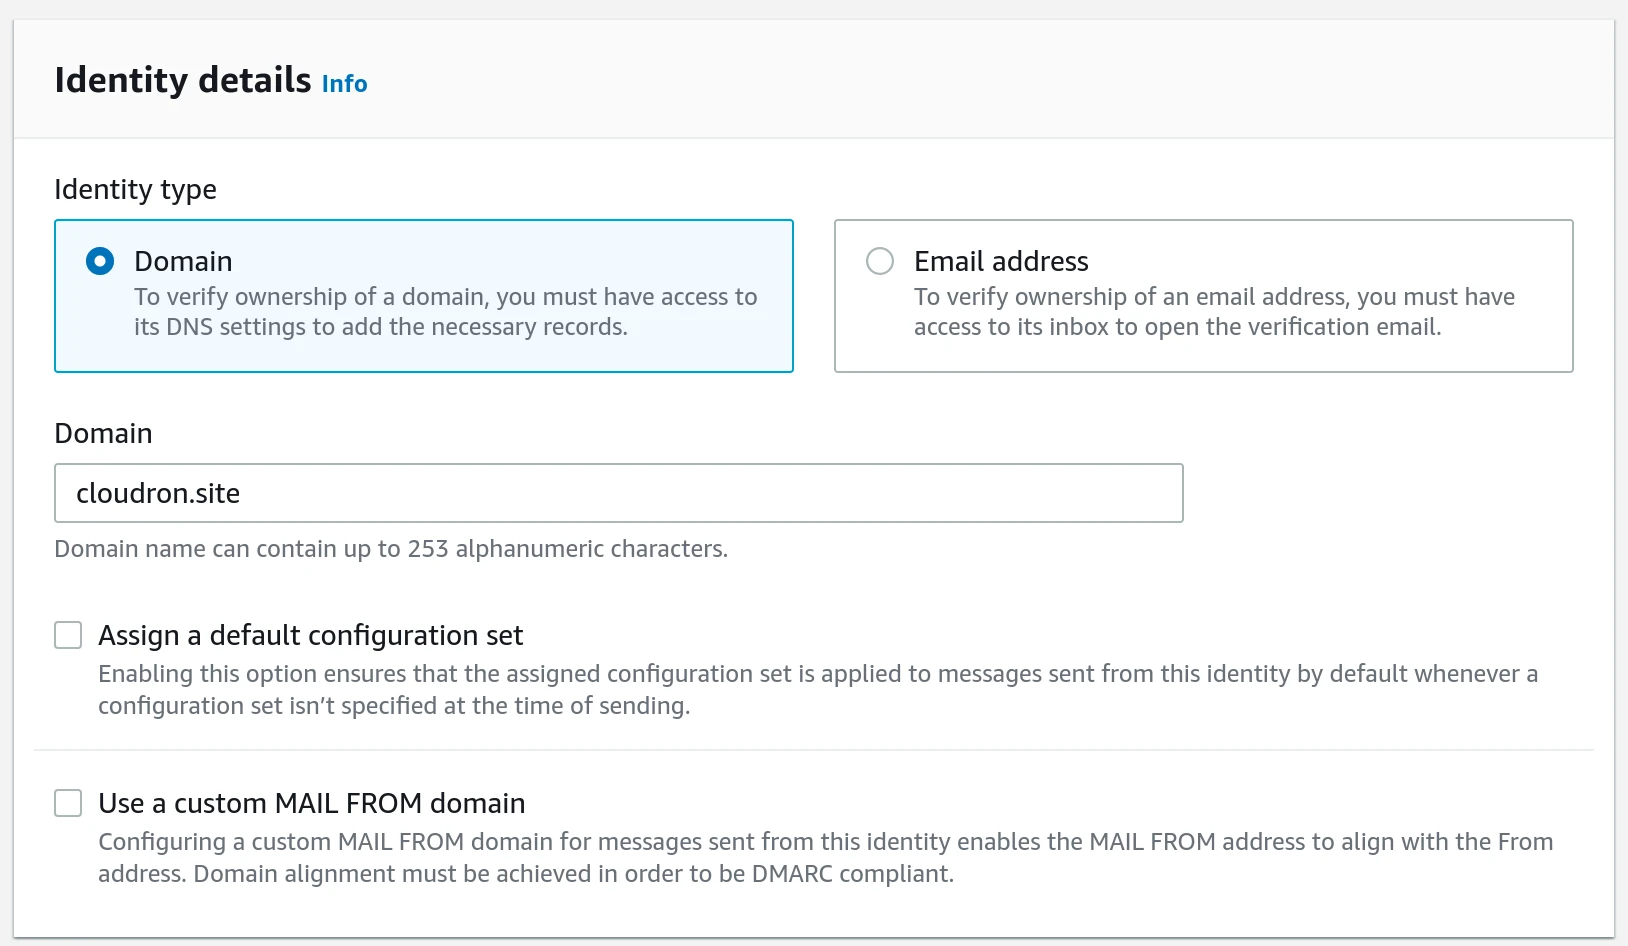
- Add Domain Identity - Go to Amazon SES dashboard and add a new Domain Identity. Note that Email address Identity will not work
because apps send emails with different email addresses. When verifying the domain, leave the
Provide DKIM authentication tokenunchecked.
-
To complete domain verification, add the DNS keys (CNAME records) in the domain's DNS.
-
Once domain is verified, click on
Account dashboardin the left pane and scroll down toCreate SMTP credentials.
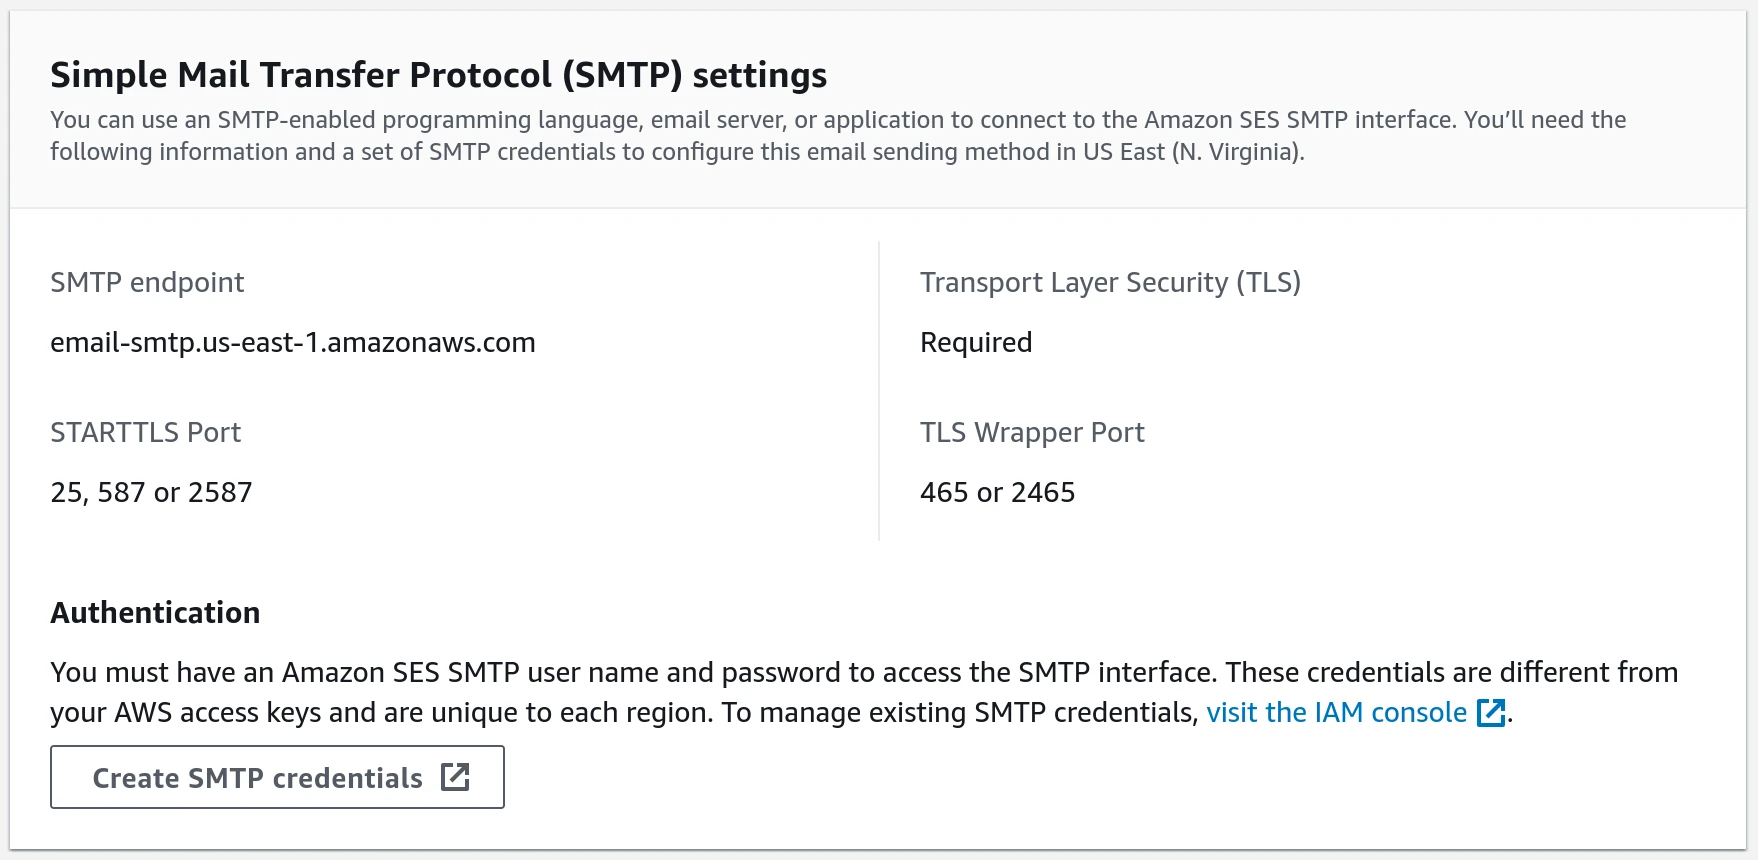
Follow through the wizard to create a new IAM user that has the following policy
"Statement": [{ "Effect":"Allow", "Action":"ses:SendRawEmail", "Resource":"*"}]
- Setup the relay on the platform under the Email section:
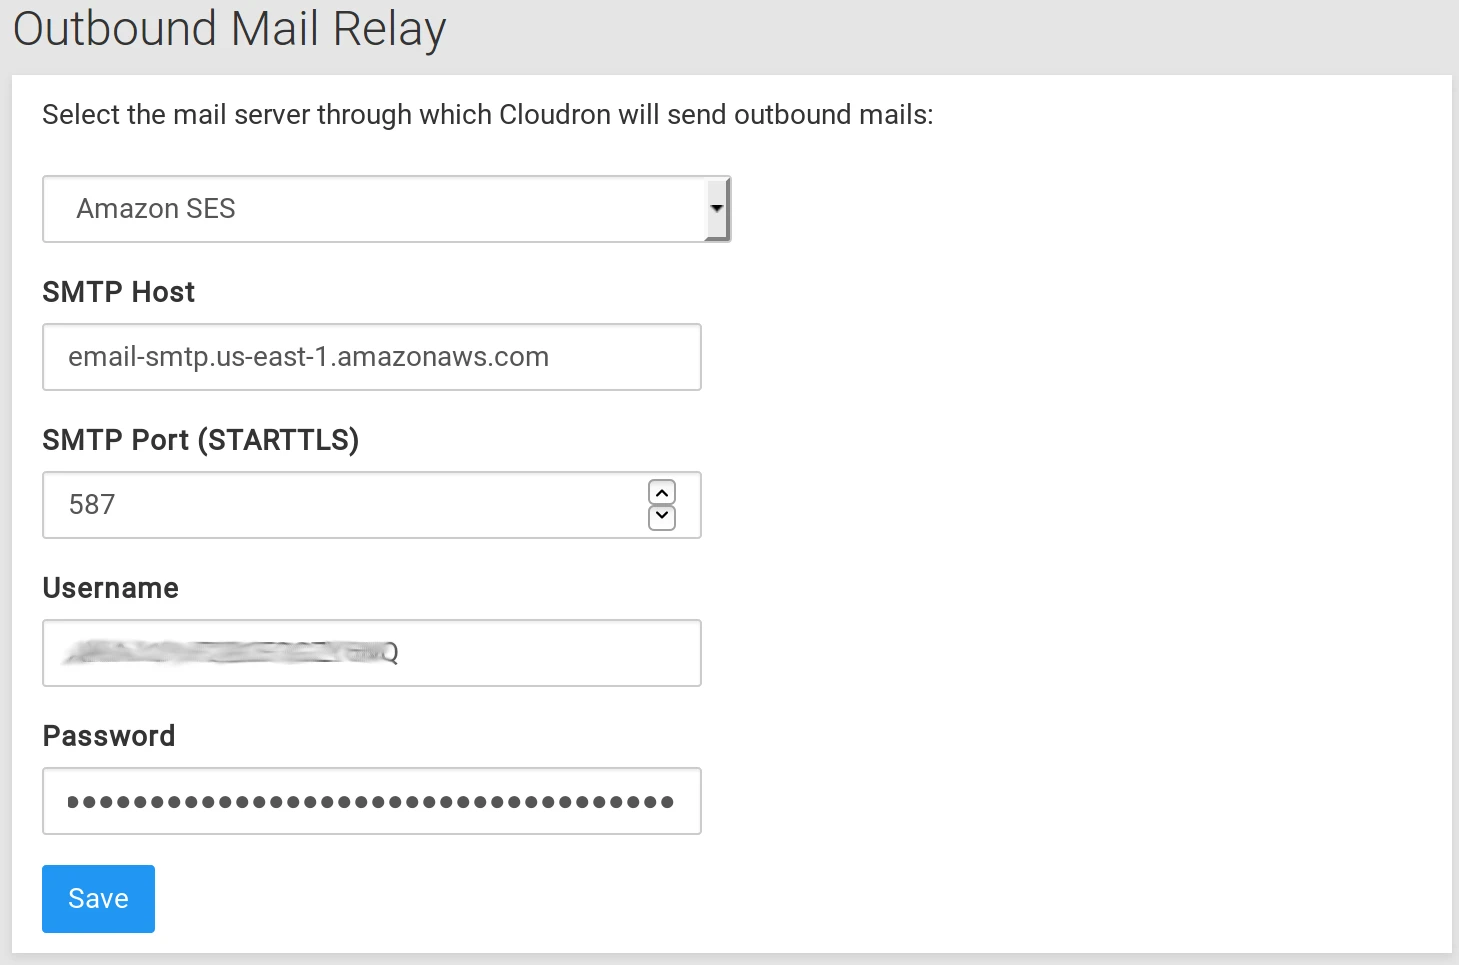
-
Use the Send Test Email button to verify emails are sent.
-
If you do not receive the email, please verify that your AWS SES is not in sandbox mode. In this mode, new AWS accounts are only able to send mails to verified domains or the simulator. You can check this in the
Sending Statisticspage and looking for a note that looks like below:

To remove sandbox, log a request to increase the sending limit to say 500 emails a day. Note that, a custom MAIL FROM domain must be set for the DMARC alignment to succeed.
Google
When using Google to relay mail, if you encounter an error message of the form Invalid login or
Please log in via your web browser and then try again, you must configure your Google account
to either use App passwords or enable less secure apps. See Google Support for more information.
Office 365
To setup Office 365 as relay, add a connector under mail flow following the instructions under Option 3. Note that relaying via Office 365 requires port 25 to be open and requires a static IP.
SendGrid
When using SendGrid, authenticate the sender identity using Domain Authentication.
Cloudron Email relay feature sends emails using multiple email addresses on the same domain, as is the case when multiple apps are installed and each app uses its own email address.
SMTP server
Relay via external SMTP with or without authentication. Use External SMTP server for username/password auth, or External SMTP server (No authentication) for IP-based auth.
Forward all emails
Create Sieve filters to forward emails to external addresses. Use SnappyMail, Roundcube, or any ManageSieve-compatible client.
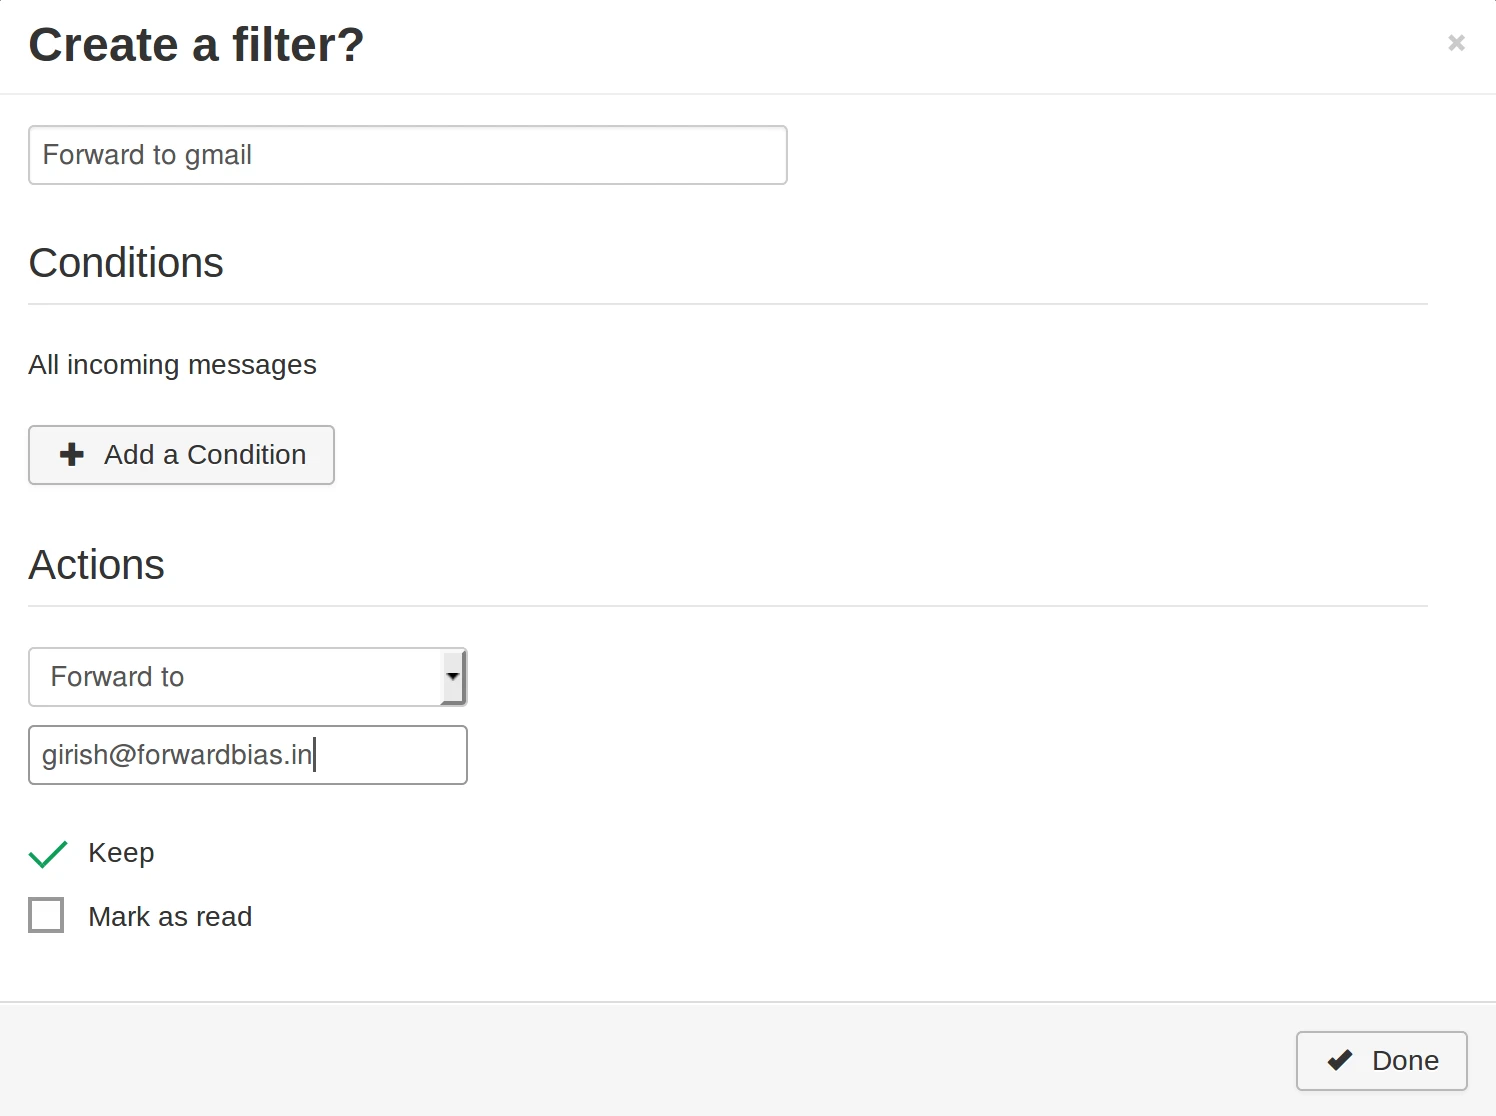
To support forwarding mails to external address, Implements SRS.
Marking spam
Train the spam filter by moving junk to the Spam folder (most clients have a Junk button). Move incorrectly marked mail back to Inbox to unlearn.
The filter activates after training on 50 spam and 50 ham messages.
DNSBL
The mail server checks connecting IPs against DNSBL/RBL blocklists. Default: zen.spamhaus.org from Spamhaus.
Configure DNSBL servers in the Email view.
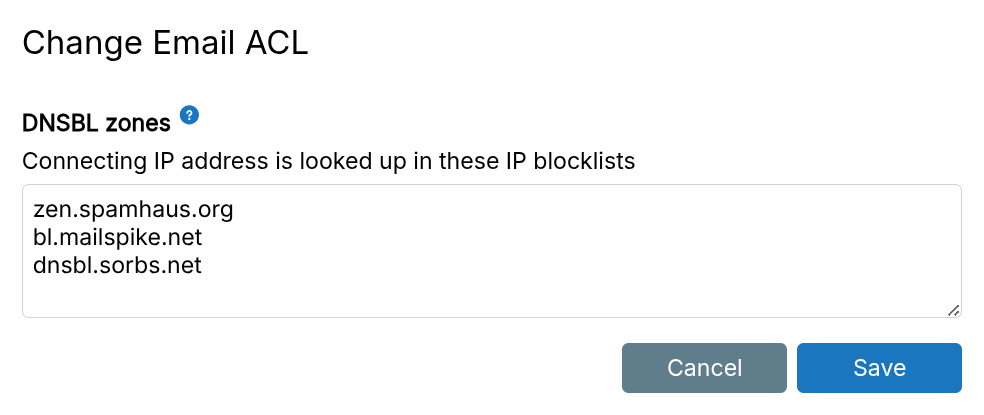
Popular DNSBL services (verify reliability before enabling — see this discussion):
bl.mailspike.netnoptr.spamrats.combl.0spam.orgdnsbl.sorbs.netblack.junkemailfilter.comall.spamrats.comzen.spamhaus.org(default)
Address blocklist
Blocklist addresses and domains in the Email view. Matched emails go to Spam. Supports * and ? glob patterns. Applies globally to all domains.
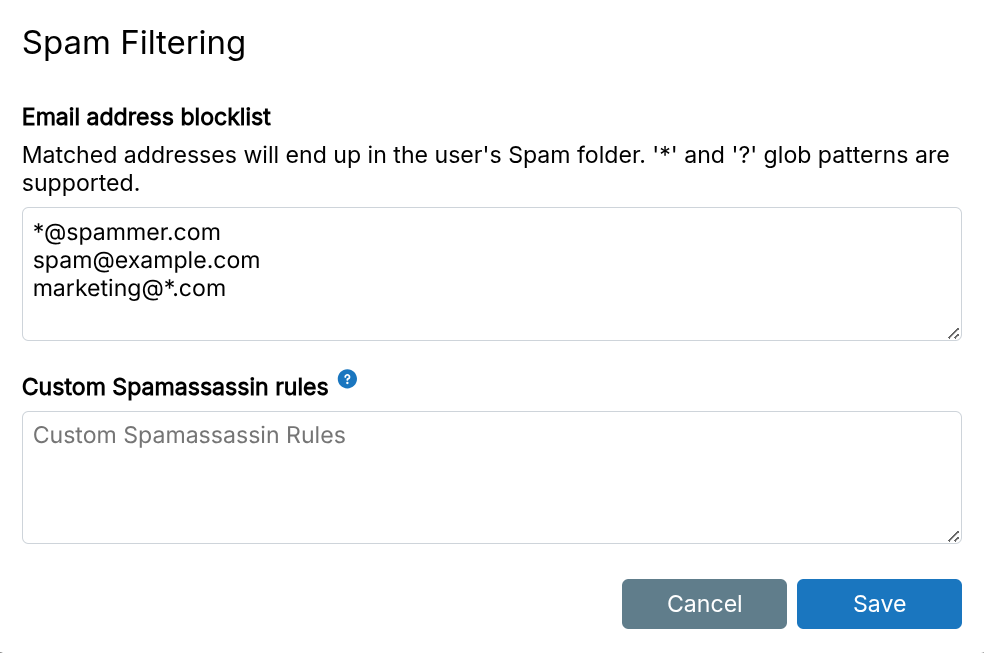
Matched emails have USER_IN_BLACKLIST in the X-Spam-Status header.
Block IP addresses or networks via Firewall configuration.
Custom spam filtering rules
Set custom spam filter rules in the Email view. Rules apply globally to all domains.
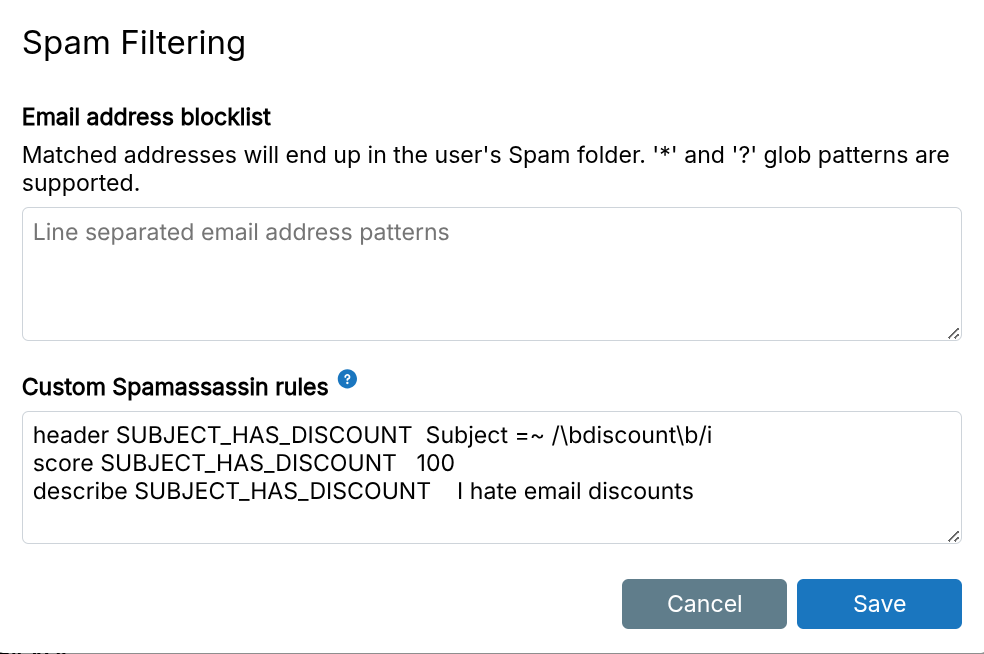
Example SpamAssassin rule to mark "discount" in subject as spam:
header SUBJECT_HAS_DISCOUNT  Subject =~ /\bdiscount\b/i
score SUBJECT_HAS_DISCOUNT   100
describe SUBJECT_HAS_DISCOUNT    I hate email discounts
See this guide for writing custom rules.
Emails with spam score above 5.0 are marked as spam (X-Spam-Flag: YES).
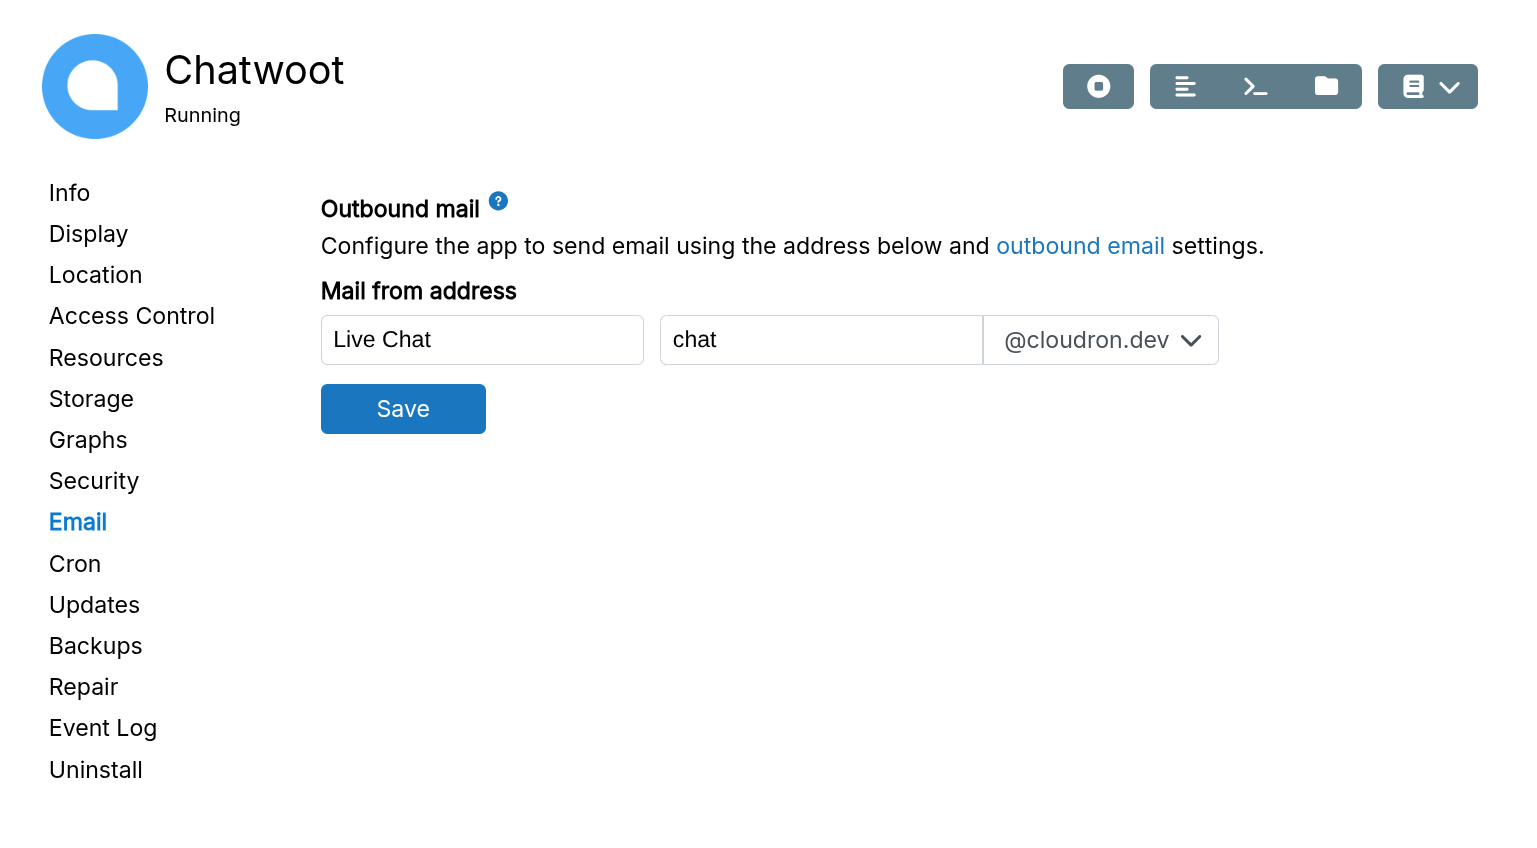
Change FROM address of an app
Apps use location.app@domain as the FROM address by default. Change it in the app's configure dialog.
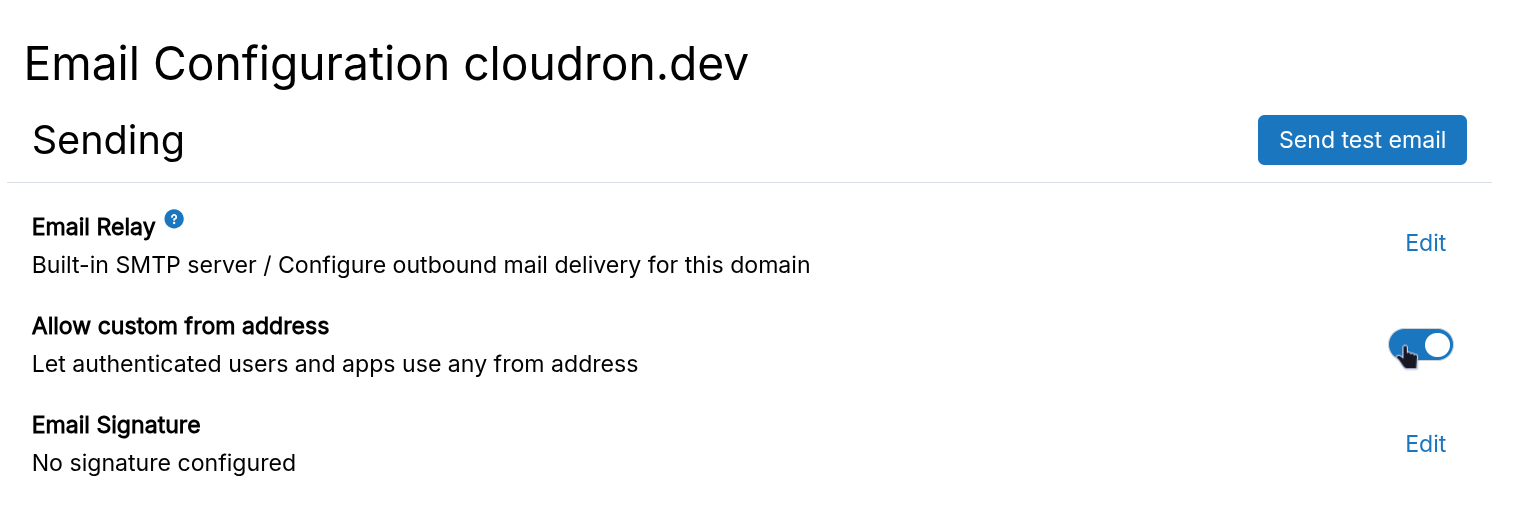
Disable FROM address validation
Cloudron prevents masquerading (sending as another user) by default. Enable masquerading in Email settings to allow it.
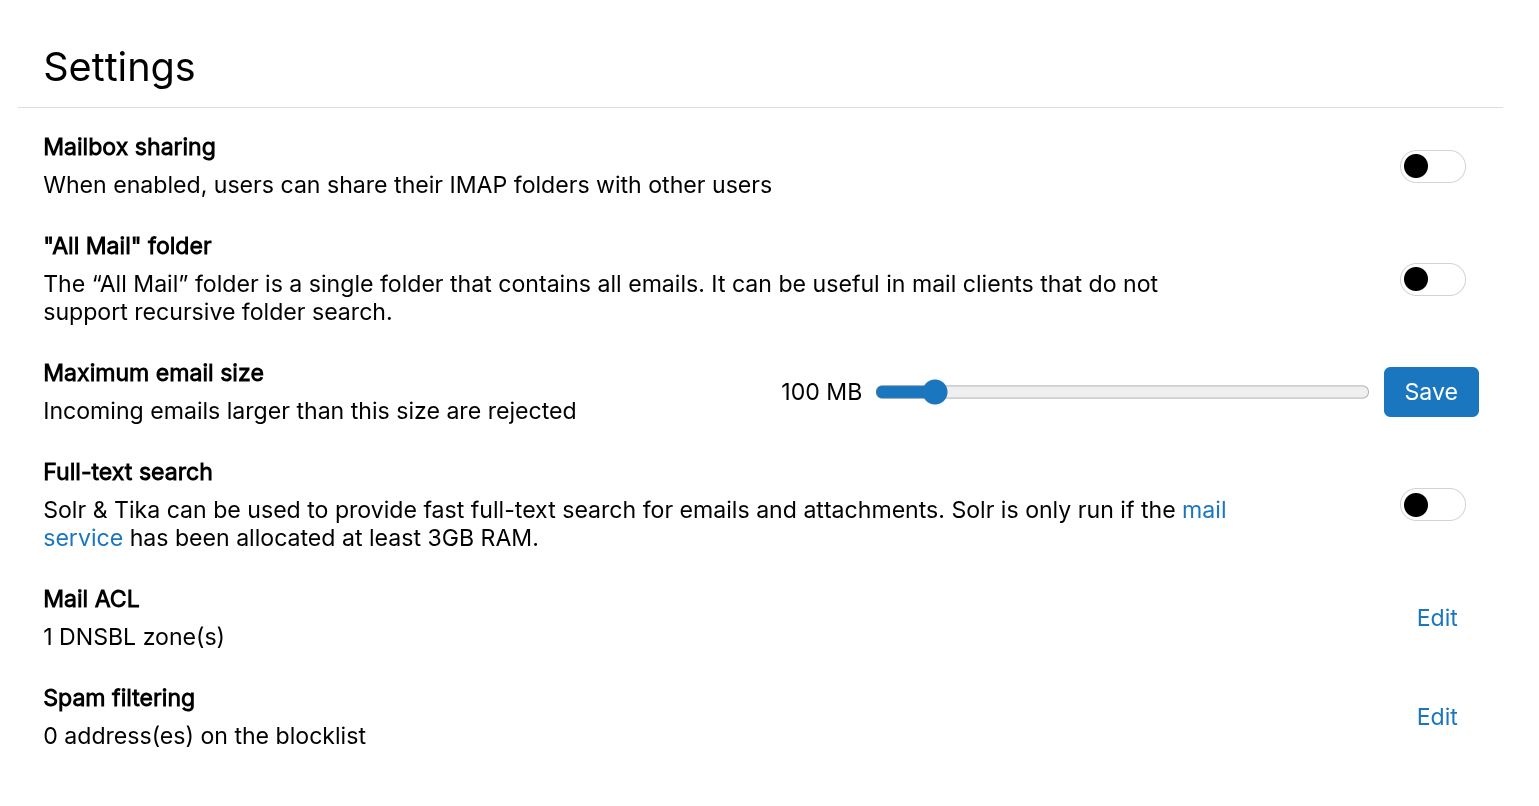
Max mail size
Set the maximum email size in the Maximum Mail Size setting.
Storage quota
Storage limit can be set per mailbox by enabling Storage Quota.
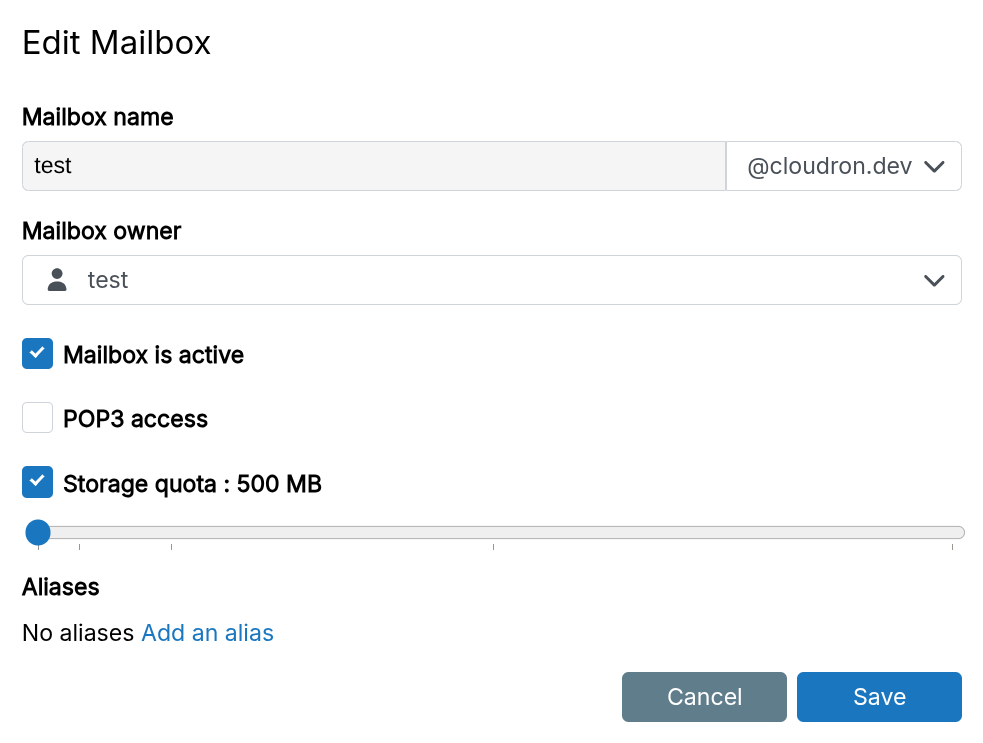
Full mailboxes bounce incoming mail. Notifications are sent at 80% and 95% quota usage. Entries appear in the event log.
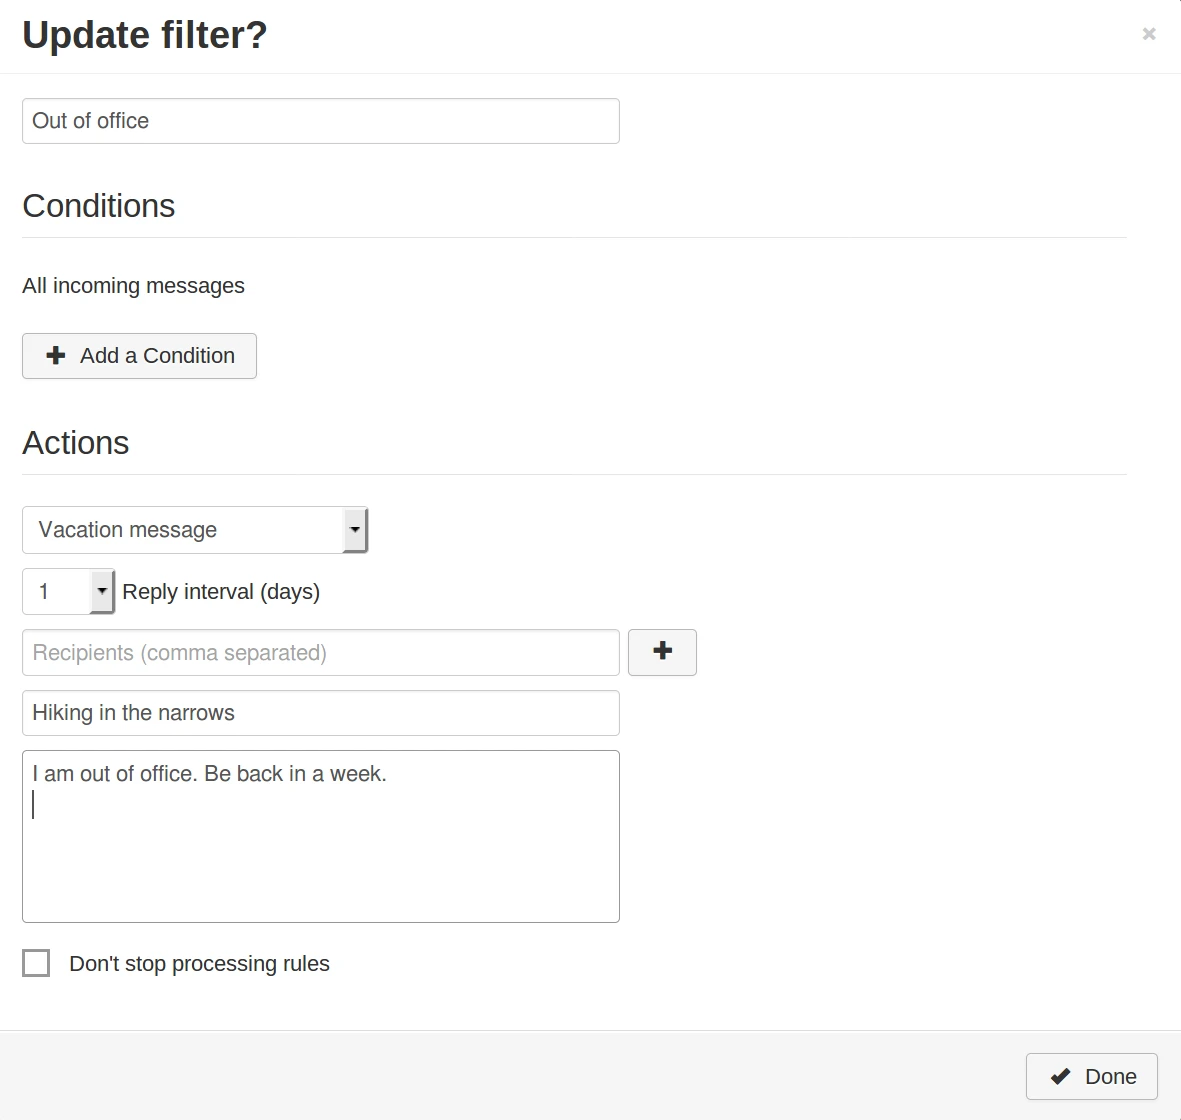
Vacation mail
Set up vacation messages using Sieve filters. In SnappyMail: Settings > Filters > Add filter > Vacation message.
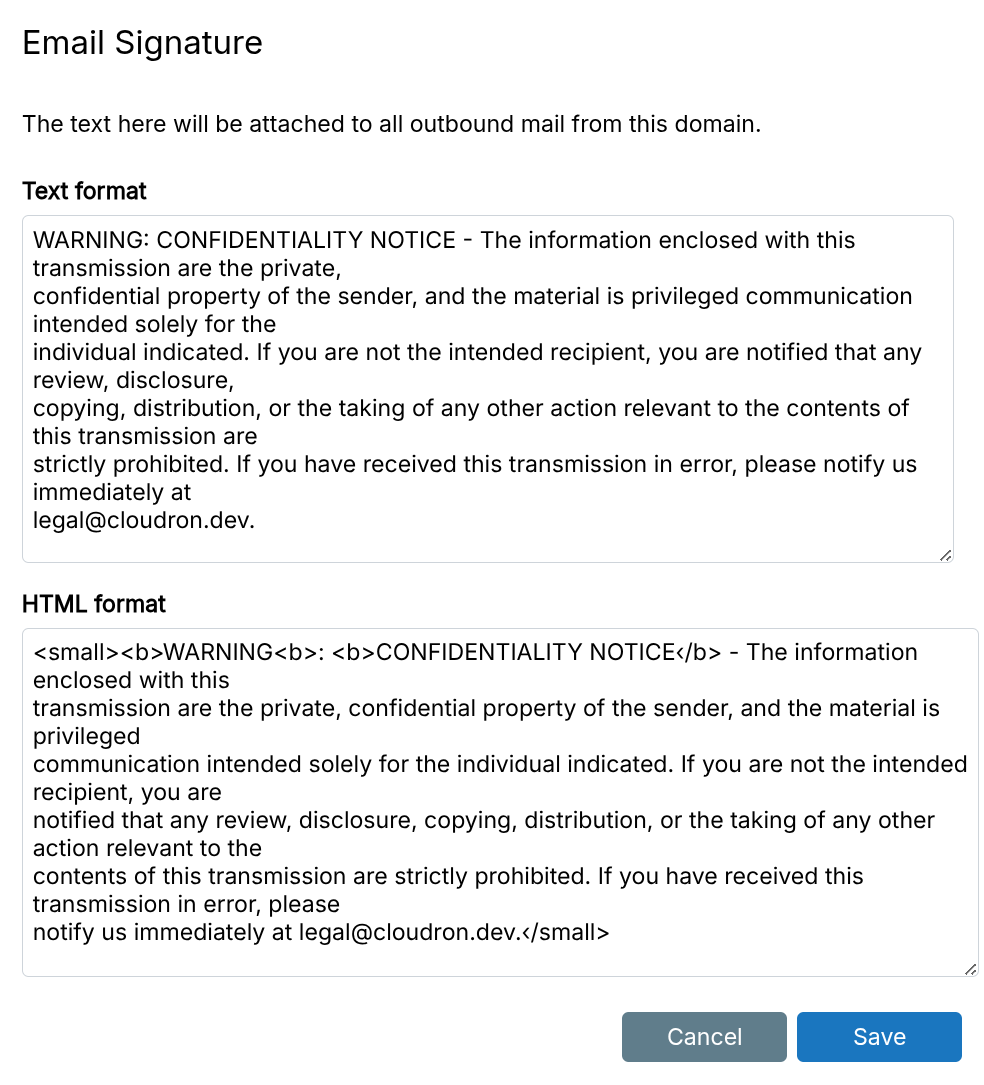
Signature
Append disclaimers or legal text to outgoing emails via Email Signature (per-domain setting).
Event log
Monitor mail server activity in the Event log.
Click Logs again for raw logs (at /home/yellowtent/platformdata/logs/mail). Retains 10MB current plus 1 rotated log. Logs older than 14 days are deleted.
For security & privacy reasons, email event log is only viewable by superadmins (as they most likely have SSH access anyway).
| Type | Notes |
|---|---|
| Bounce | mail resulted in a bounce, and a bounce notification was sent |
| Deferred | temporary delivery failure of an outgoing mail |
| Denied | connection was denied by the mail server. for example, the remote IP is in DNSBL or the mailbox is invalid |
| Queued | mail was queued for incoming or outgoing delivery |
| Quota | mailbox hit storage quota limits |
| Saved | mail was saved in a mailbox |
| Sent | mail was transferred to another server |
| Spam | incoming mail was identified as spam |
| Spam Training | spam training cron job |
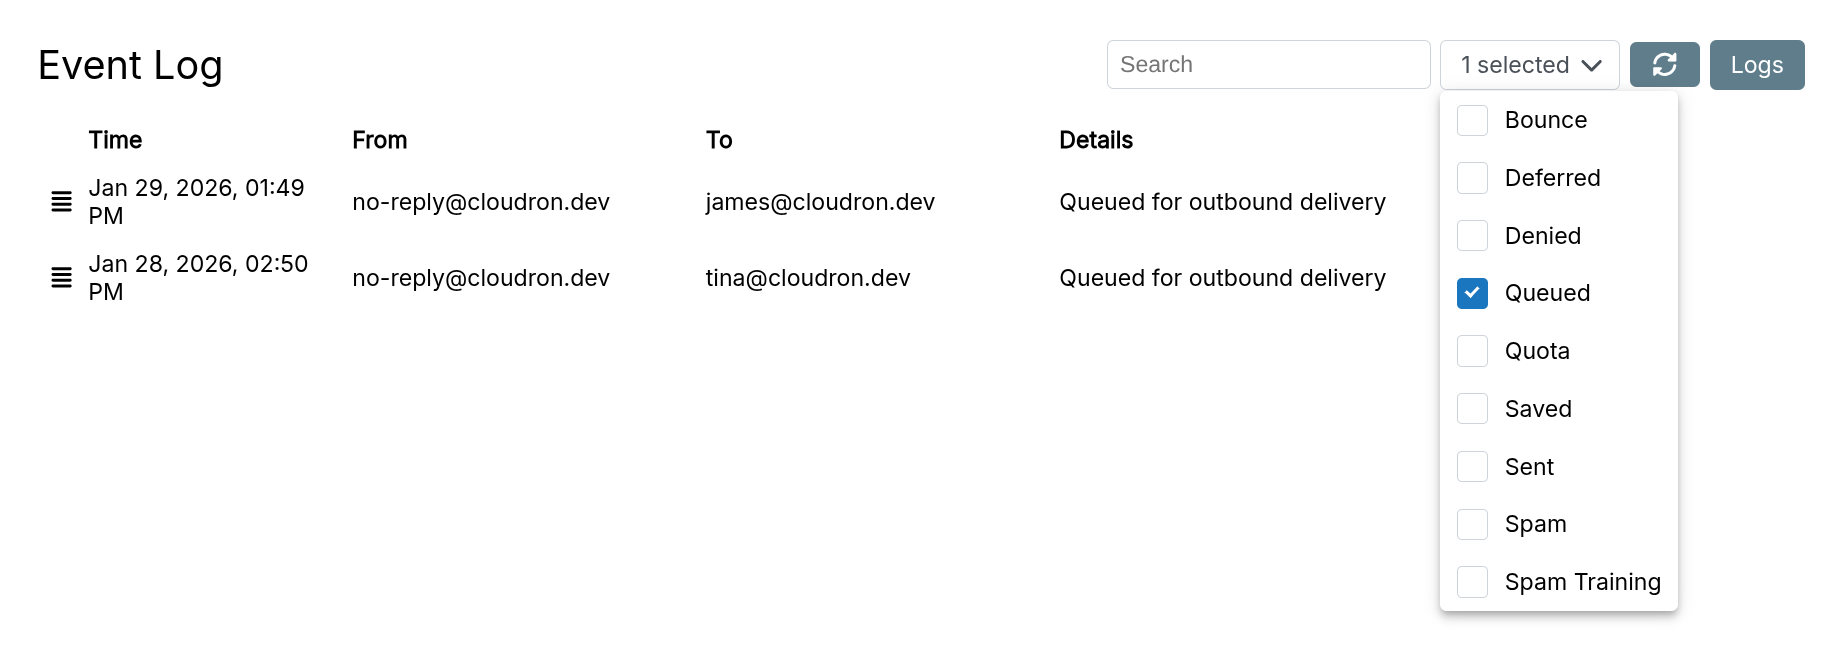
Mail queue
Monitor and manage the mail queue via the Email Event Log filter.
Full text search
By default, every text search involves a sequential search through the body of all emails. With a small number of emails (< 5GB), the performance of search is usually acceptable. If there are a large number of emails or if you want to search attachments as well, the emails can be indexed (using Solr and Tika).
To enable the search index, enable Full Text Search for the mail body and mail attachments from the Email settings:
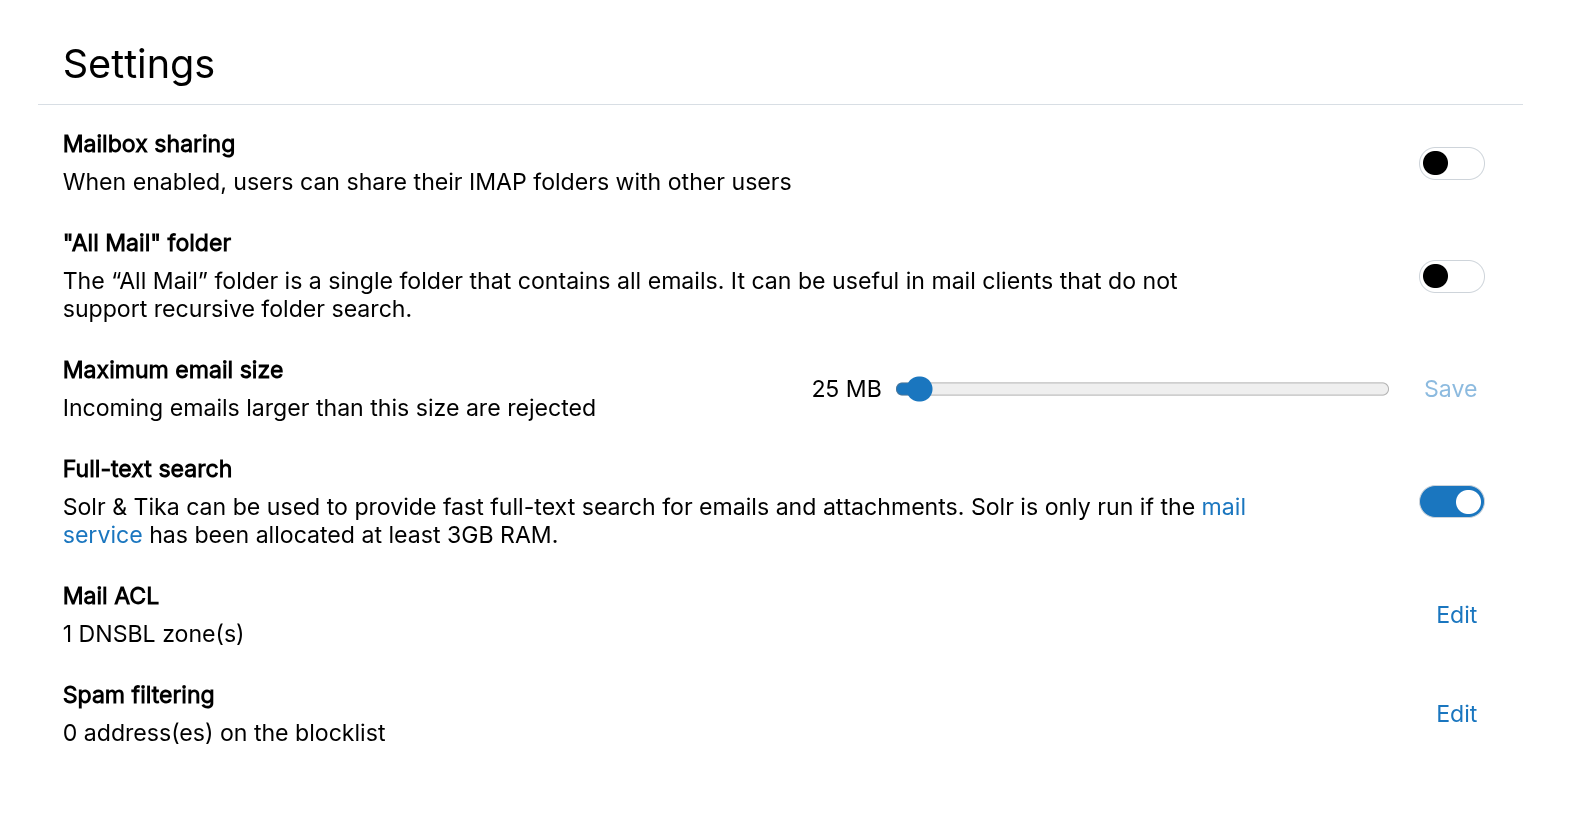
The indexer requires significant memory — Cloudron may skip it if the mail server lacks resources.
New emails are indexed automatically. For existing mailboxes, the first search triggers indexing, which can take up to 10 minutes per GB depending on server speed.
Both, Roundcube and SOGo can take advantage of indexed search.
Solr requires significant memory and disk. Allocate at least 3GB for the mail service.
Recursive search
IMAP recursive search uses MULTISEARCH, but client support is rare. Roundcube, Thunderbird, and SOGo support it natively.
For other clients (e.g., SnappyMail), the virtual All Mail folder contains all emails for easy searching.
The All Mail folder can be enabled in the Email Settings:
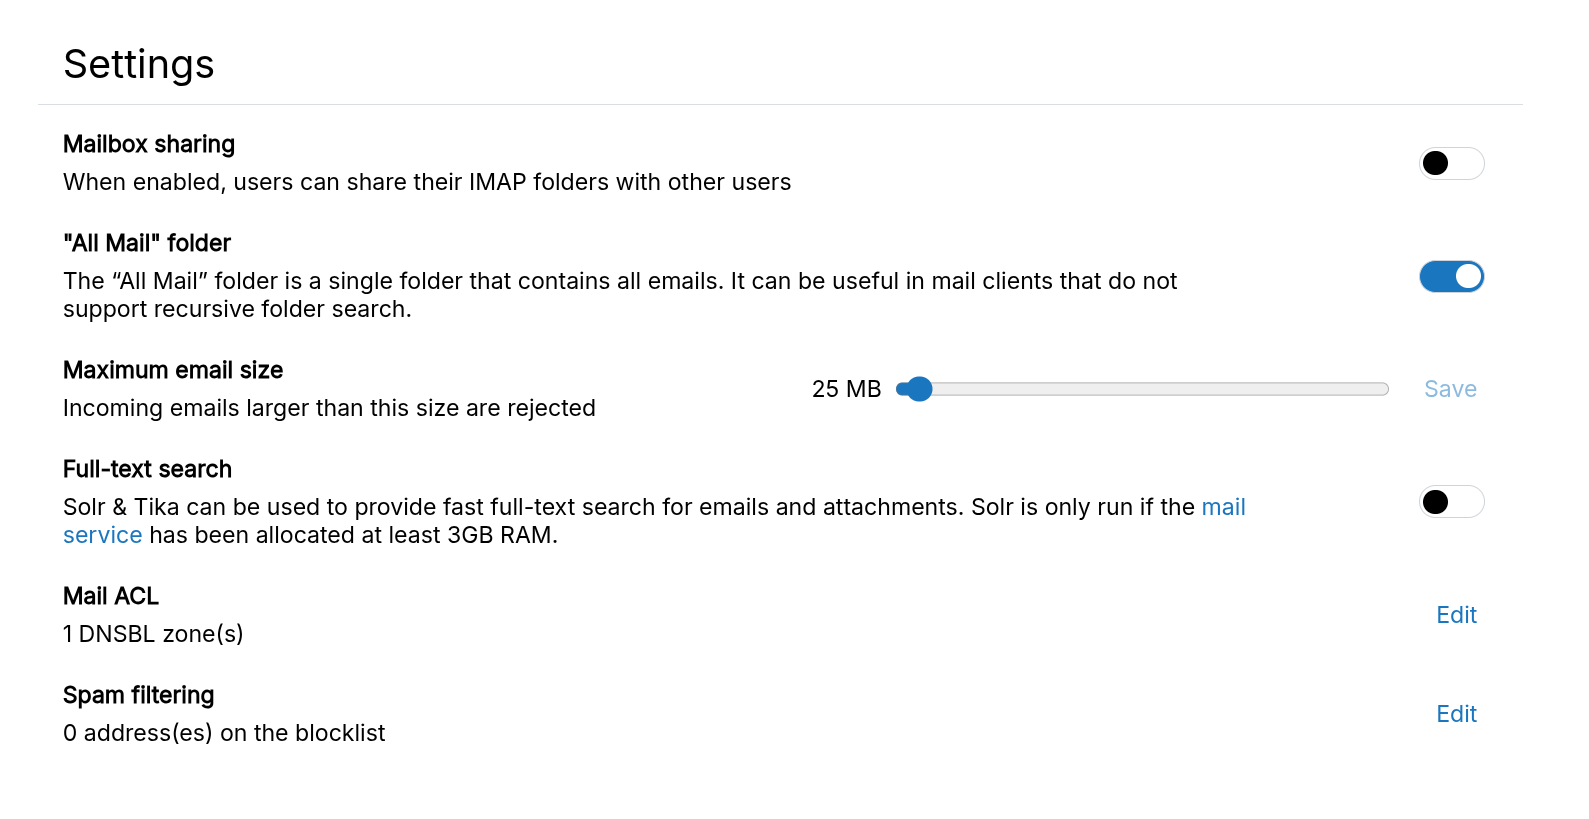
See this blog post for more information.
Mailbox sharing
Mailbox Sharing feature allows users to share their mailboxes with each other using IMAP ACLs.
Mailbox Sharing can be enabled in the Email view:
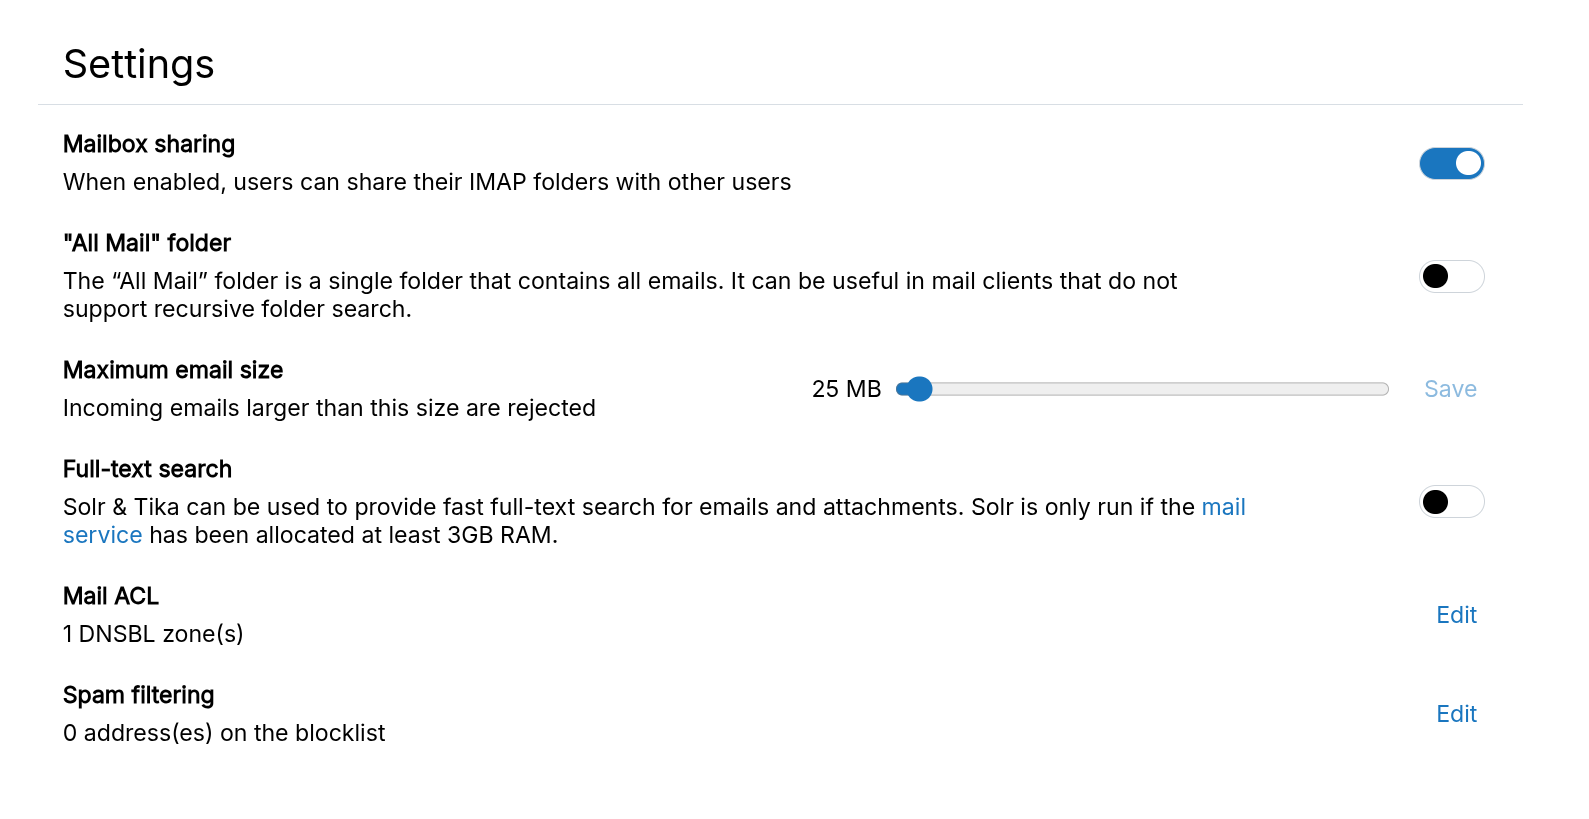
Once enabled, users can share their mailboxes using webmail like SOGo and Roundcube.
For example, in Roundcube, a user can share a folder of their mail account with another user like below:
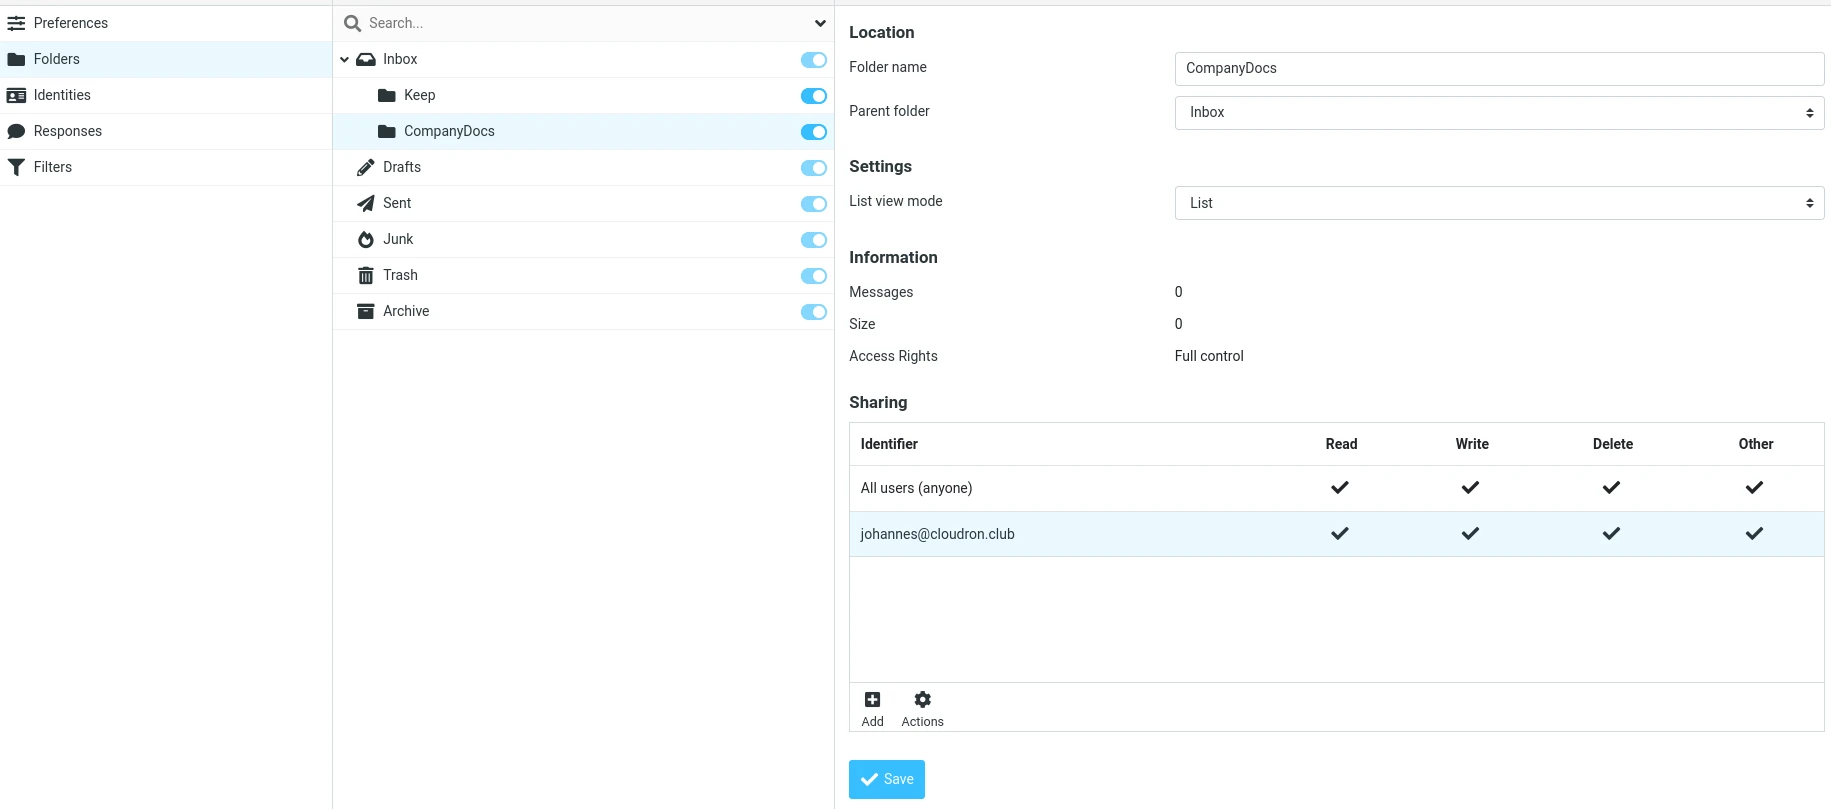
The other user can see the shared folder in their account:
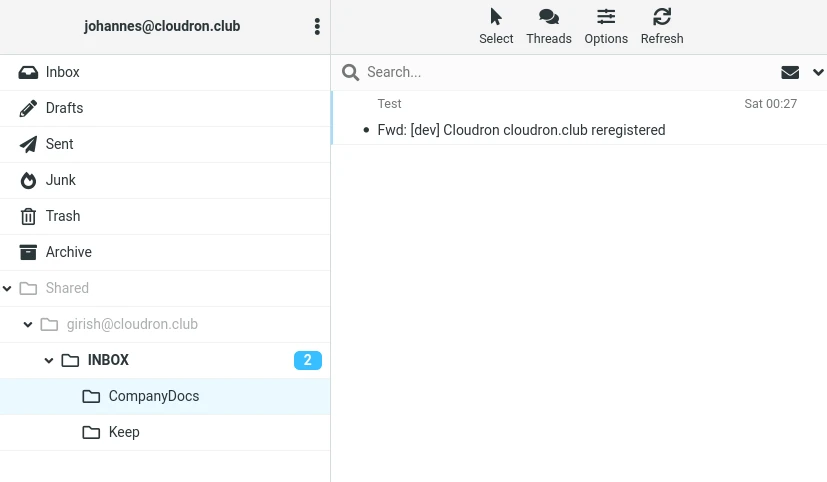
Mailbox sharing does not work out of the box for Cloudrons that were installed before 6.0. Follow this guide to migrate.
Alternate MX
A failover/alternate/backup MX can be setup for a domain . To set this up, do the following:
-
Enable incoming mail for the platform domain
-
Cloudron has a anti-spoof feature to ensure that only it can generate emails for the incoming domains. This feature will prevent the external MX from forwarding emails to it. However, Cloudron skips this spoof check for servers listed in the domain's SPF record. So, white list the MX's IP address block in the domain's SPF record. Note that it is necessary to specifically whitelist the server(s). Just a permissive SPF with
~alland?allis not enough.
Archived emails
When deleteing a mailbox, you can choose whether to delete the content (emails) inside the mailbox.
If you choose to keep the emails, then you can find the archived emails at /home/yellowtent/boxdata/mail/vmail/.
Autodiscover
Auto discover is a feature where an email client is able to automatically detect the SMTP and IMAP configuration from the email address. Setting up auto discover is very client specific.
Autoconfig.xml
The autoconfig.xml config format is supported by
many email clients like Thunderbird, K-9, KMail, Evolution, Kontact & others. Cloudron automatically serves up the autoconfig.xml
for all configured mail domains. Note that this feature requires an app to be installed on each of the email bare domains
i.e. domain1.com, domain2.com, domain3.com and so on. These bare domains can also be redirects
to an existing app. If the bare domain is hosted outside Cloudron, see this forum post
for instructions.
Cloudron can serve autoconfig.xml only if an app is installed on the email domain address. For example,
if the email address girish@cloudron.example , you must have an app (or redirect/alias) at cloudron.example
and https://cloudron.example should work.
To test if the file is being served up, run the following command and validate the output against the spec:
curl https://cloudron.example/.well-known/autoconfig/mail/config-v1.1.xml
Autodiscover.xml
The autodiscover.xml config format is a process by which a Microsoft Exchange Server client can determine the URL of a particular Microsoft Exchange ActiveSync endpoint. Cloudron supports ActiveSync via SOGo. Note that only Outlook is known to implement this protocol.
If your email address is girish@cloudron.example, you must configure the app hosted at cloudron.example, to serve up a file named autodiscover/autodiscover.xml i.e https://cloudron.example/autodiscover/autodiscover.xml must have the file below:
<Autodiscover>
  <Response>
    <Culture>en:us</Culture>
    <Action>
      <Settings>
        <Server>
          <Type>MobileSync</Type>
          <Url>https://sogo.cloudron.example</Url>
          <Name>https://sogo.cloudron.example</Name>
        </Server>
      </Settings>
    </Action>
  </Response>
</Autodiscover>
Outlook
This method does not seem to work with Microsoft Outlook 2016, Microsoft Outlook 2019 or Microsoft Outlook for Office 365. Your mileage may vary.
Outlook performs an HTTP POST request to the following in order:
https://example.com/autodiscover/autodiscover.xmlhttps://autodiscover.example.com/autodiscover/autodiscover.xml- DNS SRV lookup of
_autodiscover._tcp.example.comand use the response to look uphttps://srvresponse/autodiscover/autodiscover.xml. The SRV record is of the format0 0 443 ssl.mailprovider.com`.
Because this is a POST request, you cannot use a static hosting setup. For example, you can use a PHP file like below (more sophisticated approaches also exist):
<?php
$raw = file_get_contents('php://input');
$matches = array();
preg_match('/<EMailAddress>(.*)<\/EMailAddress>/', $raw, $matches);
header('Content-Type: application/xml');
?>
<Autodiscover xmlns="http://schemas.microsoft.com/exchange/autodiscover/responseschema/2006">
  <Response xmlns="http://schemas.microsoft.com/exchange/autodiscover/outlook/responseschema/2006a">
    <User>
      <DisplayName>Cloudron</DisplayName>
      <EMailAddress><?php echo $matches[1]; ?></EMailAddress>
    </User>
    <Account>
      <AccountType>email</AccountType>
      <Action>settings</Action>
      <Protocol>
        <Type>IMAP</Type>
        <Server>my.example.com</Server>
        <Port>993</Port>
        <DomainRequired>off</DomainRequired>
        <SPA>off</SPA>
        <SSL>on</SSL>
        <AuthRequired>on</AuthRequired>
        <LoginName><?php echo $matches[1]; ?></LoginName>
      </Protocol>
      <Protocol>
        <Type>SMTP</Type>
        <Server>my.example.com</Server>
        <Port>587</Port>
        <DomainRequired>off</DomainRequired>
        <SPA>off</SPA>
        <Encryption>TLS</Encryption>
        <AuthRequired>on</AuthRequired>
        <LoginName><?php echo $matches[1]; ?></LoginName>
      </Protocol>
    </Account>
  </Response>
</Autodiscover>
SRS
Sender Rewriting Scheme is a scheme for rewriting the envelope sender address of an email message. This method was devised to forward email without breaking SPF.
Cloudron mail server implements SRS for forwarded emails. Cloudron's SRS implementation is in-line with email providers like Office 365 and namecheap.
TLS version
There exist email servers in the wild that use old and obsolete TLS protocols like SSLv3, TLSv1 and TLSv1.1.
By default, all these protocols are disabled on the mail server since they are insecure. You can double check
if the mail server is using these old protocols using nmap --script ssl-enum-ciphers -p 25 <mailserverip>.
If you want to enable support for these insecure protocols, you can do the following:
docker exec -ti mail /bin/bash- Edit
/run/haraka/config/tls.iniand the lineminVersion=TLSv1. Add this line to the beginning of the file. supervisorctl restart haraka
Note that the setting is not persistent across mail container and server restarts. So, you have to add this line by hand, if those events happen.
Server status
The status of the DNS and Email delivery is available in the Status tab of the mail domain (Email -> Select Domain -> Status).
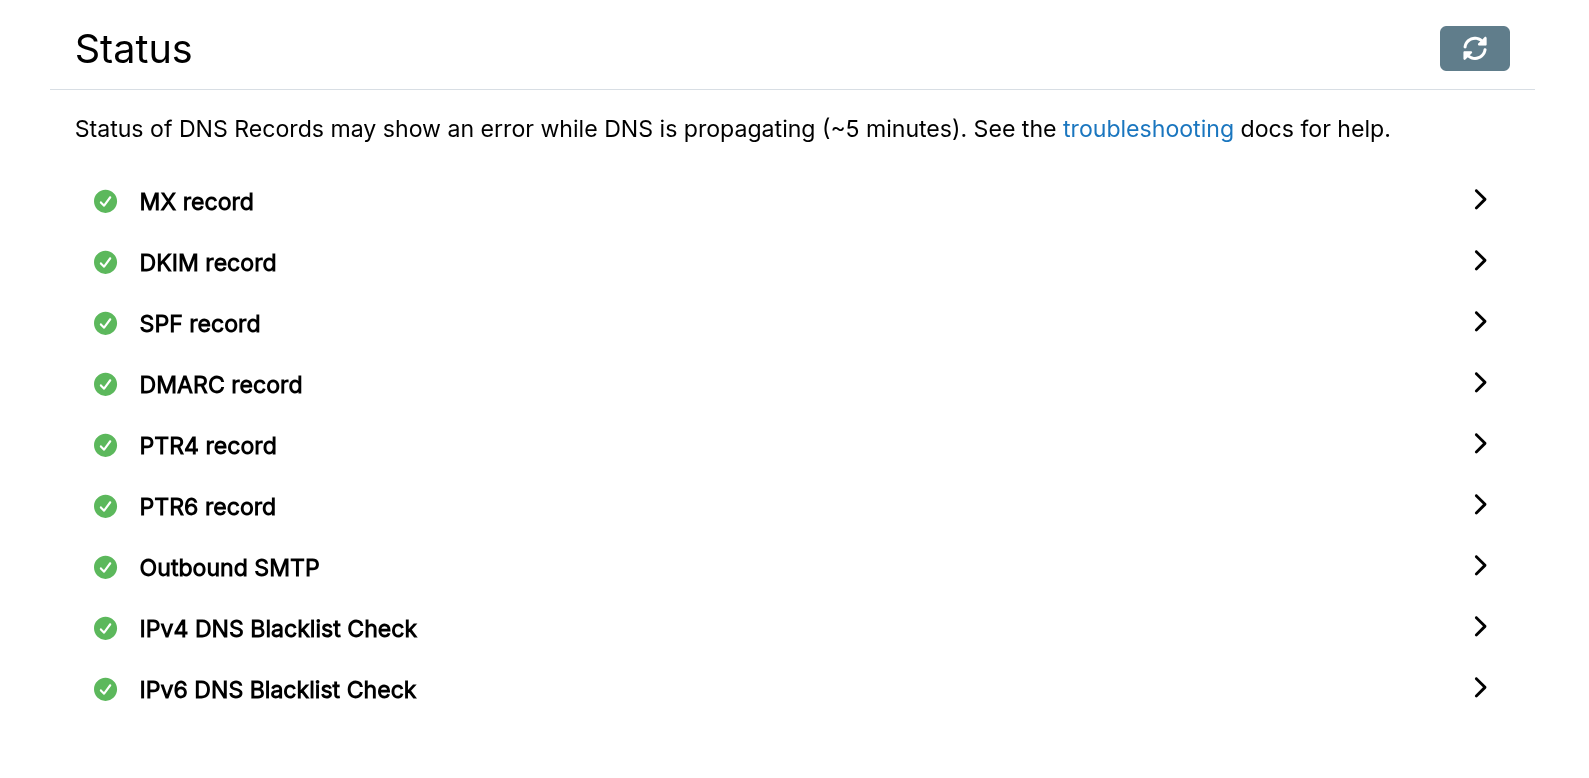
Check your spam score periodically at mail-tester.com. This gives a view of how rest of the world views your email server.
DNS records
SPF
SPF records specify which servers are allowed to send emails on behalf of a domain name. When you setup Cloudron, it will create a SPF record and set itself as the sender. If a SPF record already exists, it will add itself to the existing record.
If you use a relay, you must modify the SPF record to allow the relay to send emails on behalf of the domain. Please refer to your relay provider's documentation on how to setup SPF.
The SPF project has detailed information on the syntax of this record.
Some DNS providers list a DNS record type of SPF. This DNS record is obsolete. Use a TXT record instead.
DKIM
DKIM records specify a public key that can be used to authenticate mails from a domain. The rough idea is to generate a public/private key and use the private key to sign all outgoing mails. The public key is listed in the DNS and can be used to verify the email.
Cloudron automatically generates a DKIM key pair for each domain and sets up the DNS with the selector cloudron-<uniqueid>.
The unique id suffix is necessary for the domain to be used across multiple Cloudrons.
DMARC
DMARC is a protocol that uses SPF and DKIM to detect email spoofing. For DMARC validation to succeed, along with SPF or DKIM check, DMARC alignment needs to succeed as well.
By default, Cloudron sets up DMARC records to reject all mails that fail SPF/DKIM validation. This way the Cloudron administrator can feel fairly safe that nobody else is sending mails with their domain.
$ host -t TXT _dmarc.girish.in
_dmarc.girish.in descriptive text "v=DMARC1; p=reject; pct=100"
When using a relay, please check your service provider documentation to see how to make sure DMARC alignment can succeed.
MX record
The MX record is required to receive mail. If you unable to receive mail despite this being set, check if the outbound port 25 is open.
DANE
DANE provides a mechanism to authenticate TLS certificates without a certificate authority (CA).
DNSSEC is a prerequisite for DANE.
DANE record has to be set up manually. Use this site or the tlsa tool to
generate records. On Cloudron, the private key for a domain does not change. For this reason, it is safe to choose
SPKI: Use subject public key as the selector and DANE-EE: Domain Issued Certificate for usage.
$ tlsa --usage 3 --selector 1 --mtype 1 --port 25 my.cloudron.example
Got a certificate for 185.232.70.47 with Subject: /CN=*.cloudron.example
_25._tcp.my.cloudron.example. IN TLSA 3 1 1 c93c8d09af08595d90c2b59319277eb12eaeb2f7f0fada65a5f23a5b18746110
Got a certificate for 2a03:4000:4e:9d:b4a5:5aff:fec0:3347 with Subject: /CN=*.cloudron.example
_25._tcp.my.cloudron.example. IN TLSA 3 1 1 c93c8d09af08595d90c2b59319277eb12eaeb2f7f0fada65a5f23a5b18746110
PTR record
PTR records or rDNS or reverse DNS are DNS entries that can be used to resolve an IP address to a
fully-qualified domain name. For example, the PTR record of the IP 1.2.3.4 can be looked up as
host -t PTR 4.3.2.1.in-addr.arpa.
In the context of email, the PTR record must match the server location. A PTR record is required only when sending email directly from the server. If you are using a mail relay, you do not need to set the PTR record.
The PTR record is set by your VPS provider and not by your DNS provider.. For example, if your server was created in Digital Ocean, you must go to Digital Ocean to set the PTR record.
We have collected a few links to help you set the PTR record for different VPS:
-
AWS EC2 & Lightsail - Fill the PTR request form.
-
Digital Ocean - Digital Ocean sets up a PTR record based on the droplet's name. Rename your droplet to
my.<domain>. -
Hetzner - Follow this guide.
-
Linode - Follow this guide.
-
Netcup - You can enter a reverse lookup in the customer area CCP for your vServer - wiki doc
-
Scaleway - You can also set a PTR record on the interface in their control panel.
-
Time4VPS - Follow this guide.
-
UpCloud - The PTR can be set in the Network section of the VPS instance configuration.
-
Vultr - The PTR record can be set for each public IP in the Vultr server settings and is called
Reverse DNS. It takes about 24h to propagate, so make sure to do this well in advance of enabling email. -
Home servers - The PTR record has to be set by your ISP. Customers on Business plans (like Comcast Business) can send a support request to their support to have the PTR set.
Once setup, you can verify the PTR record here.
SMTP status
Outgoing SMTP
To send email, outbound port 25 needs to be unblocked. Most VPS providers block outbound port 25 as a spam control measure.
For some providers like Digital Ocean, Vultr and Linode, you can contact their support to get port 25 unblocked. Providers like EC2 and Lightsail allow oubound port but with a rate limit. For other providers like Google Cloud and home servers, you are left with no choice but to set up a relay.
Blacklists
The server's IP plays a big role in how emails get handled. Cloudron automatically checks the following services to see if your IP is blacklisted. If it is, please follow the links below and contact the services below to get your IP removed (usually this involves filling up some form).
- Abuse.ch
- Barracuda
- Composite Blocking List
- Multi SURBL
- Passive Spam Block List
- Sorbs Aggregate Zone
- Sorbs spam.dnsbl Zone
- SpamCop
- SpamHaus Zen
- The Unsubscribe Blacklist(UBL)
- UCEPROTECT Network
You can also check valli.org for an exhaustive IP blacklist check.
Security
- Cloudron checks against the Zen Spamhaus DNSBL before accepting mail.
- Email can only be accessed with IMAP over TLS (IMAPS).
- Email can only be relayed (including same-domain emails) by authenticated users using SMTP/STARTTLS.
- Cloudron ensures that
MAIL FROMis the same as the authenticated user. Users cannot spoof each other. - All outgoing mails from Cloudron are
DKIMsigned. - Cloudron automatically sets up SPF, DMARC policies in the DNS for best email delivery.
- All incoming mail is scanned via
Spamassasin.
Troubleshooting
Login
If you cannot login, double check that the username is the name of the mailbox i.e mailbox@domain.com . Note that using the cloudron username works in some apps. This is only because some code exists to help migration from legacy setups.
Solr index corruption
If search is not working, check if the solr index is corrupt. You can check if this is the case by running docker exec -ti mail /bin/bash
via SSH and checking the contents of /run/solr/solr.log. It might contain a big Java backtrace/exception.
In such cases, recreate the index by running the following commands via SSH:
docker stop mail
rm -rf /home/yellowtent/boxdata/mail/solr/dovecot
docker start mail
docker exec -it mail /app/code/dovecot-config/rebuild-index.sh
Haraka queue corruption
When the Haraka mail queue becomes corrupt, Haraka will keep crashing. To fix this, empty out the queue.
Run these commands via SSH:
docker stop mail
rm /home/yellowtent/boxdata/mail/haraka-queue/*
docker start mail