Domains & Certs
Overview
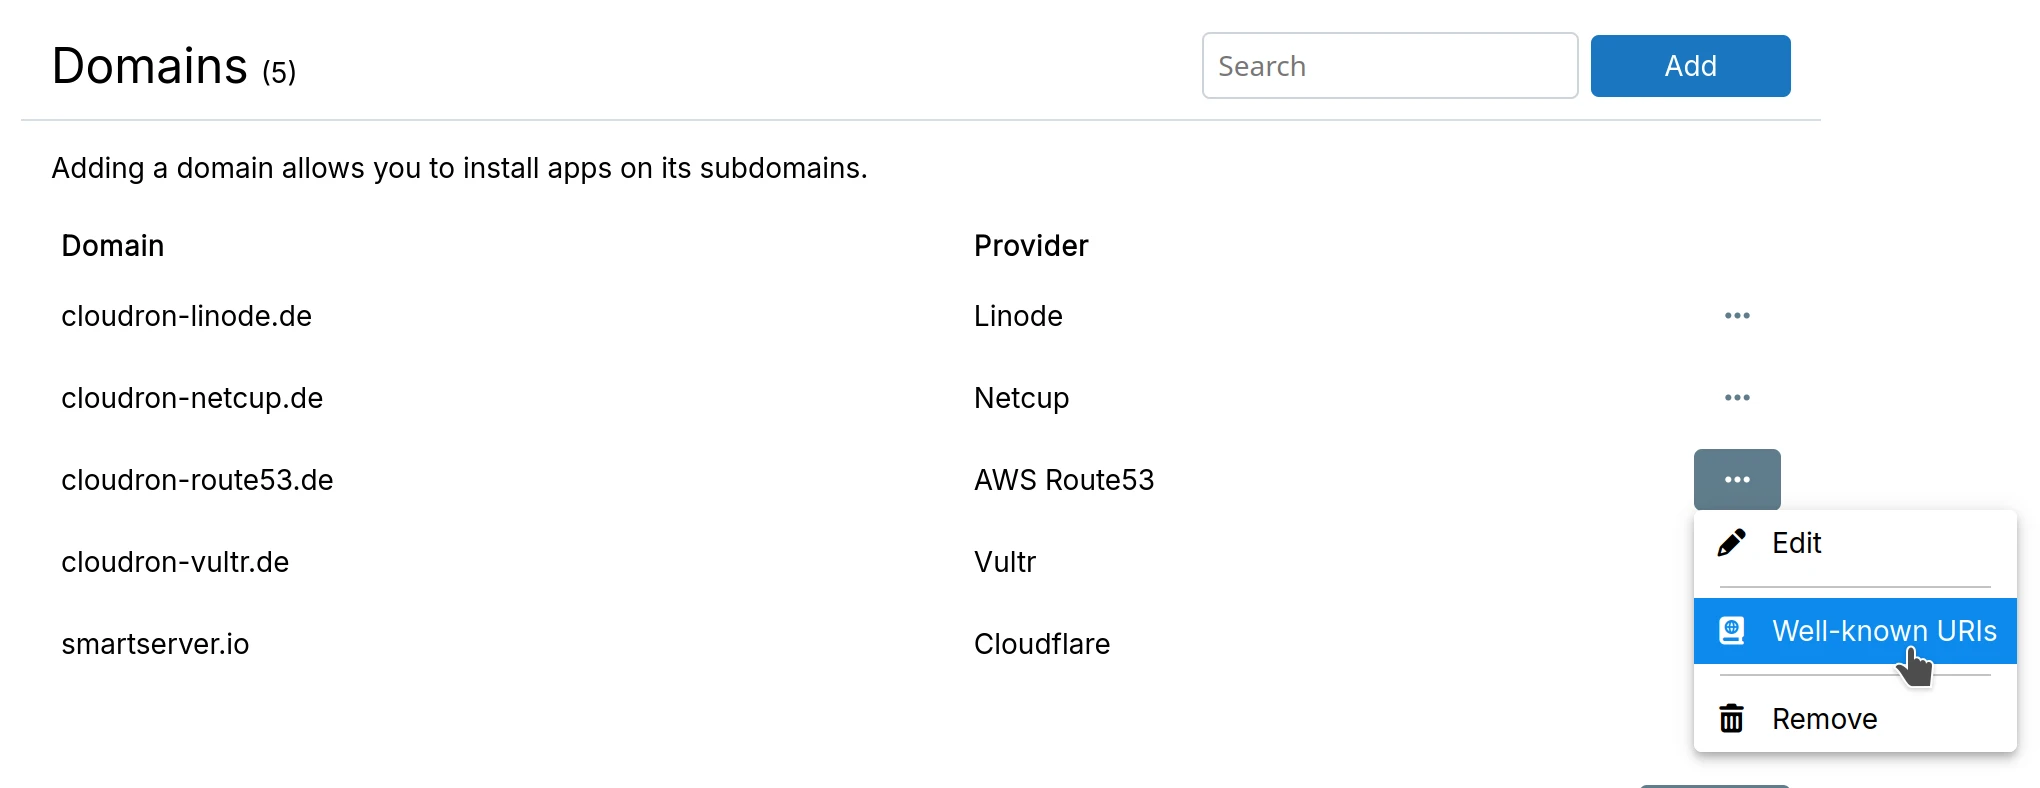
The Domains view manages domains for app installation. Apps can be installed as subdomains of any added domain. Email can be enabled per domain.
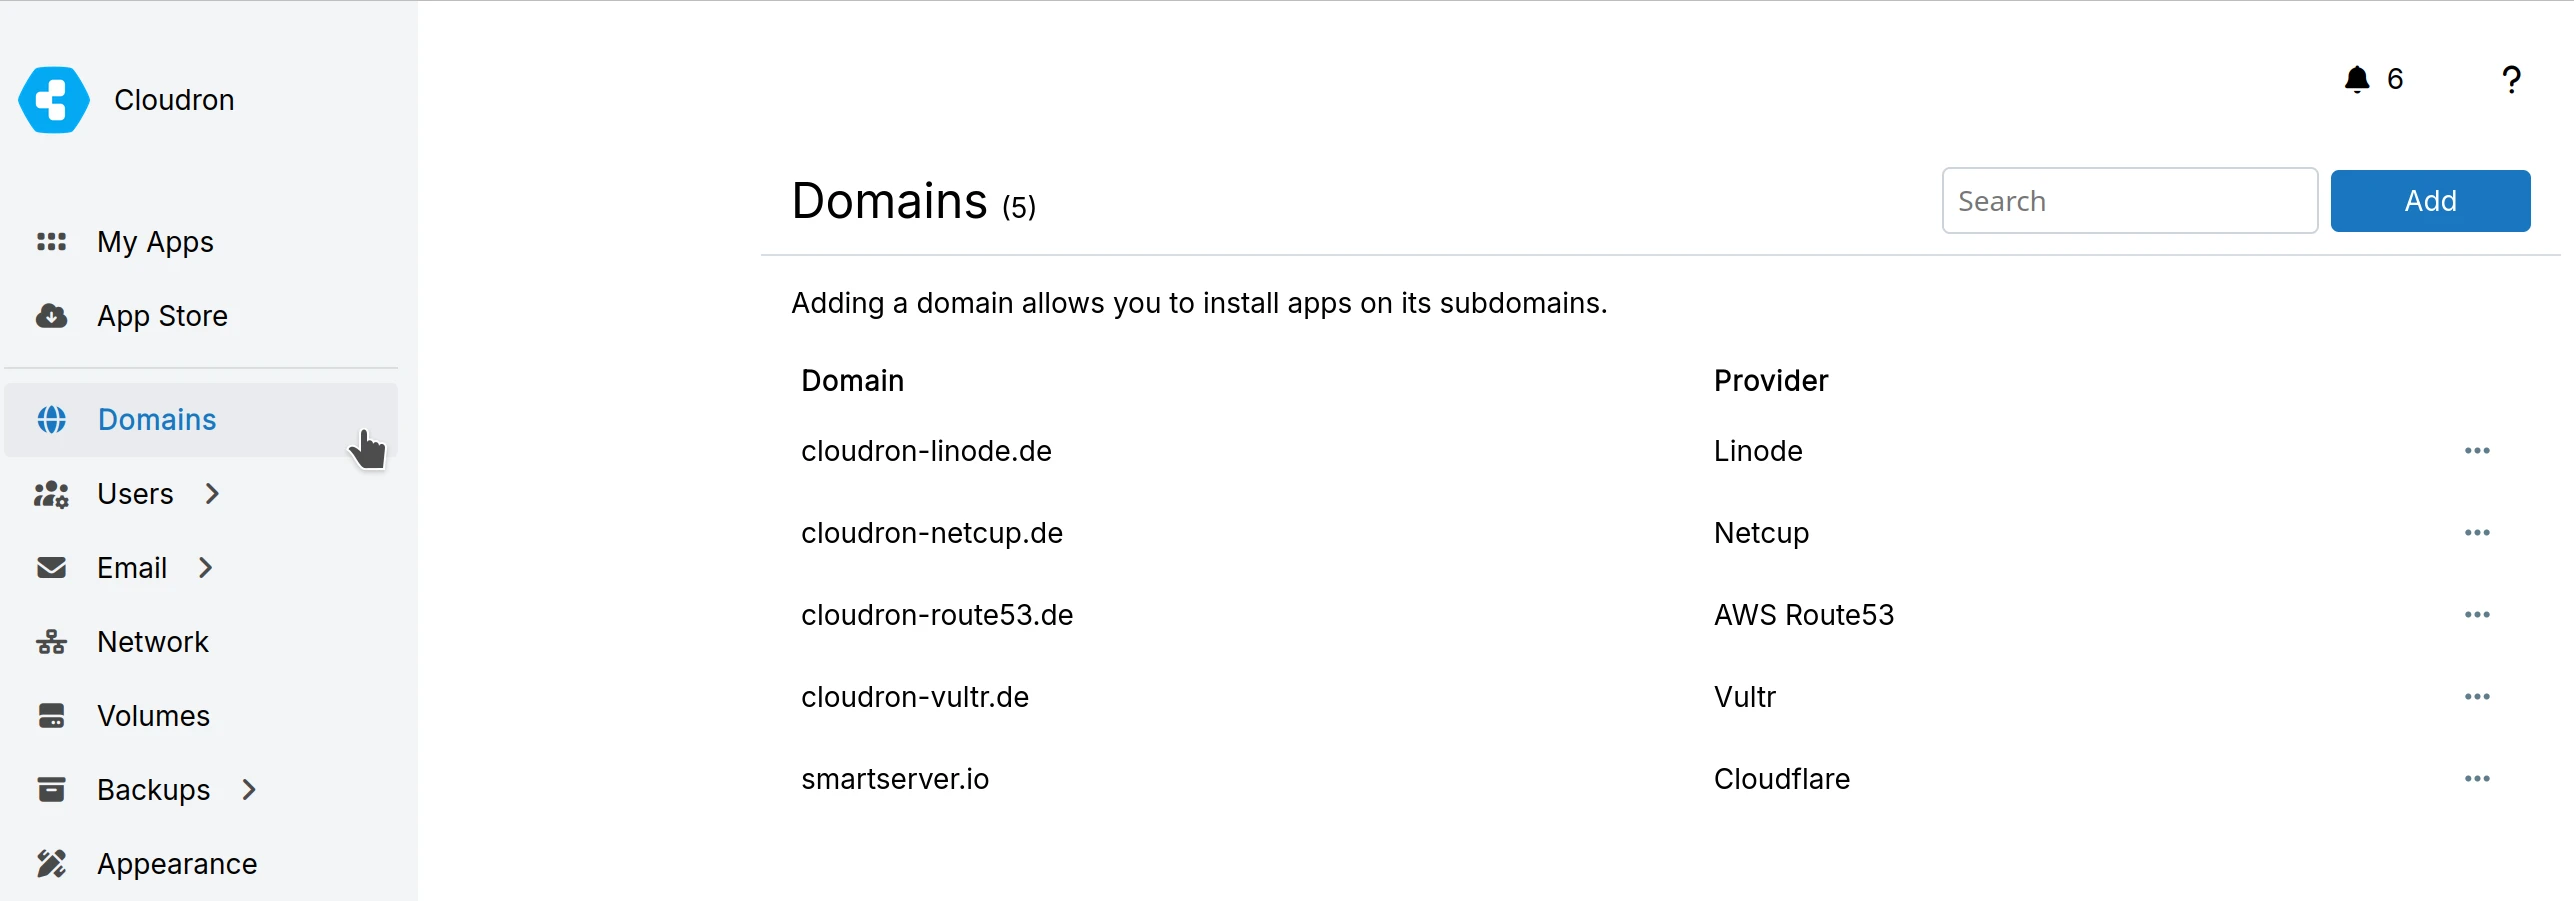
The platform integrates with various DNS service APIs to automate DNS setup. For unsupported providers, use the Wildcard option.
The same domain can be safely added to multiple servers, allowing apps on the same top-level domain across separate servers.
DNS providers
Bunny DNS
-
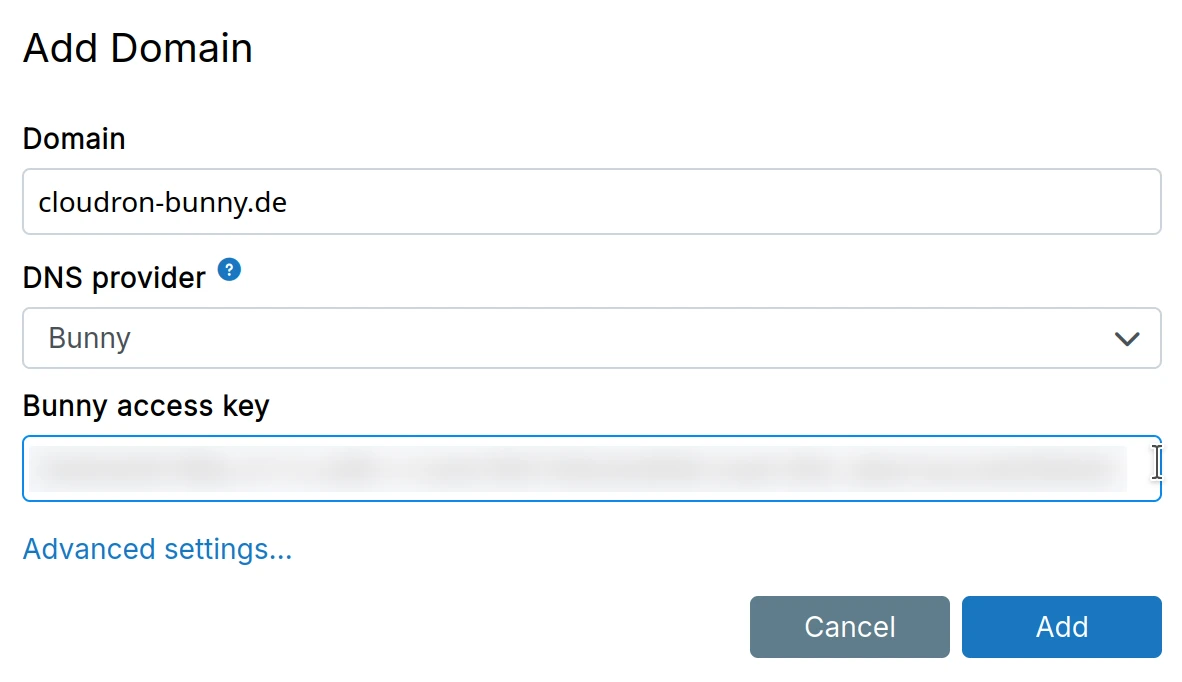
Get the Access Key
-
Choose Bunny from the dropdown and provide the Access key.
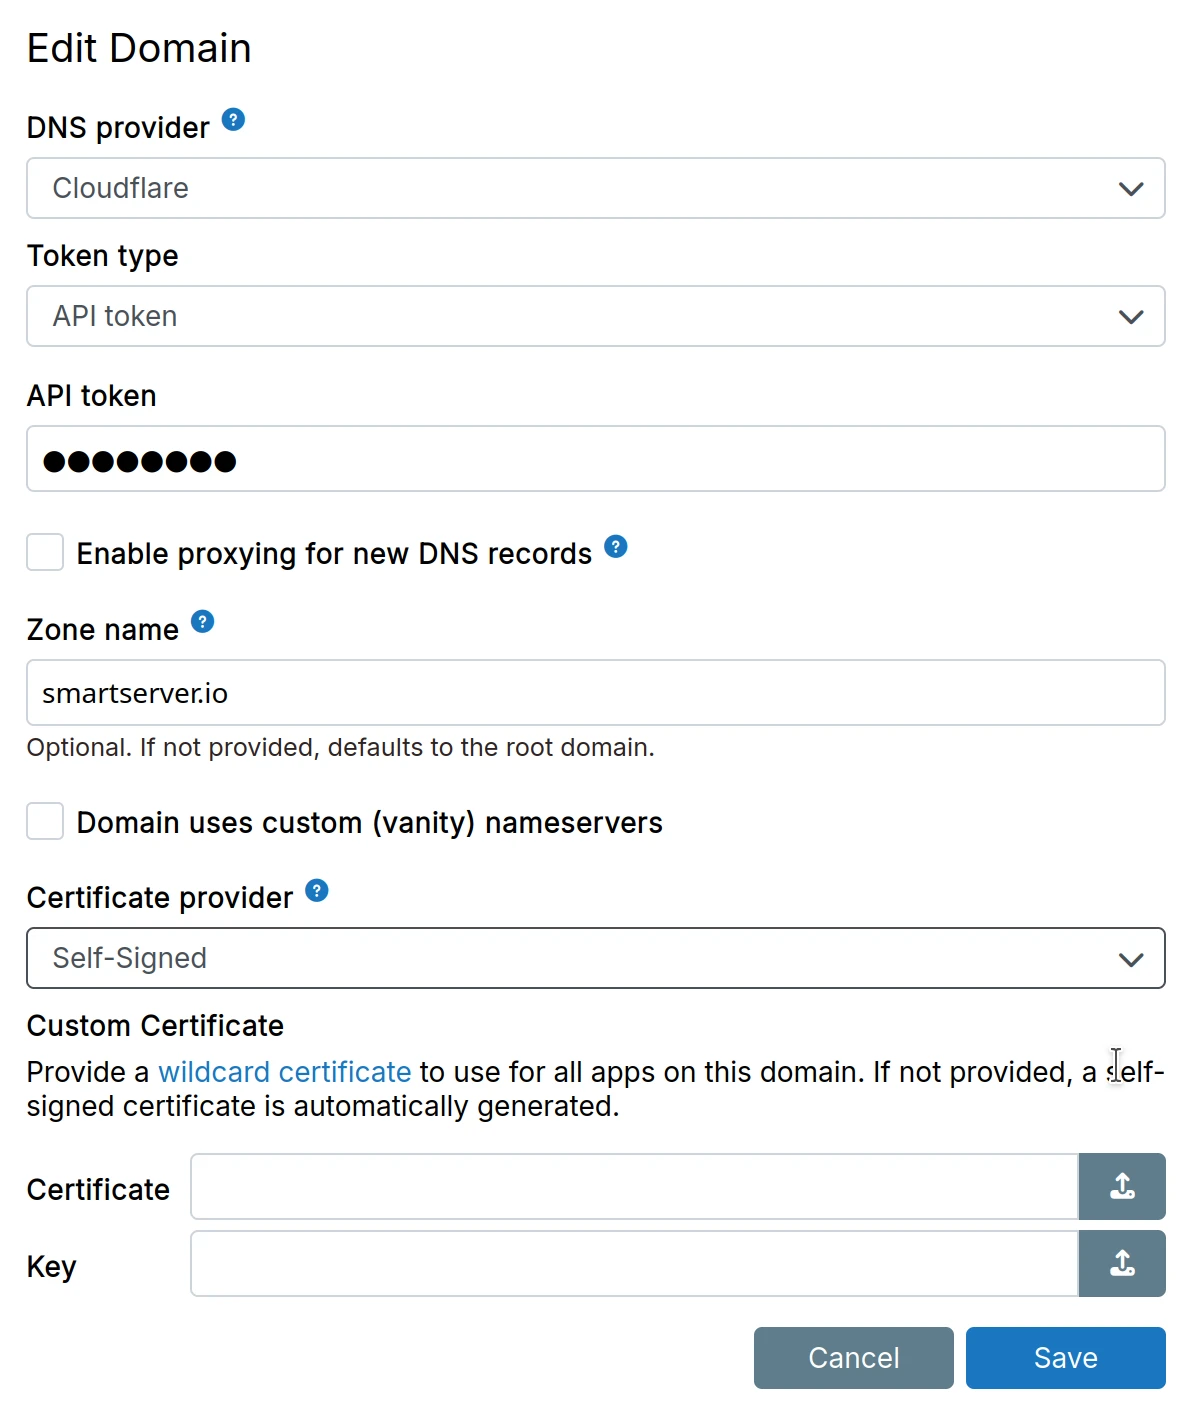
Cloudflare DNS
-
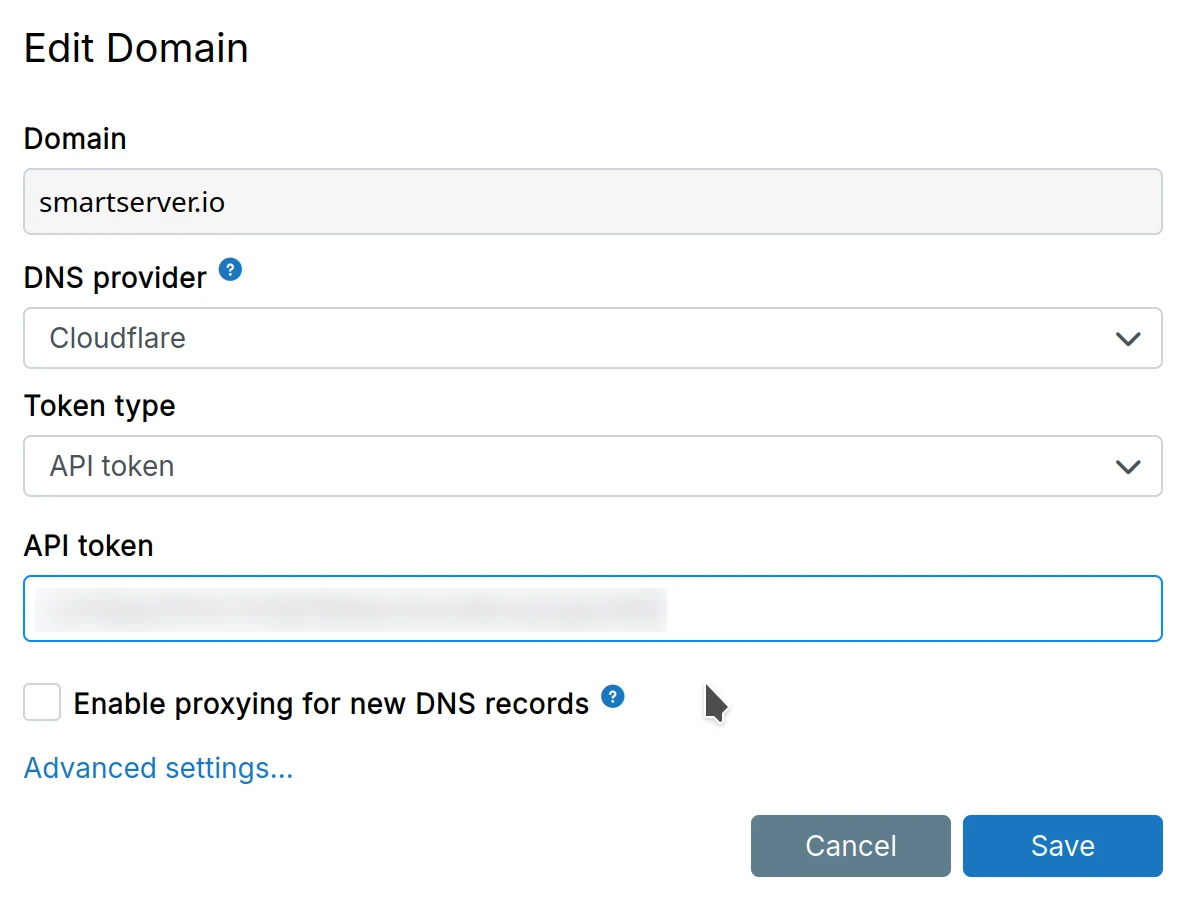
Get the Global API Key or API Token from your account profile section.
-
Choose the
Edit zone DNStemplate to create a token. -
When using the API token, it must include the
Zone:ReadandDNS:Editpermission. The token only needs permission for the specific zone as shown below:
-
Choose Cloudflare from the dropdown and provide the API key.
-
In Cloudflare crypto settings, set SSL to "Full SSL (Strict) mode" to avoid redirect loops.
Follow the Cloudflare 101 guide if your domain is not yet hosted on Cloudflare.
The Enable proxying for new DNS records checkbox configures HTTP proxying. Cloudflare reads all traffic when enabled. Use Full SSL (Strict) mode.
Disable Cloudflare proxying for the my subdomain when using email. Cloudflare only proxies HTTP, not email.
Cloudflare free plan universal certificates support only one subdomain level with HTTPS proxying. See this thread.
deSEC DNS
-
Create a token.
-
Choose deSEC from the dropdown and provide the token.

DigitalOcean DNS
-
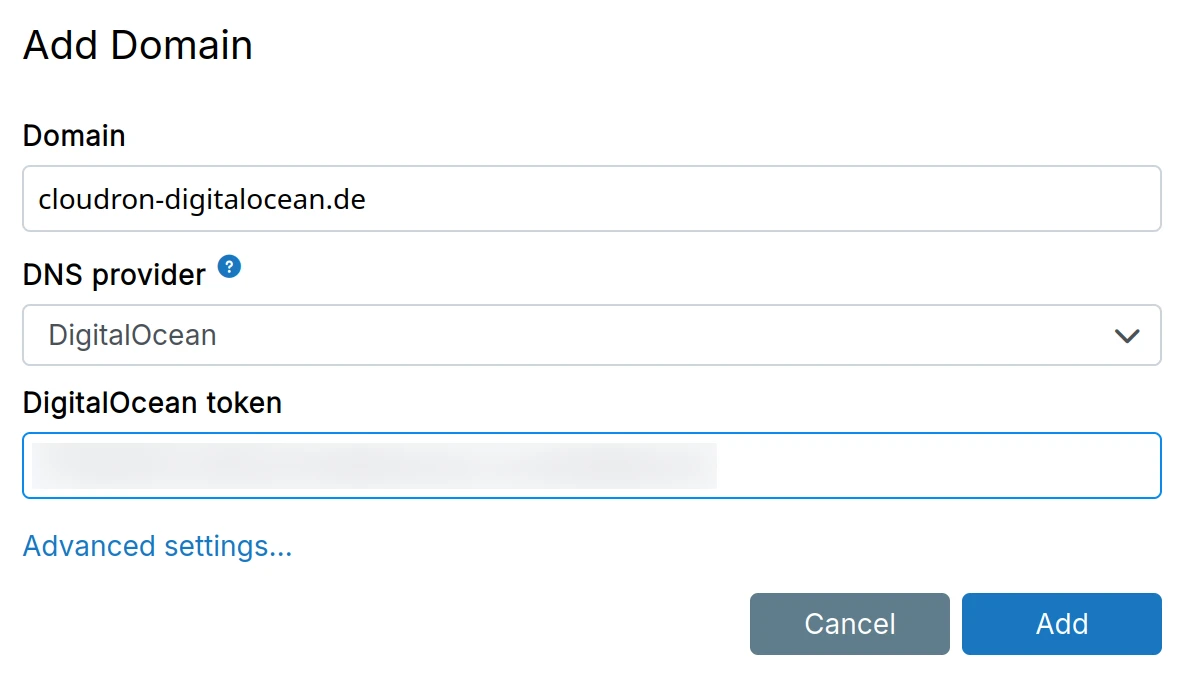
Create an APIv2 token with read+write access.
-
Choose DigitalOcean from the dropdown and provide the API key.
If your domain is not yet hosted on DigitalOcean, follow this tutorial to point your domain's nameservers to DigitalOcean nameservers.
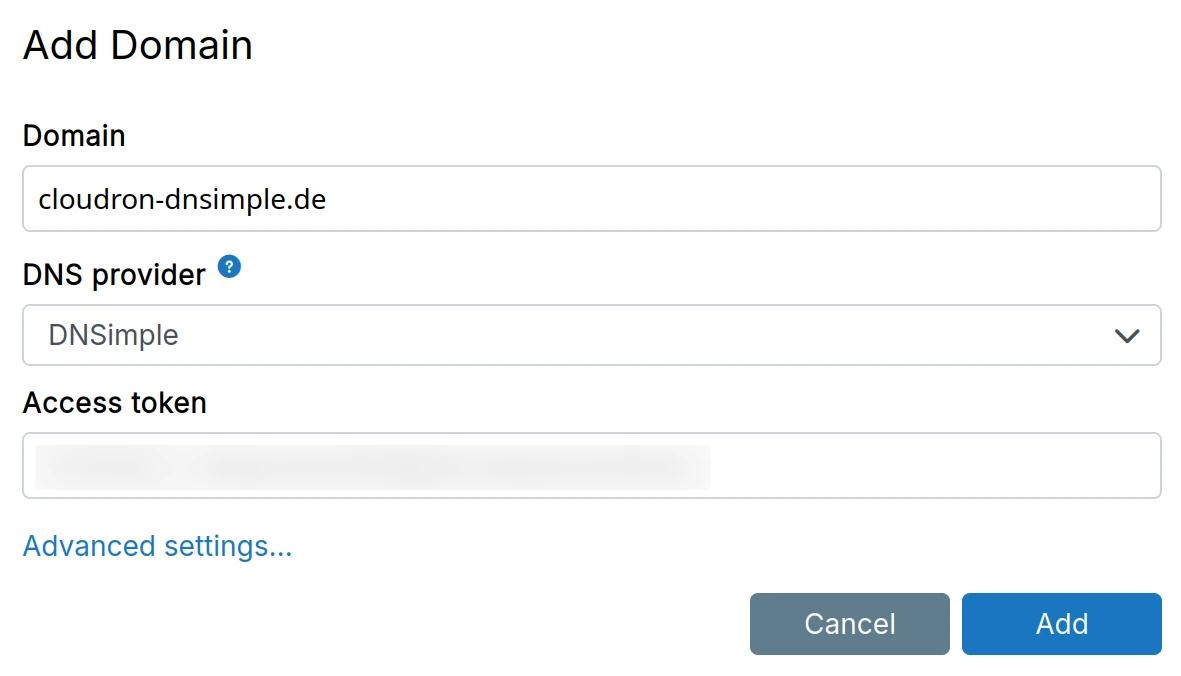
DNSimple DNS
-
Create an API token
-
Choose DNSimple from the dropdown and provide the API key.
If your domain is not yet hosted on DNSimple, follow these articles.
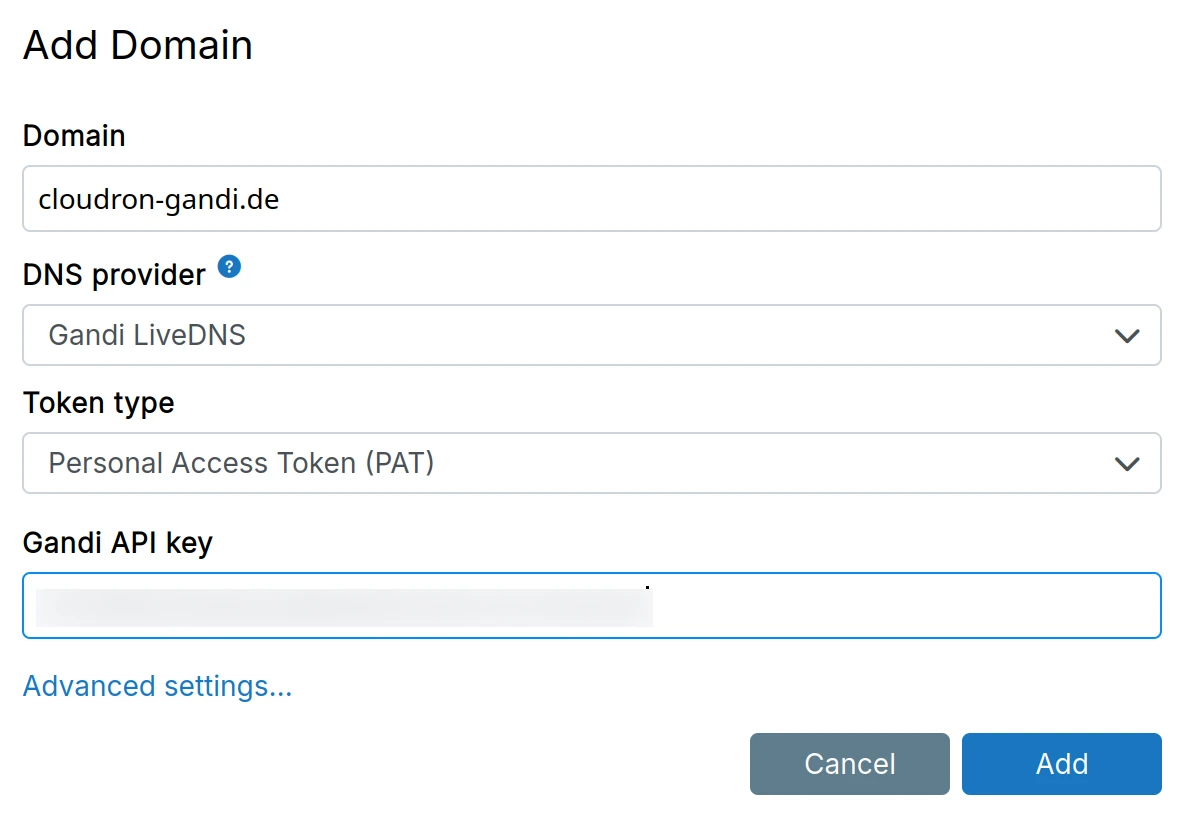
Gandi LiveDNS
-
Create a Personal Access Token (PAT) in the security section under
Authentication options. SelectManage domain name technical configurationspermission. -
Choose Gandi LiveDNS from the dropdown and provide the PAT.
Verify the domain uses LiveDNS in the DNS Records page. Older domains may show a Switch to LiveDNS banner. click Gandi's DNS Records and wait 2-3 hours for migration.
::
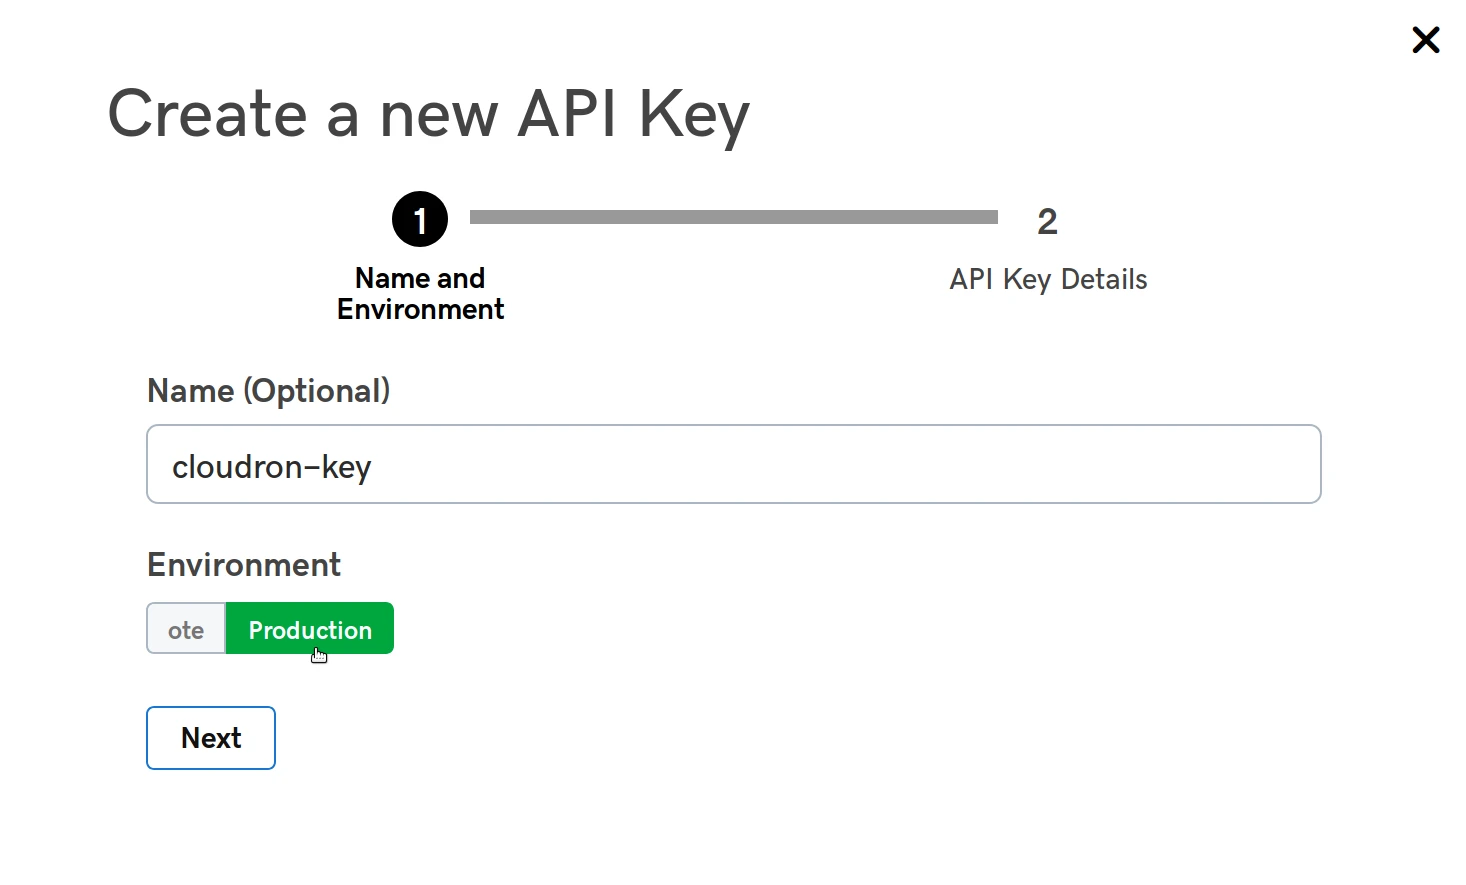
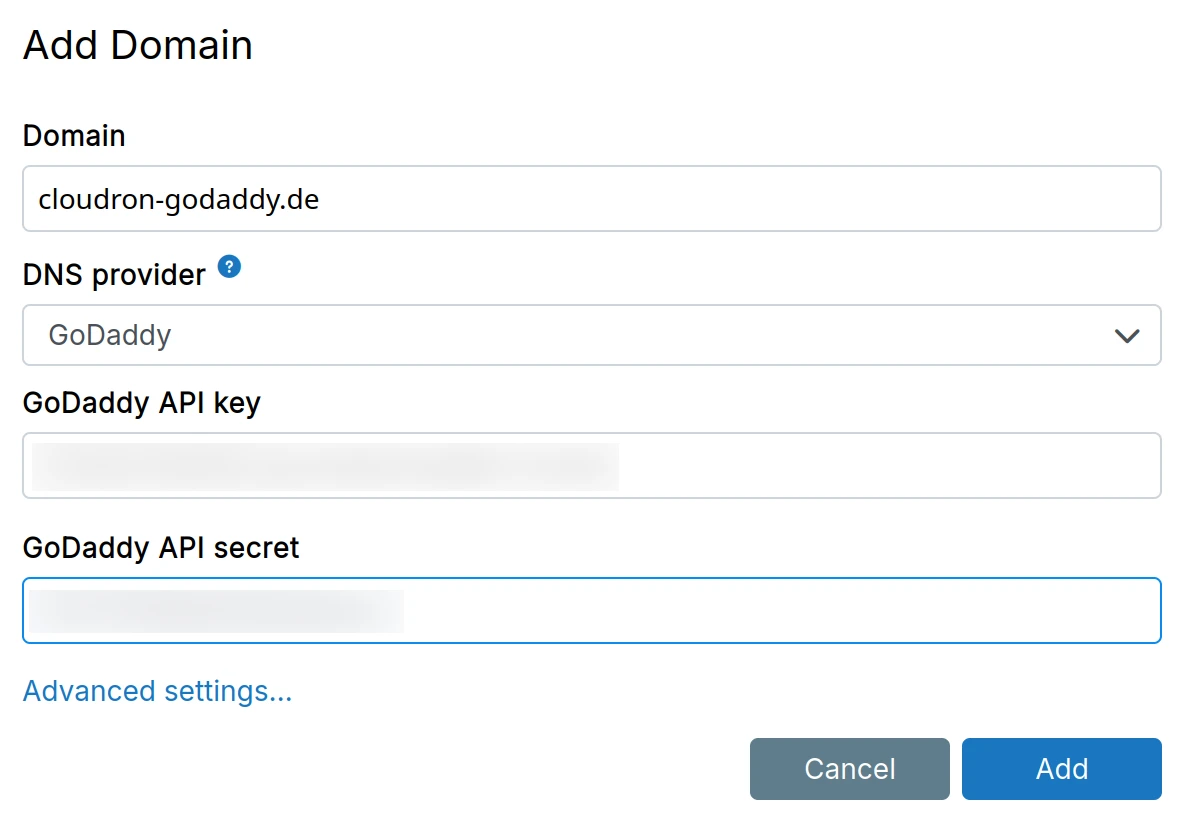
GoDaddy
As of 2024, API access requires accounts with 50+ domains.
-
Create a GoDaddy API Key at their developer portal. Select production environment when creating the key.
-
Choose GoDaddy from the dropdown and provide the key and secret.
GoDaddy lacks a delete record API, so are set deleted records to 0.0.0.0.
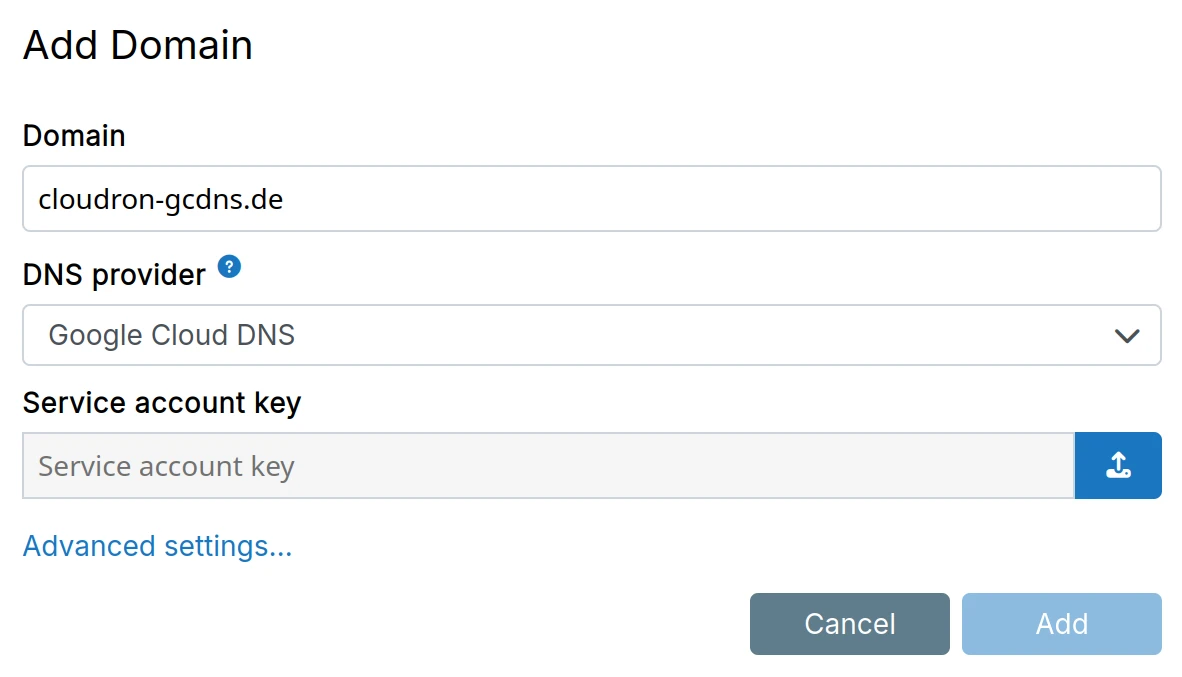
Google Cloud DNS
-
Create a service account key in JSON format.
-
Choose Google Cloud DNS from the dropdown.
See this guide to migrate your domain to Google Cloud DNS.
Google Domains is a different product than Google Cloud DNS. The above guide gives directions on how to make a Google Domains hosted domain use the Google Cloud DNS
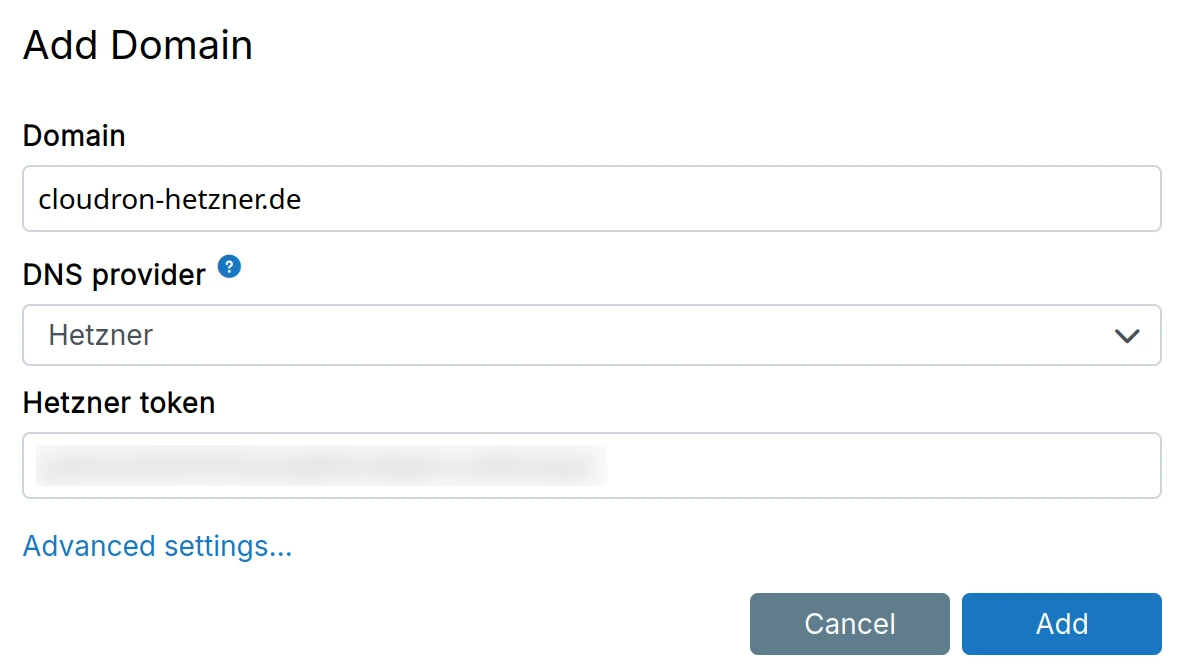
Hetzner DNS (legacy)
-
Create a Hetzner Console API token.
-
Choose Hetzner DNS from the dropdown.
are required Robot name servers (*.ns.hetzner.com). KonsoleH domains use *.your-server.de. switch to Robot for integration.
Hetzner is migrating DNS Console zones into the Hetzner console. Please migrate at the earliest.
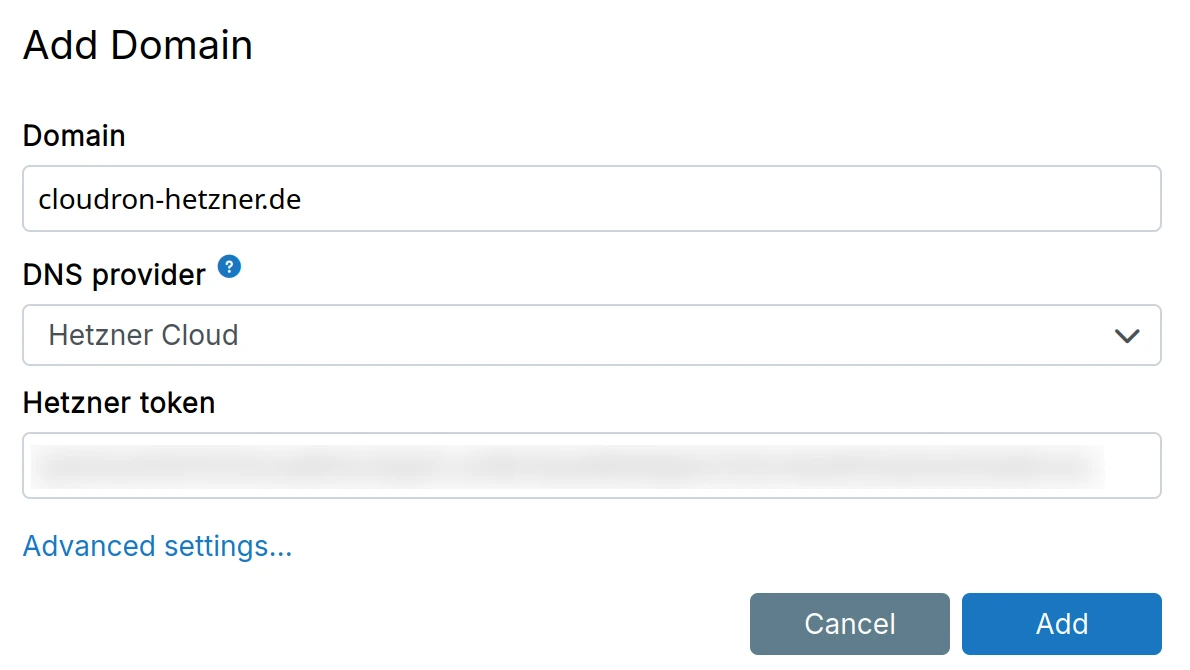
Hetzner Cloud DNS
-
Create a Hetzner Cloud API token.
-
Choose Hetzner Cloud DNS from the dropdown.
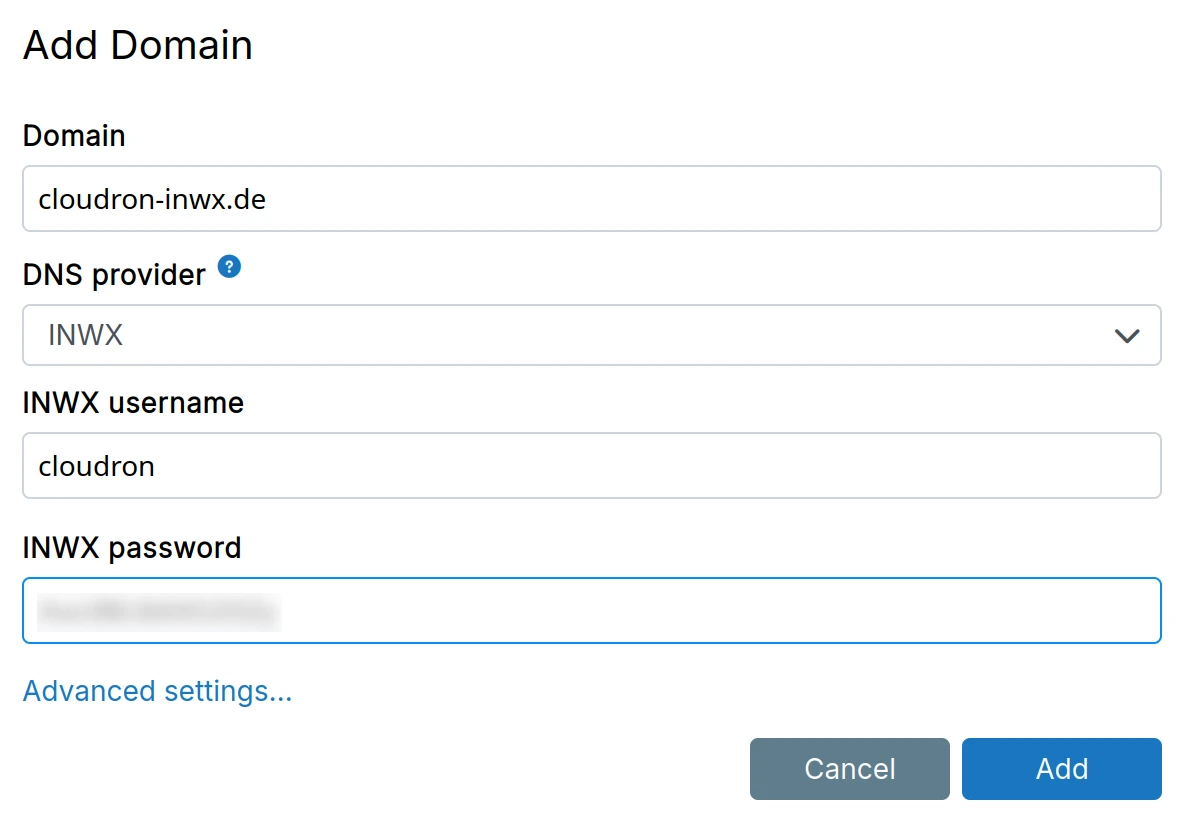
INWX DNS
-
It is recommended to set up a dedicated API sub-user to use the API.
-
Choose INWX from the dropdown.
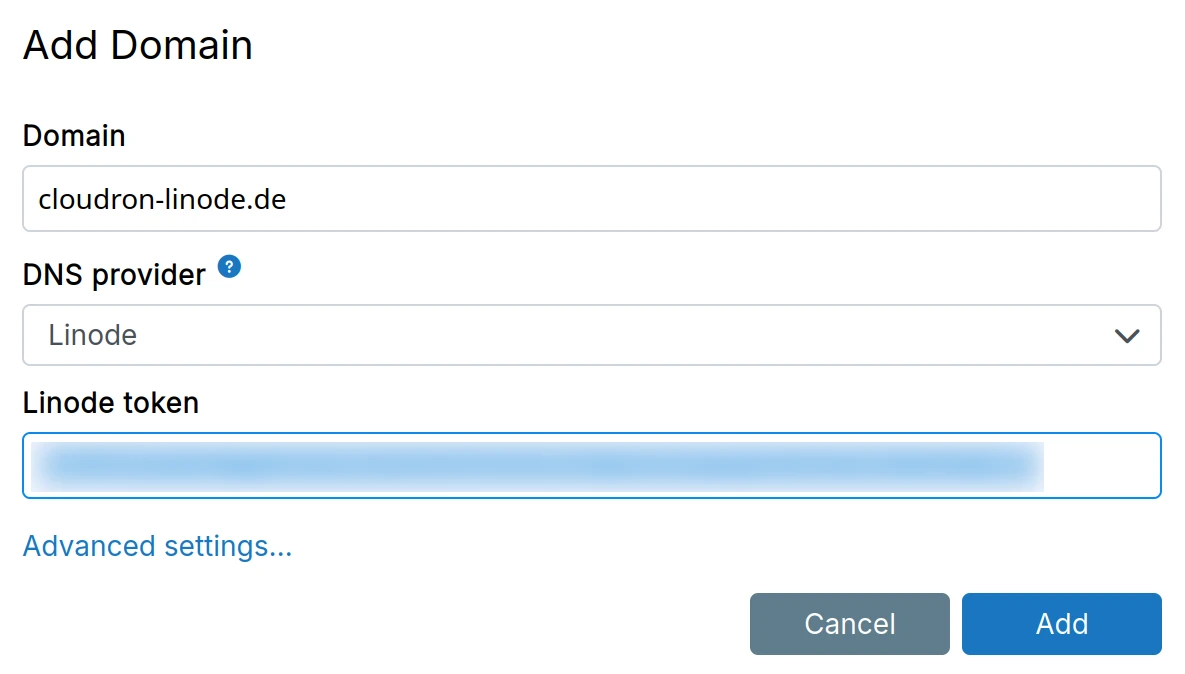
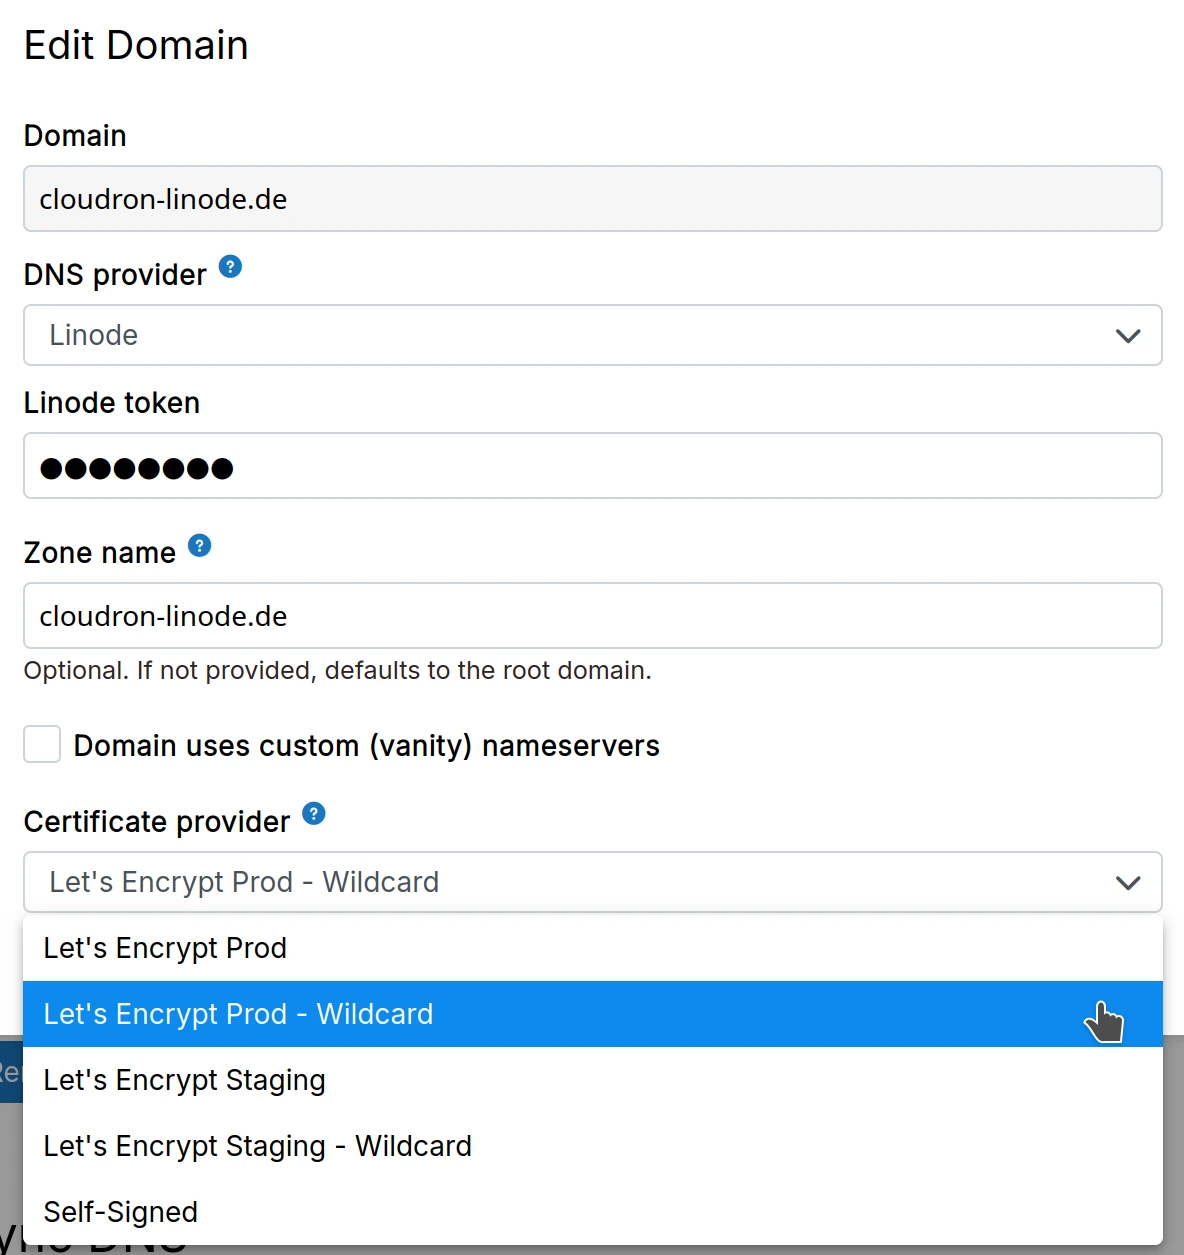
Linode DNS
-
Create a Linode API token. The Personal Access Token must have
Domainsaccess. Set theExpirytoNever. -
Choose Linode from the dropdown.
Follow this guide to migrate an existing domain to Linode DNS.
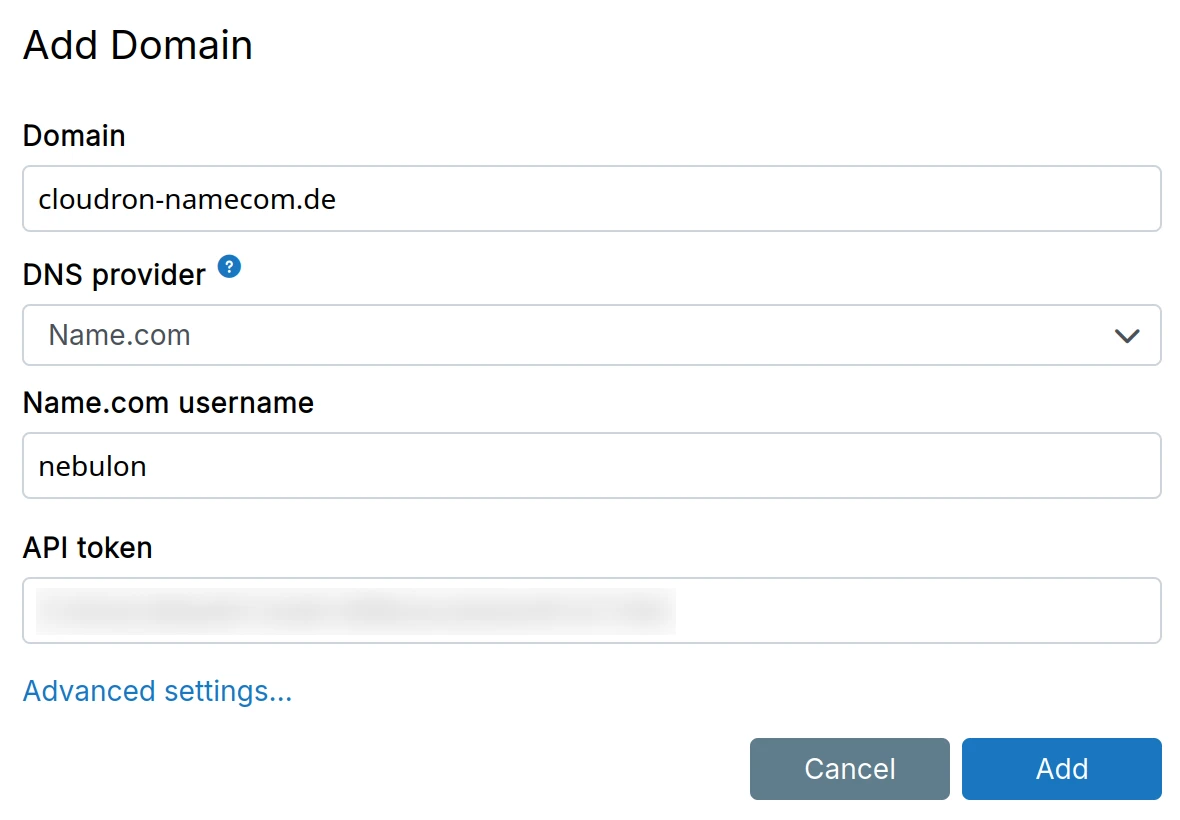
Name.com DNS
-
Create a name.com API token
-
Choose Name.com from the dropdown.
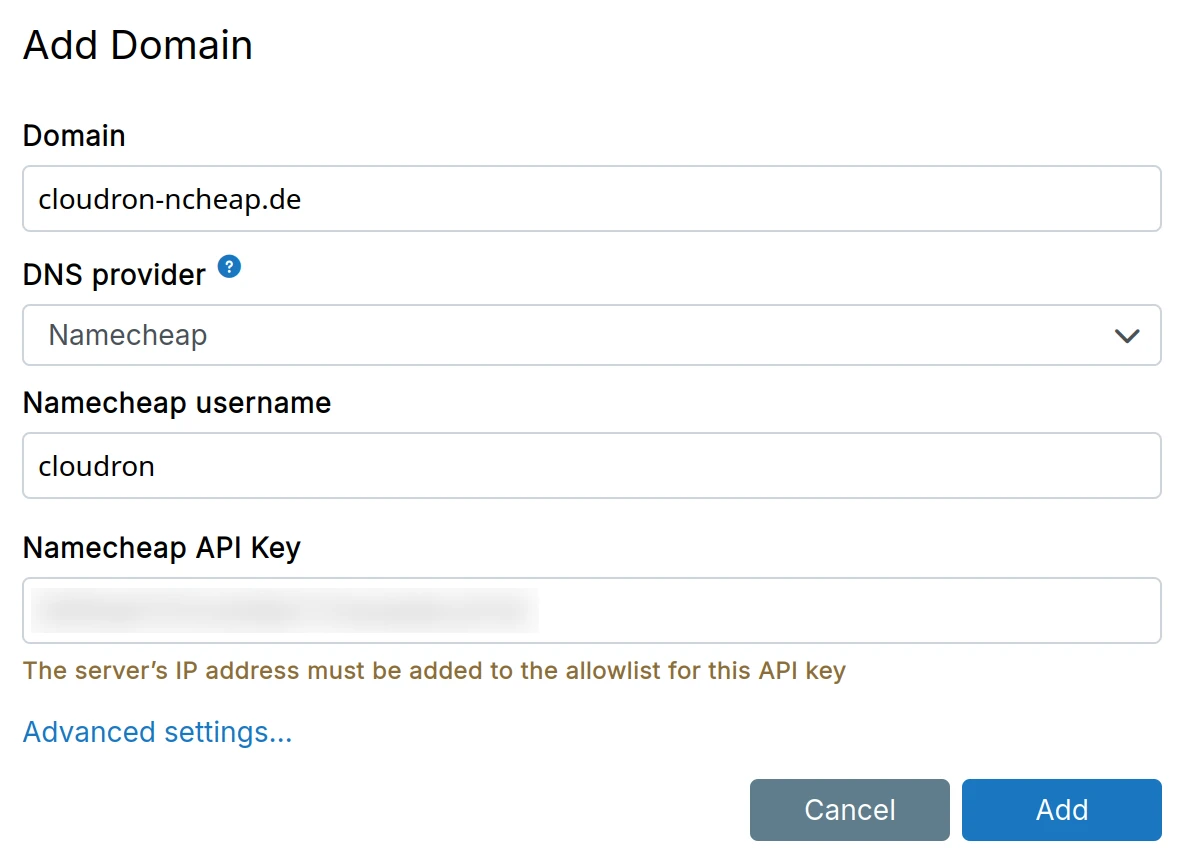
Namecheap DNS
- Create an API key (Profile -> Tools) and whitelist the server's IP in the Namecheap dashboard.
It takes a few minutes for the IP whitelisting to take effect. If adding the domain in Cloudron gives an access error, wait a bit.
-
For email, select
Custom MXinMAIL SETTINGSand set the MX record tomy.example.com(the primary domain). Cloudron keeps this record updated.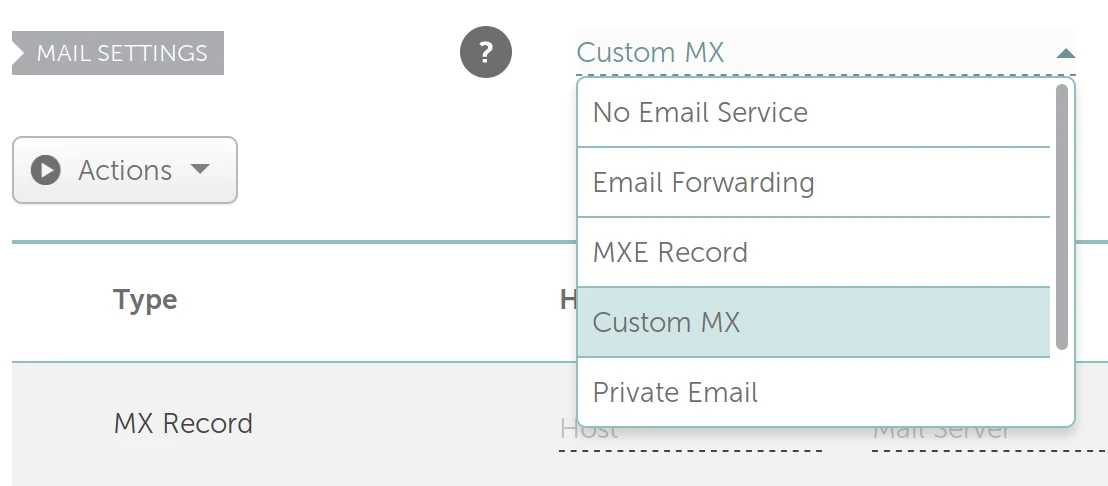
-
Choose Namecheap from the dropdown.
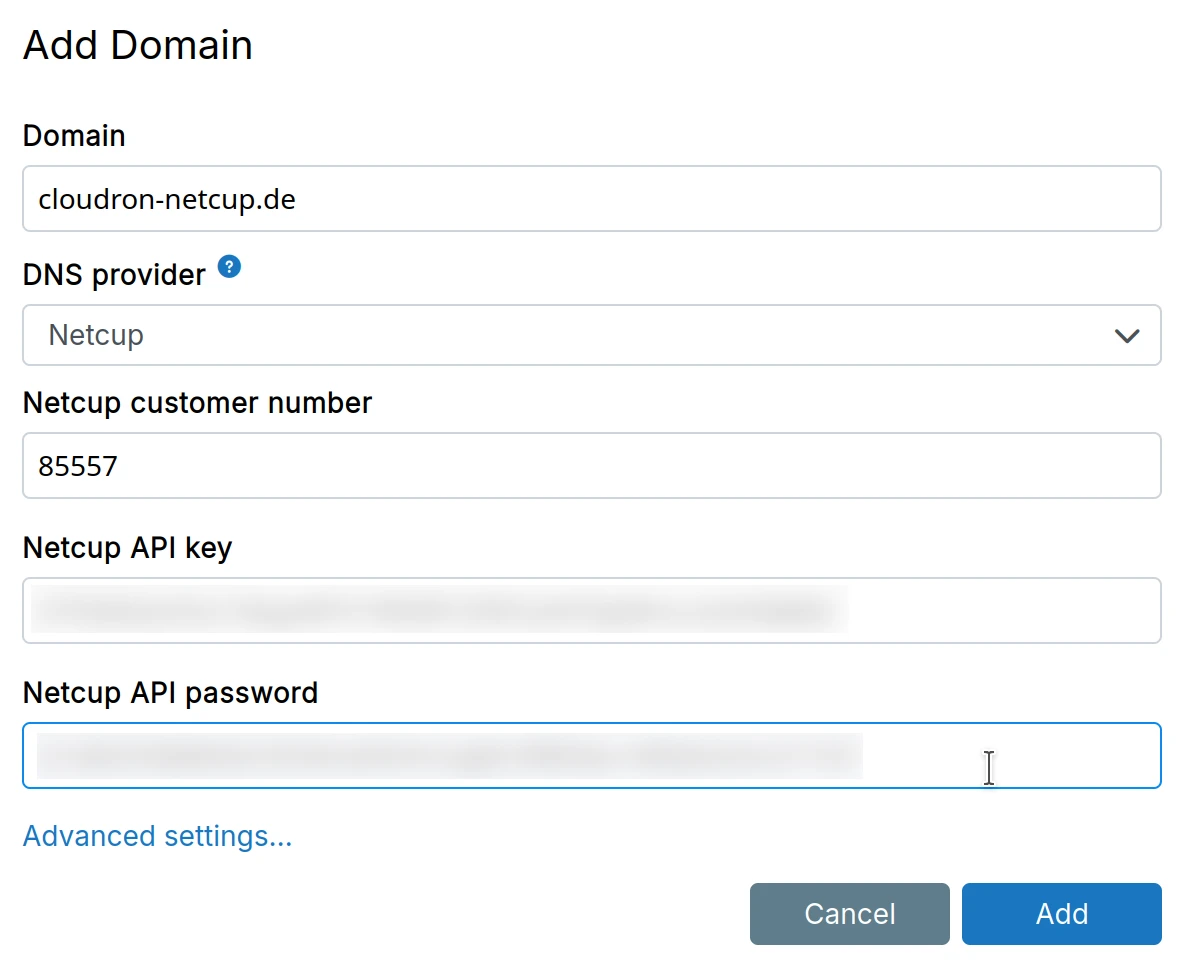
Netcup DNS
On Netcup DNS updates take longer than on other providers. This means app installation or location may take a few minutes.
-
Create an API Key and Password in the Customer Control Panel after accepting ToS.
-
Enter your customer number (shown at top of control panel), API key, and password.
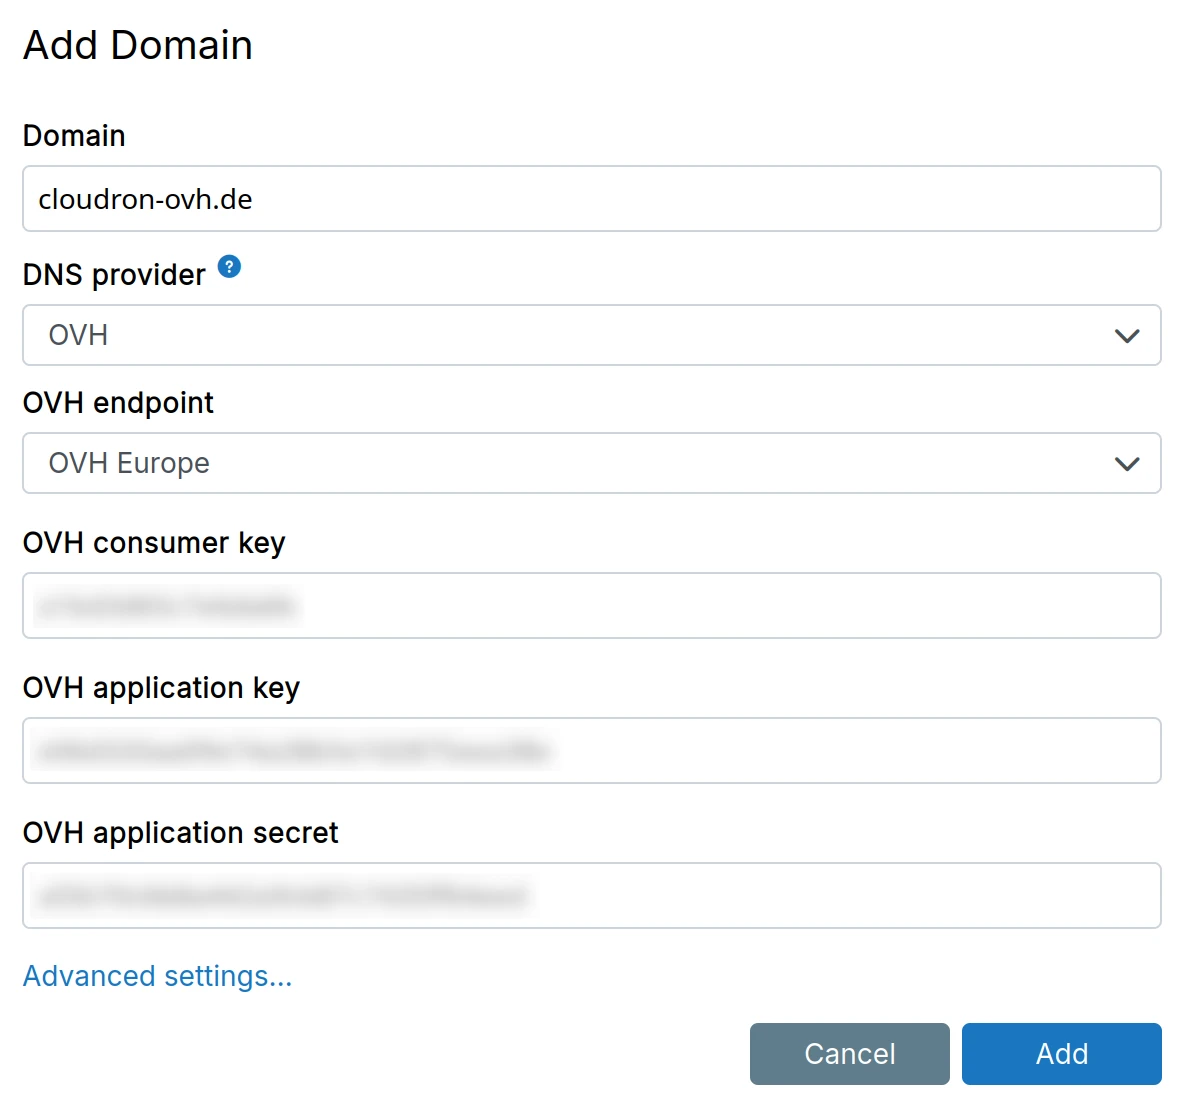
OVH DNS
-
Create an Application key, Application secret and Consumer Key by following the docs at OVHCloud Help.
-
API Keys can be created with a minimal scope:
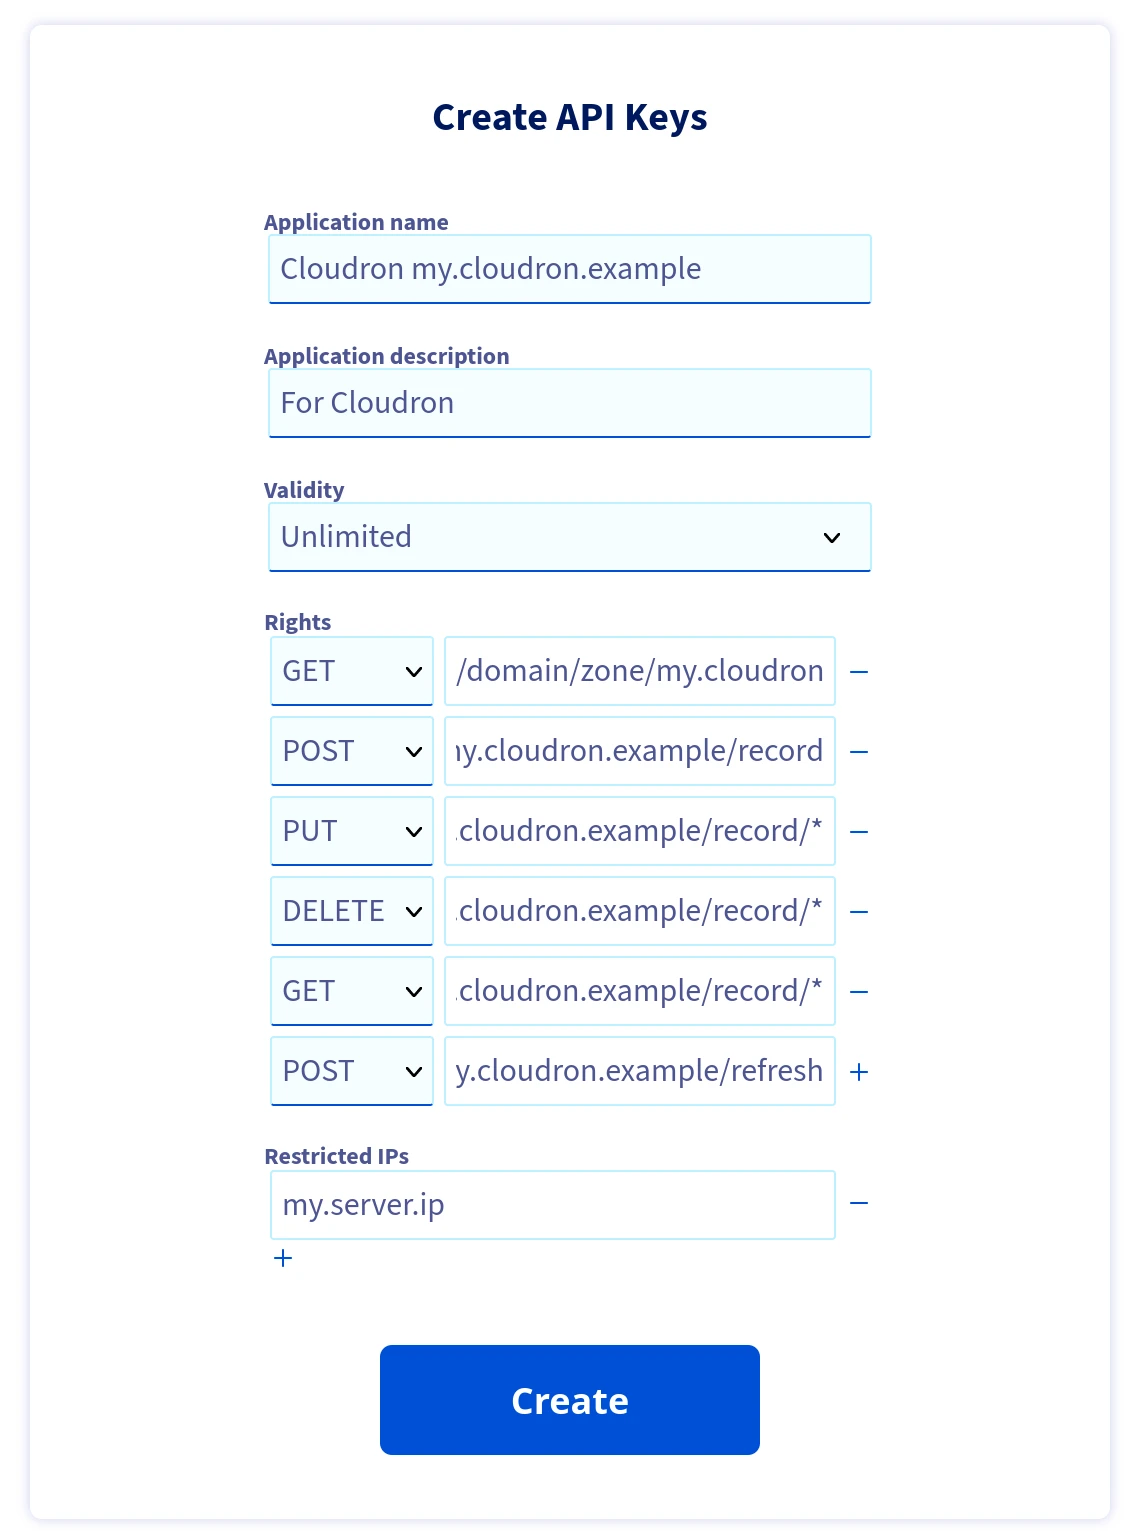
GET /domain/zone/{zone Name}/record
POST /domain/zone/{zone Name}/record
PUT /domain/zone/{zone Name}/record/*
DELETE /domain/zone/{zone Name}/record/*
GET /domain/zone/{zone Name}/record/*
POST /domain/zone/{zone Name}/refresh
-
Choose OVH from the dropdown and enter the Application key, Application secret & Consumer Key.
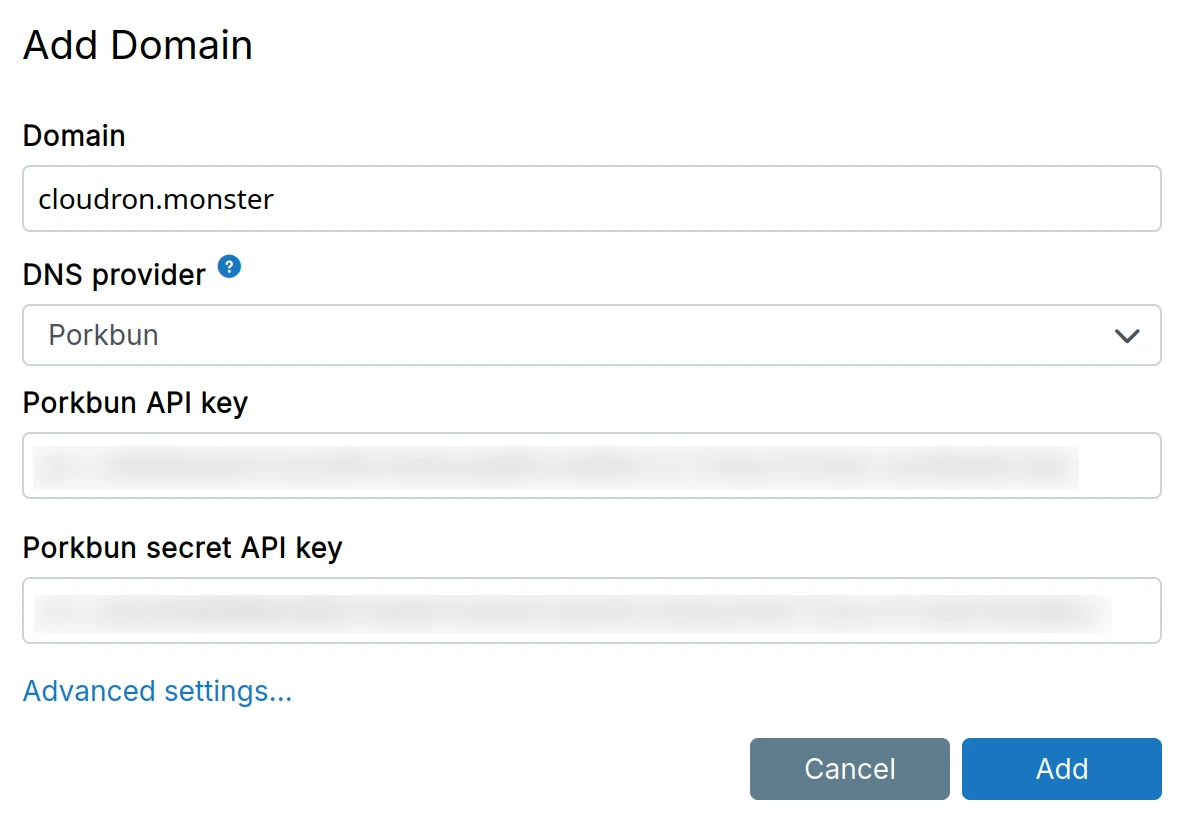
Porkbun DNS
-
Create an API Key and API Secret in the Porkbun dashboard.
-
Enable
API ACCESSfor the domain (disabled by default). -
Choose Porkbun from the dropdown and enter the API key and API secret.
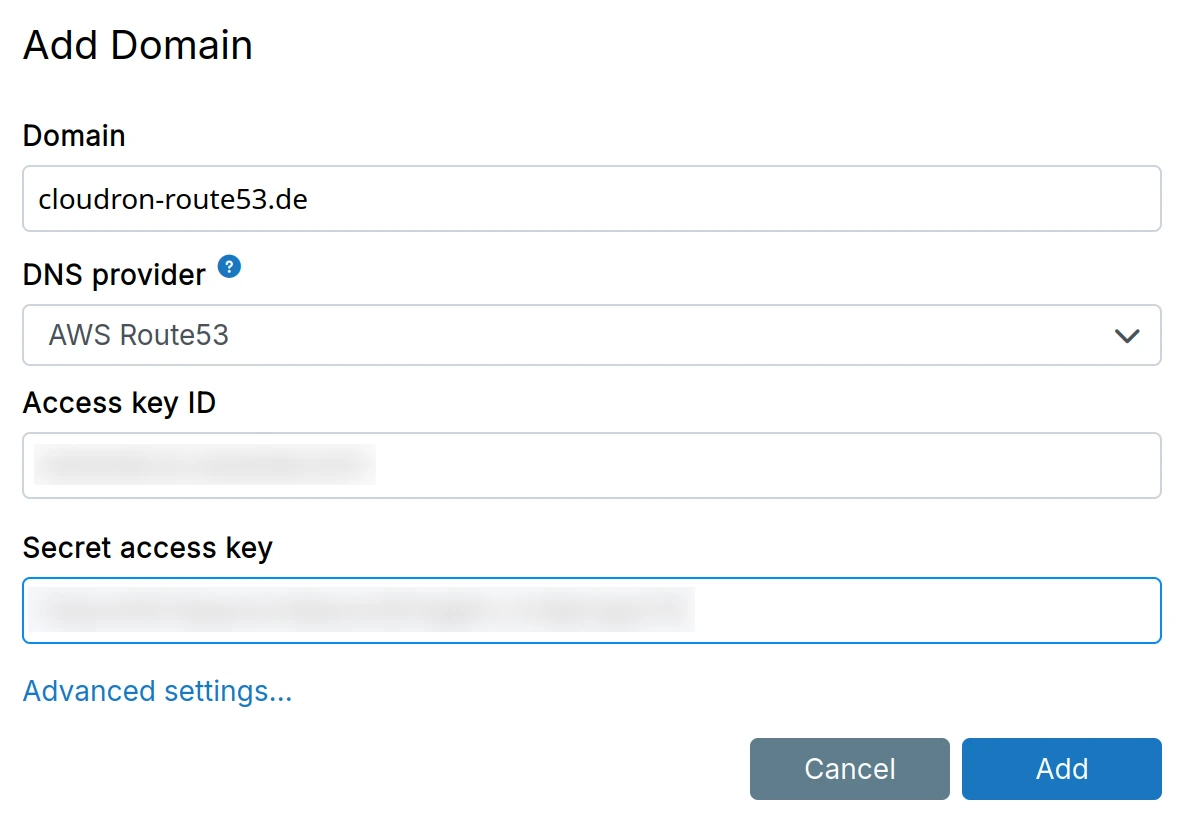
Route53 DNS
- AWS supports root and IAM credentials. For root credentials, see managing access keys. For IAM, create a user with the following policy (replace
<hosted zone id>from Route53 console):
{
    "Version": "2012-10-17",
    "Statement": [
        {
            "Effect": "Allow",
            "Action": "route53:*",
            "Resource": [
                "arn:aws:route53:::hostedzone/<hosted zone id>"
            ]
        },
        {
            "Effect": "Allow",
            "Action": [
                "route53:ListHostedZones",
                "route53:listHostedZonesByName",
                "route53:GetHostedZone",
                "route53:GetChange",
                "route53:ChangeResourceRecordSets"
            ],
            "Resource": [
                "*"
            ]
        }
    ]
}
-
Choose AWS Route53 from the dropdown.
Follow this guide to migrate an existing domain to AWS Route53.
Route53 integration is disabled in AWS Marketplace AMI per AWS policy. Use Wildcard or Manual instead.
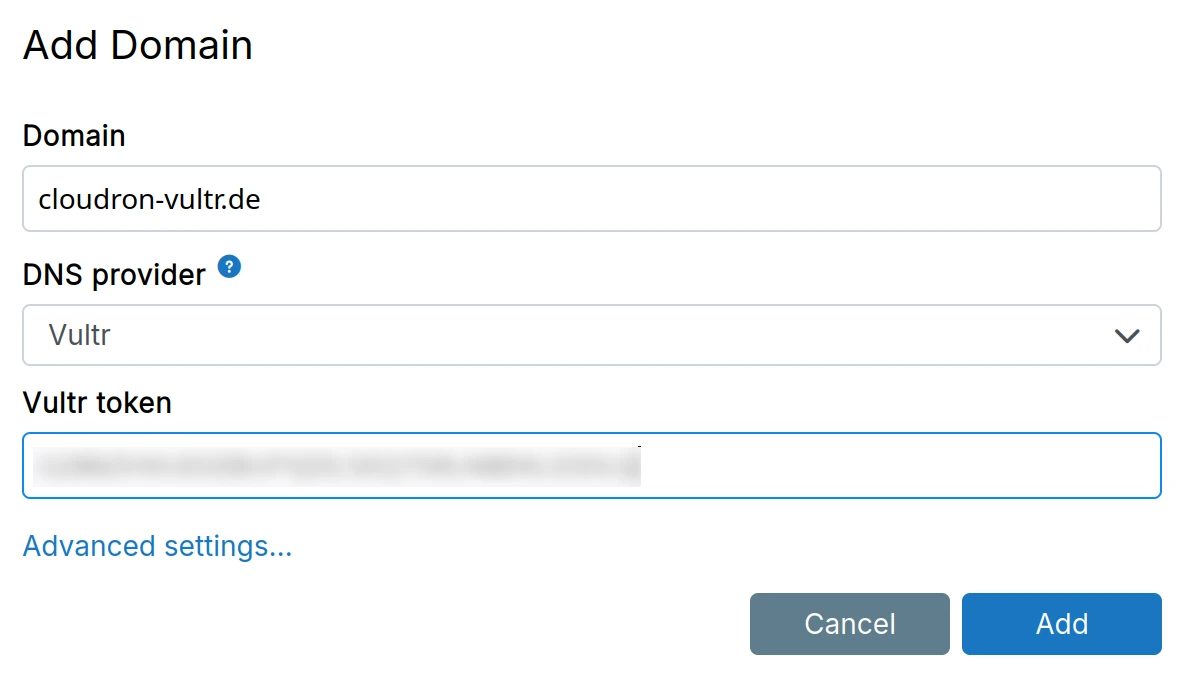
Vultr DNS
-
Create a Vultr API token and add the server's IP in Access Control.
-
Choose Vultr from the dropdown.
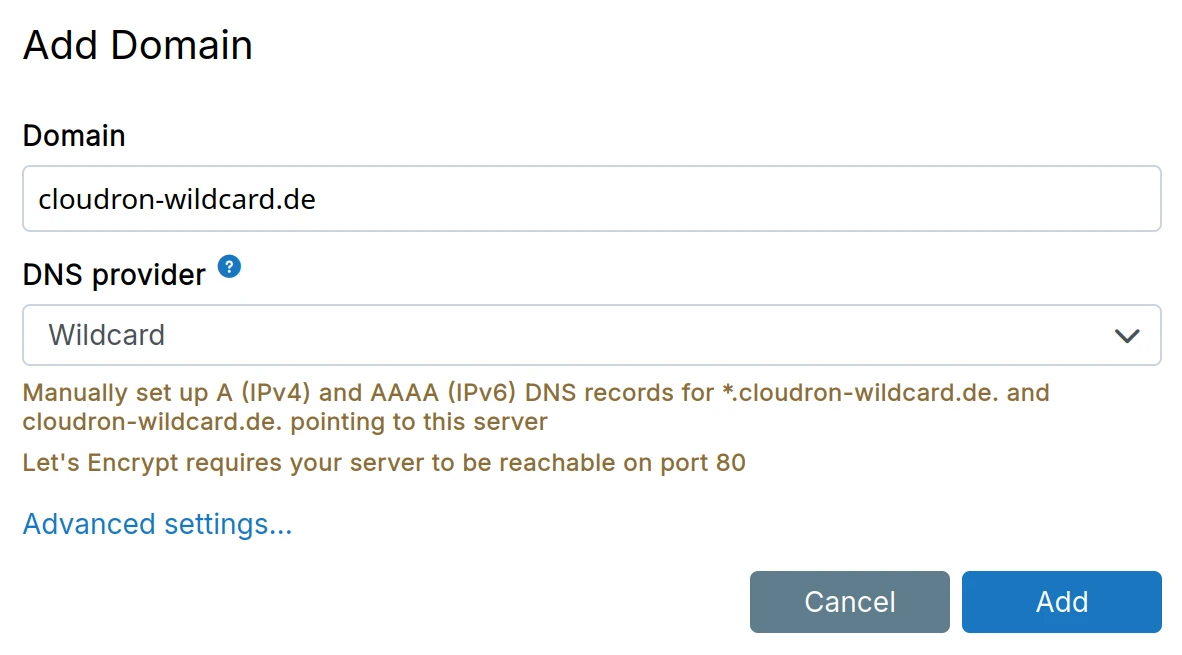
Wildcard DNS
Use the Wildcard DNS backend for unsupported DNS providers.
- Add a DNS A record with name
*.example.comto point to your server's IP.
In DNS, a wildcard entry has lower precedence to subdomains that are explicitly defined. This means
that if you already have a blog.example.com pointing to a different IP address, then it will
be unaffected by the addition of this wildcard entry.
-
(Optional) Add an A record for
example.compointing to your server's IP. Required only for hosting apps on the bare domain. -
Choose Wildcard from the dropdown.
-
For sending email, are required DKIM and SPF records to be setup as well. These records will be displayed in the UI after installation and have to be setup manually.
Let's Encrypt HTTP validation will be used to procure certificates. For this reason, you must open port 80 of your server when using the Wildcard provider.
Manual DNS
Use Manual DNS when Wildcard DNS is not possible and your provider is unsupported.
Set up DNS records before Cloudron installation and before each app installation. Apps fail to install without correct DNS.
For Cloudron setup:
-
Set the
mysubdomain to the server's public IP -
Choose Manual from the DNS provider dropdown
-
Set up DKIM and SPF records manually for email. displayed in UI after installation.
-
Create A records for each subdomain before installing apps.
Let's Encrypt HTTP validation will be used to procure certificates. For this reason, you must open port 80 of your server when using the Manual provider.
No-op DNS
The No-op DNS backend disables DNS functionality and is intended to be used for testing and development.
When using other DNS backends, DNS will be set up the DNS automatically and also check if the DNS changes have propagated. This prevents the user from hitting name resolution (NXDOMAIN) errors. When using the No-op backend, the setup and checks are disabled and you are on your own to ensure that names are getting resolved correctly.
Zone name
The Zone Name is the domain managed by the DNS provider, typically the top-level domain like example.com. Set a different zone name when a subdomain uses a different DNS provider.
Example: If example.com is on GoDaddy but internal.example.com is delegated to DigitalOcean, set the zone name to internal.example.com when using cloudron.internal.example.com as the primary domain.
Custom nameservers
Custom nameservers (also called vanity nameservers) allow you to use branded nameservers like ns1.yourdomain.com instead of your DNS provider's default nameservers like ns1.cloudflare.com.
When adding a domain, the platform checks the domain's nameservers and matches them against the selected DNS provider. This verification ensures the DNS provider can manage the domain's records. However, this check fails when using custom nameservers since they don't match the provider's default nameservers.
To use custom nameservers, enable the Domain uses custom (vanity) nameservers checkbox in the domain's advanced settings. This bypasses the nameserver verification check.

Custom nameservers must be properly configured at your DNS provider to point to their nameservers before enabling this option.
Well known locations
A well-known URI is a Uniform Resource Identifier for a URL path prefixes that start with /.well-known/. They are implemented
in webservers so that requests to the servers for well-known services or information are available at URLs consistent
well-known locations across servers. See RFC 8615 for more
information.
You can edit well known locations in the Domains view:
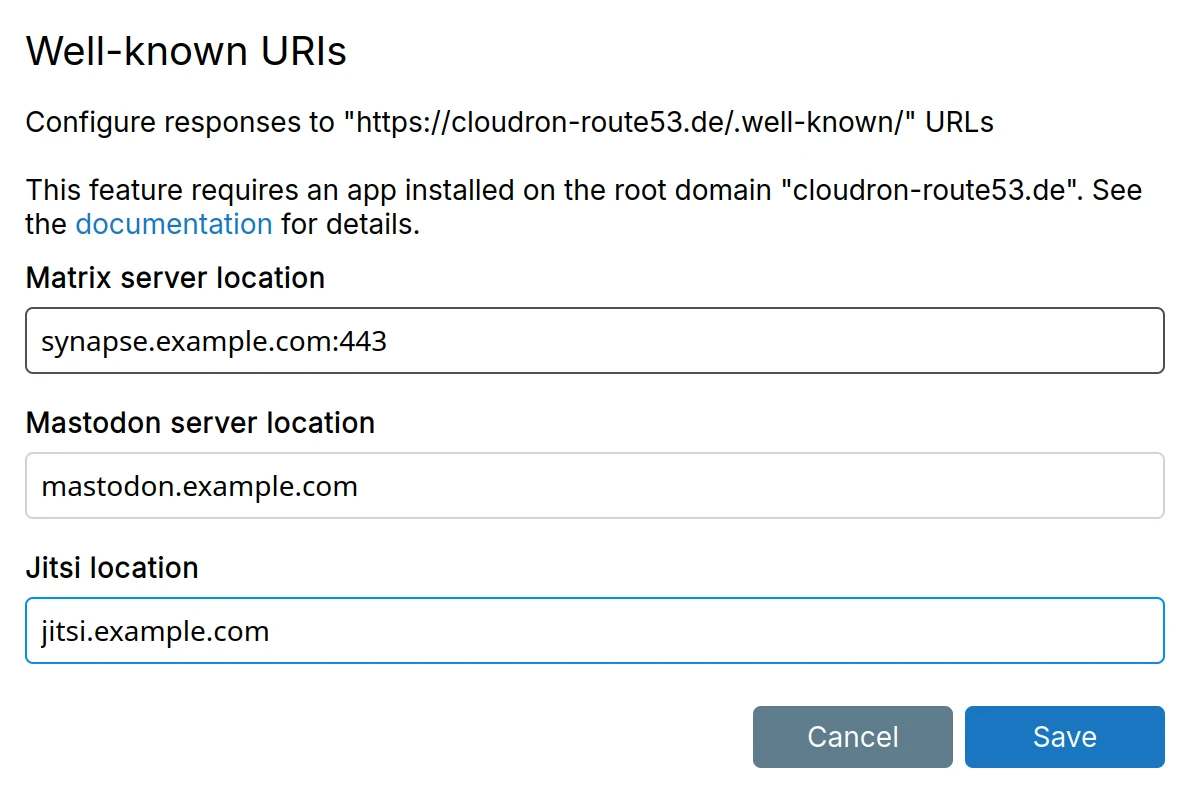
Matrix server location
Set the Matrix server's domain and port. The platform responds to two well-known URIs:
-
The
https://{domain}/.well-known/matrix/serverend point. This is required for federation to work. Note that This endpoint only works to this end point only when an app is installed on the bare domain. -
The
https://{domain}/.well-known/matrix/clientend point. This is required by clients to discover the matrix servers.
The default matrix server port is 8448. However, the Synapse app uses port 443. For this reason, you must specify the port explicity, like matrix.domain.com:443.
An app must be installed on the bare domain to respond to well-known queries.
Mastodon server location
The mastodon hostname is the domain name on which the mastodon server is running. When set, requests
to requests to the https://{domain}/.well-known/host-meta end point. This is required for federation to work.
This endpoint only works to this end point only when an app is installed on the bare domain.
An app must be installed on the bare domain to respond to well-known queries.
Jitsi location
Set the Jitsi server's domain. The platform responds to https://{domain}/.well-known/matrix/client per Element documentation. Requires an app on the bare domain.
In the above example, an app must be installed on the bare domain https://cloudron.space to be
able to respond to well known queries.
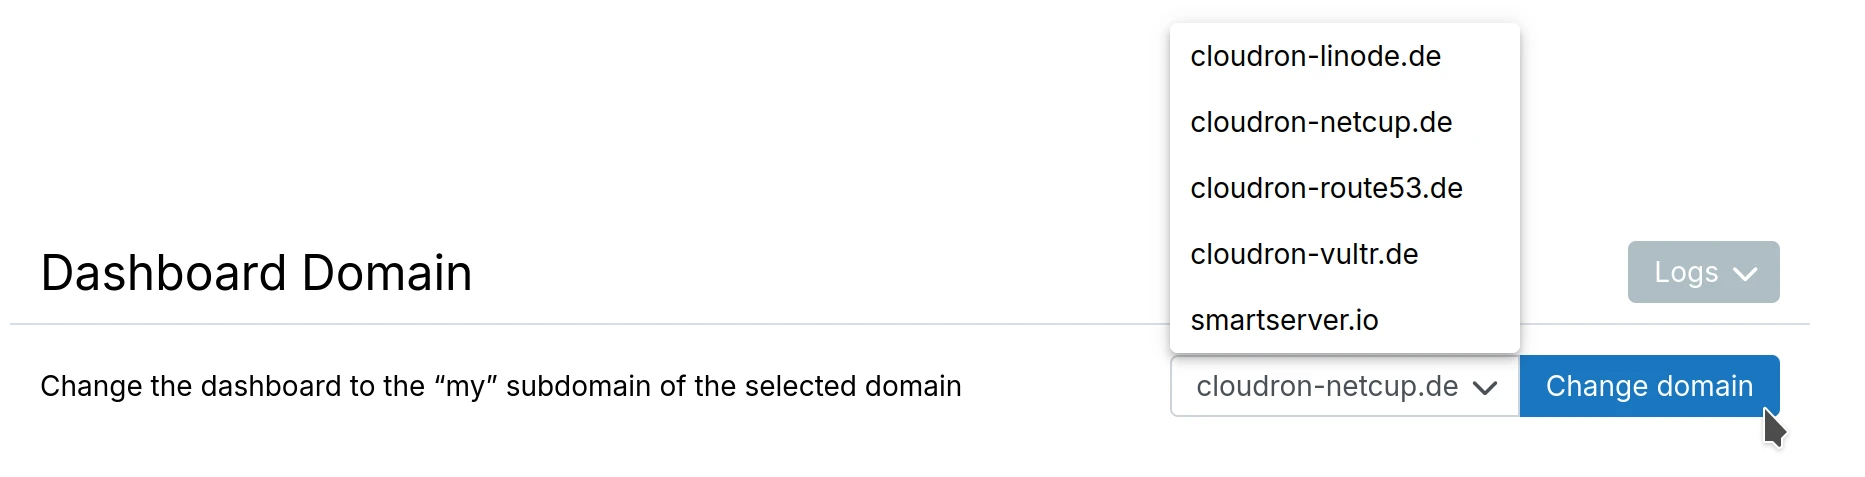
Dashboard domain
The dashboard is at the my subdomain of the primary domain. The my subdomain is hardcoded, but the primary domain can be changed in the Domains view.
Select the target domain and click Change Domain. Redirect to the new location occurs within minutes.
Implications of changing the primary domain:
- Dashboard moves to
my.newprimarydomain.com. update bookmarks. - Update API scripts to use the new dashboard domain.
- Email notifications come from
no-reply@newprimarydomain.com. - Mail server location remains unchanged.
- The old
myDNS record is not removed the oldmyDNS record. Remove it manually if you also change the mail server location.
See troubleshooting if the dashboard is unreachable.
Sync DNS
If you accidentally deleted DNS records or are switching DNS providers, you can restore them using the
Sync DNS button in the Domains view. Note that Only DNS records that are in use
and not records that were externally created.

Autodiscover
DAV
RFC 6764 enables CalDAV and CardDAV service discovery. Add DNS entries manually. see this tutorial for required records.
Email
See Email autodiscovery for more information.
Certificates
The platform integrates with Let's Encrypt to install certificates for apps. Certificates are renewed automatically. supports the following certificate providers:
Let's Encrypt Prod- Obtain individual certs for each domain. This provider uses HTTP automation and requires inbound port 80 to be open. This provider will list your individual domain names in the Certificate transparency project.Let's Encrypt Prod - Wildcard(default) - Obtain wildcard certs for each domain. This provider uses DNS automation and can only be used with programmatic DNS API providers.Let's Encrypt Staging- Obtain individual certs for each domain from Let's Encrypt staging endpoint. These certs are for testing and not trusted by the browser. This provider uses HTTP automation and requires inbound port 80 to be open.Let's Encrypt Staging - Wildcard- Obtain wildcard certs for each domain from Let's Encrypt staging endpoint. These certs are for testing and not trusted by the browser. This provider uses DNS automation and can only be used with programmatic DNS API providers.Self-Signed/Custom Certificate- Disable Let's Encrypt integration and use a custom wildcard certificate instead.
Set the certificate provider per domain in Domains > Advanced settings.
Custom certificates
A custom wildcard certificate can be provided per domain in advanced settings of a domain in the
Domains view. When setting such a certificate, make sure to add both the bare domain and the
wildcard domain as part of the certificate.
Follow this tutorial for instructions on how to generate a custom wildcard certificate that has both the bare domain and the wildcard domain.
Append all intermediate certificates to the cert file for a complete chain.
Certificate transparency
Let's Encrypt participates in Certificate transparency. This means that your apps and subdomains are discoverable via the Certificate transparency project (crt.sh and Google's website). Some attackers take advantage of this to hack web applications before they are installed.
For this reason, we recommend that you use Wildcard certificates. When using Wildcard certificates, the subdomain information is not 'leaked'. Note that Let's Encrypt only allows obtaining wildcard certificates using DNS automation. will default to obtaining wildcard certificates when using one of the programmatic DNS API providers.
Automatic renewal
Certificates are renewed automatically based on suggested renewal times provided via ACME Renewal Information (ARI). Benefits of ARI include reducing load spikes at the CA, faster revocation response, and smarter scheduling. Renewals typically occur 1 month before expiry.
Failed renewals trigger admin email notifications. Expired certificates fall back to default certificates.
Manual renewal
To instantly trigger renewal of Let's encrypt certificate, click the Renew All button on the domains page.

Revokation
Cloudron does not revoke certificates when an app is uninstalled. Instead, it retains the
certificate, so that it can be reused if another app is installed in the same
subdomain. This allows you to install apps for testing in the same location, say test,
and not have to worry about running over the Let's Encrypt rate limit.
CAA records
Let's Encrypt checks CAA records to verify certificate issuance authorization. Either leave the CAA record empty or add one allowing letsencrypt.org.