Backups
Overview
The backup system creates portable snapshots of platform data and application data. Each app is backed up independently, allowing them to be restored, cloned, or migrated independently.
Unlike VM snapshots, backups contain only the necessary information for reinstallation. Application code and system libraries are not included because app packages are read-only and never change. Runtime files (lock files, logs) and temporary files are excluded. Only the database and app user data is backed up. This design significantly reduces backup size.
Backup sites
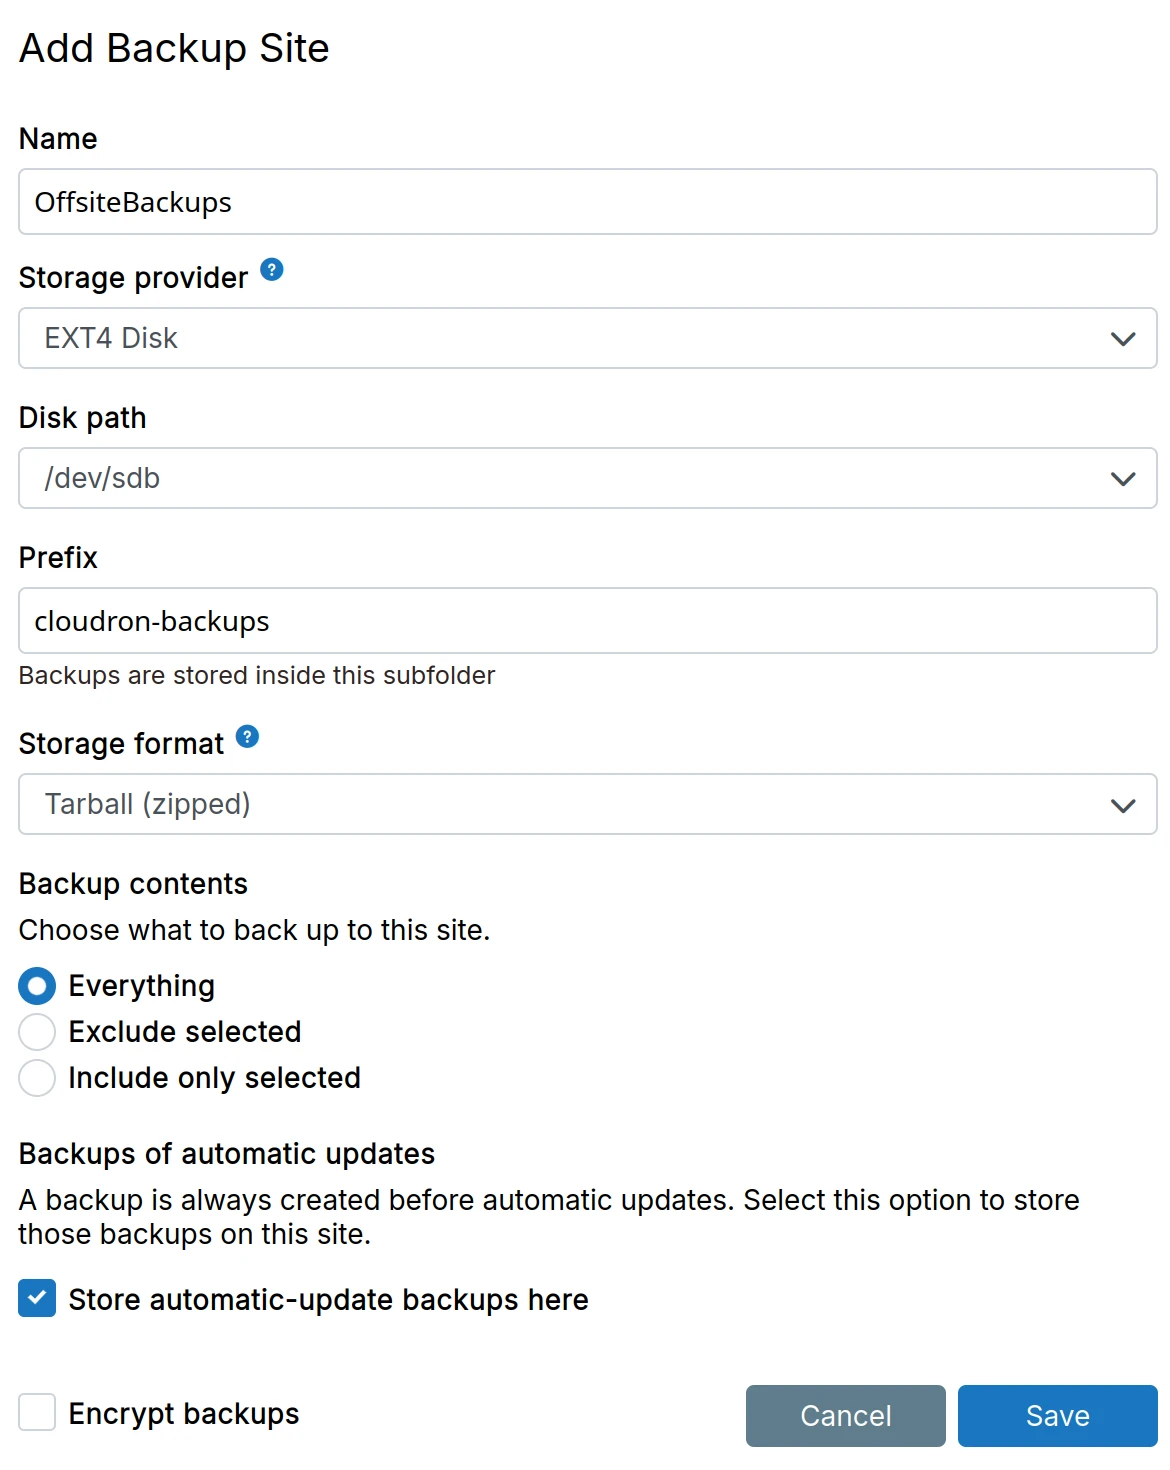
Backups are stored in one or more backup sites. Each site is configured with:
- Storage provider - Where backups are stored (S3, Backblaze, DigitalOcean Spaces, etc.)
- Storage format - How backups are stored (tgz or rsync)
- Backup contents - Which app backups are stored to this site:
- Everything
- Exclude selected apps
- Include only selected apps
- Automatic update backups - Store backups created before automatic updates on this site
- Encryption - Optional encrypt backups with a password
Multiple sites allow you to back up to different destinations with different retention policies. For example, store everything on a primary site and only selected apps on a secondary site.
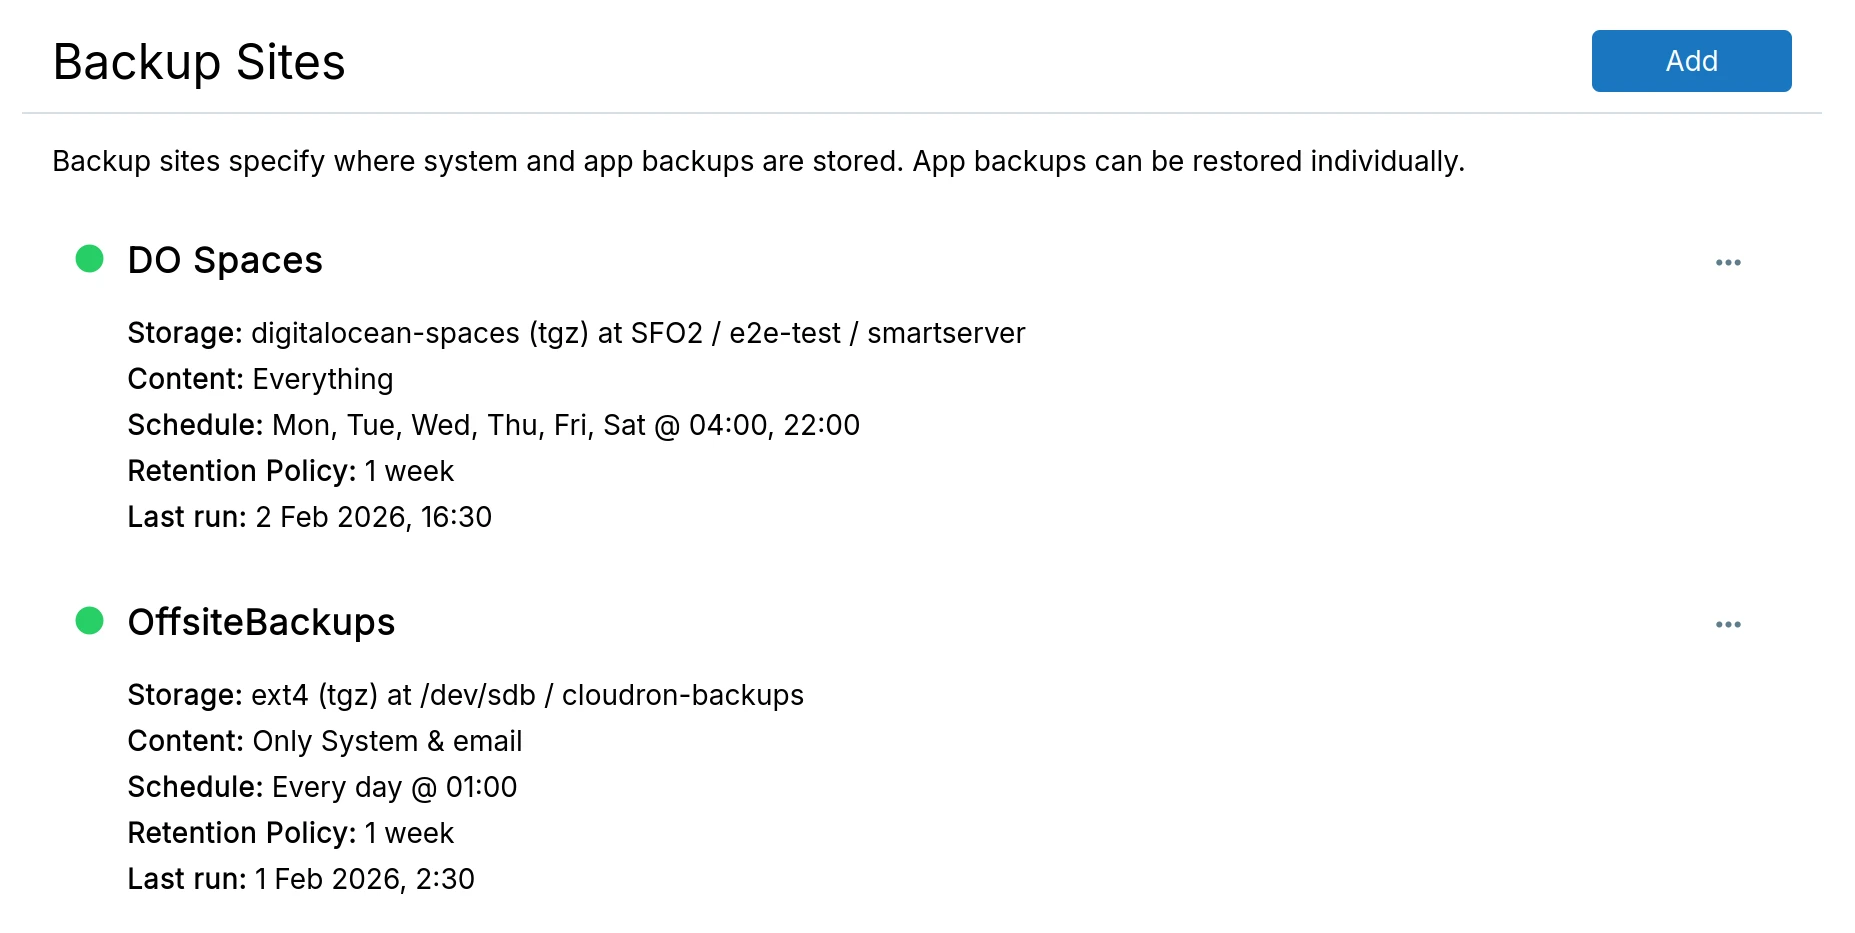
Backup site listing displays the storage provider, format and location, backup contents, schedule, last run time, and a status indicator (green for healthy, red for errors).
Storage providers
Amazon S3
- Create a bucket in S3.
S3 buckets can have lifecycle rules to automatically remove objects after a certain age. When using
the rsync format, these lifecycle rules may remove files from the snapshot directory and corrupt
the backups. For this reason, avoid setting lifecycle rules that delete objects
after a certain age. Old backups are periodically cleaned up based on the retention period.
- AWS has two forms of security credentials - root and IAM. When using root credentials, follow the instructions here to create access keys. When using IAM, follow the instructions here to create a user and use the following policy to give the user access to the bucket:
    {
        "Version": "2012-10-17",
        "Statement": [
            {
                "Effect": "Allow",
                "Action": "s3:*",
                "Resource": [
                    "arn:aws:s3:::<your bucket name>",
                    "arn:aws:s3:::<your bucket name>/*"
                ]
            }
        ]
    }
-
In the dashboard, choose
Amazon S3from the drop down.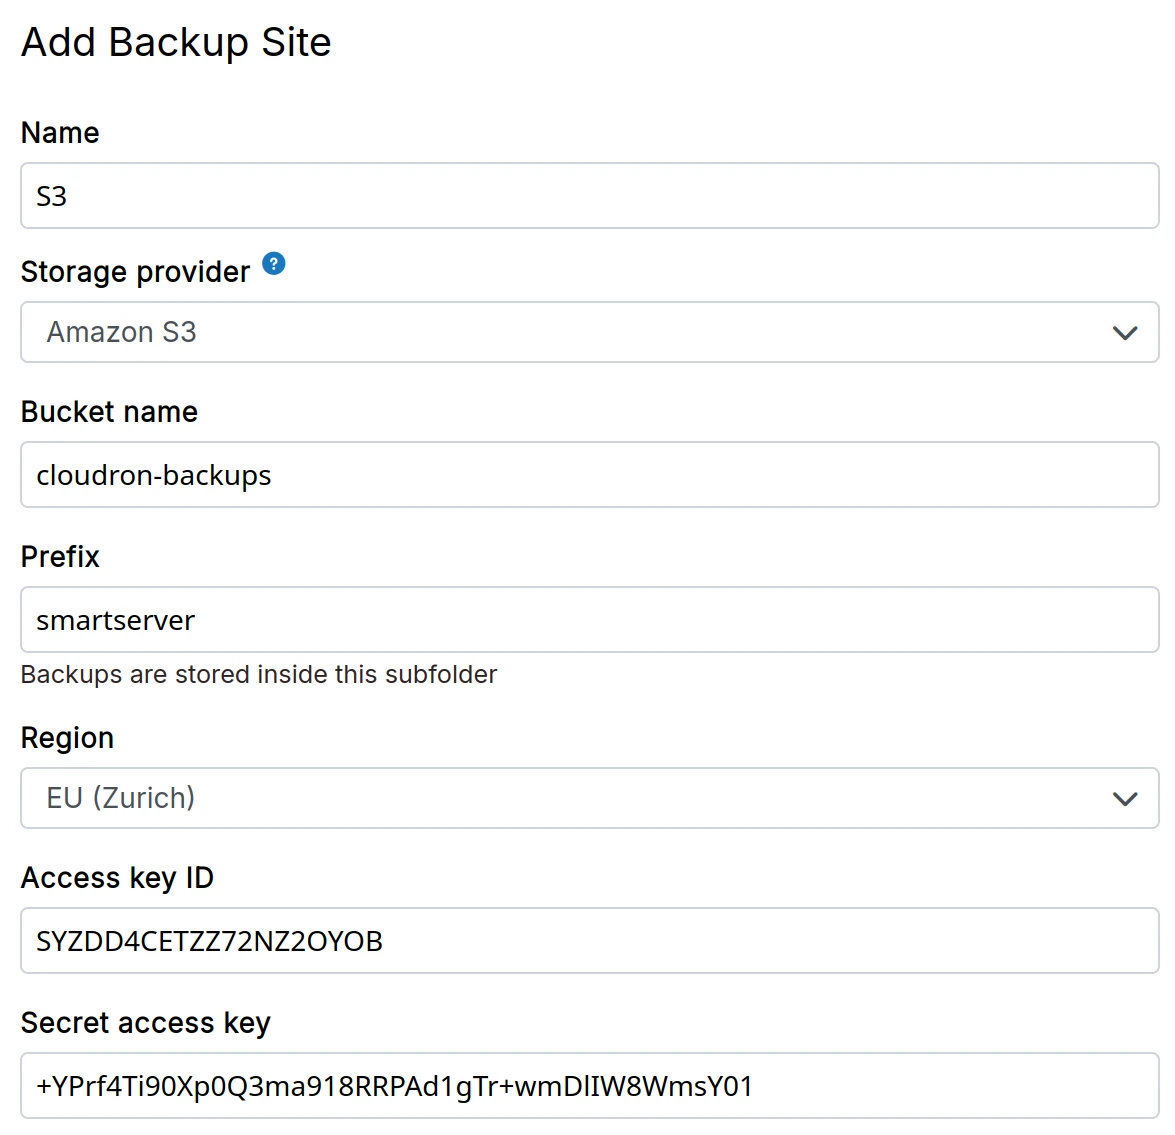
Backblaze B2
- Create a Backblaze B2 bucket
Versioning is enabled by default in Backblaze. Despite periodic cleanup of old backups,
Backblaze retains a copy of them. Over time, these copies add up and result in significant
cost. Change the Lifecycle Settings to Keep only the last version of the file. Backups
are already versioned by date, so you won't need additional copies.
-
Create Access key and Secret Access Key from the
Application Keyssection in Backblaze. Be sure to provide read and write access to the bucket. You should restrict access of the key to just the backup bucket. -
Make a note of the
keyIDandapplicationKey. As noted in their docs:
    Access Key	<your-application-key-id>
    Secret Key	<your-application-key>
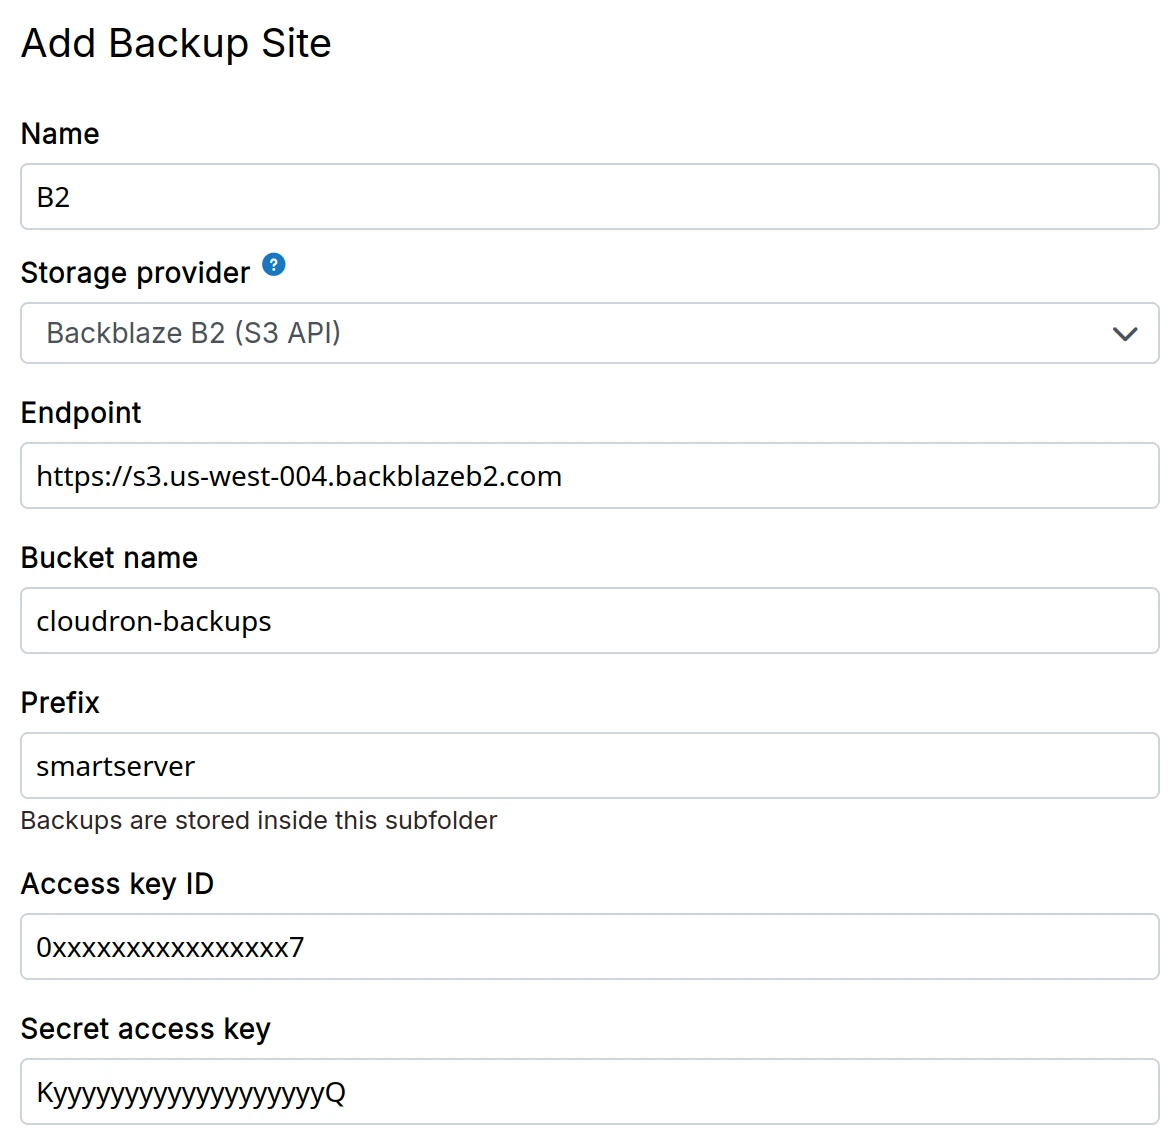
- In the dashboard, choose
Backblaze B2from the drop down. The Endpoint URL has the forms3.<region>.backblazeb2.com, where <region> is similar tous-west-004.
CIFS
-
Hosting providers like Hetzner and OVH provide storage boxes that can be mounted using Samba/CIFS.
-
In the dashboard, choose
CIFS Mountfrom the drop down.
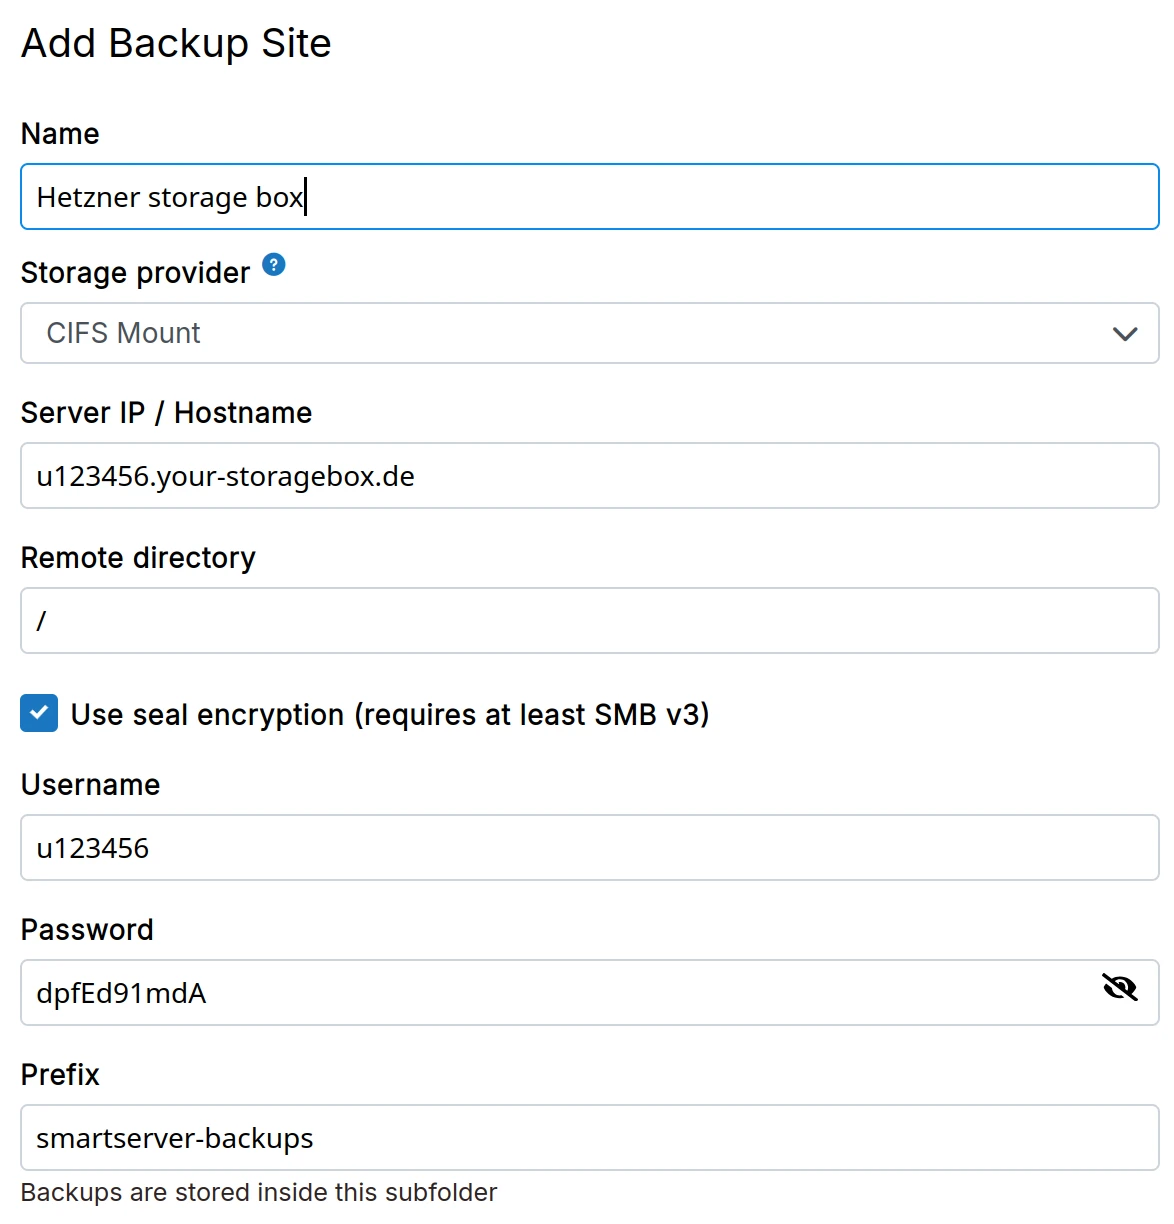
We recommend using SSHFS for Hetzner Storage Box since it is much faster and efficient storage wise compared to CIFS.
When using Hetzner Storage Box with CIFS, the Remote Directory is /backup for the main account. For sub accounts,
the Remote Directory is /subaccount.
Cloudflare R2
-
Create a Cloudflare R2 bucket.
-
Generate S3 auth tokens for the bucket.
-
In the dashboard, choose
Cloudflare R2from the down down. The S3 endpoint in shown in the Cloudflare dashboard.
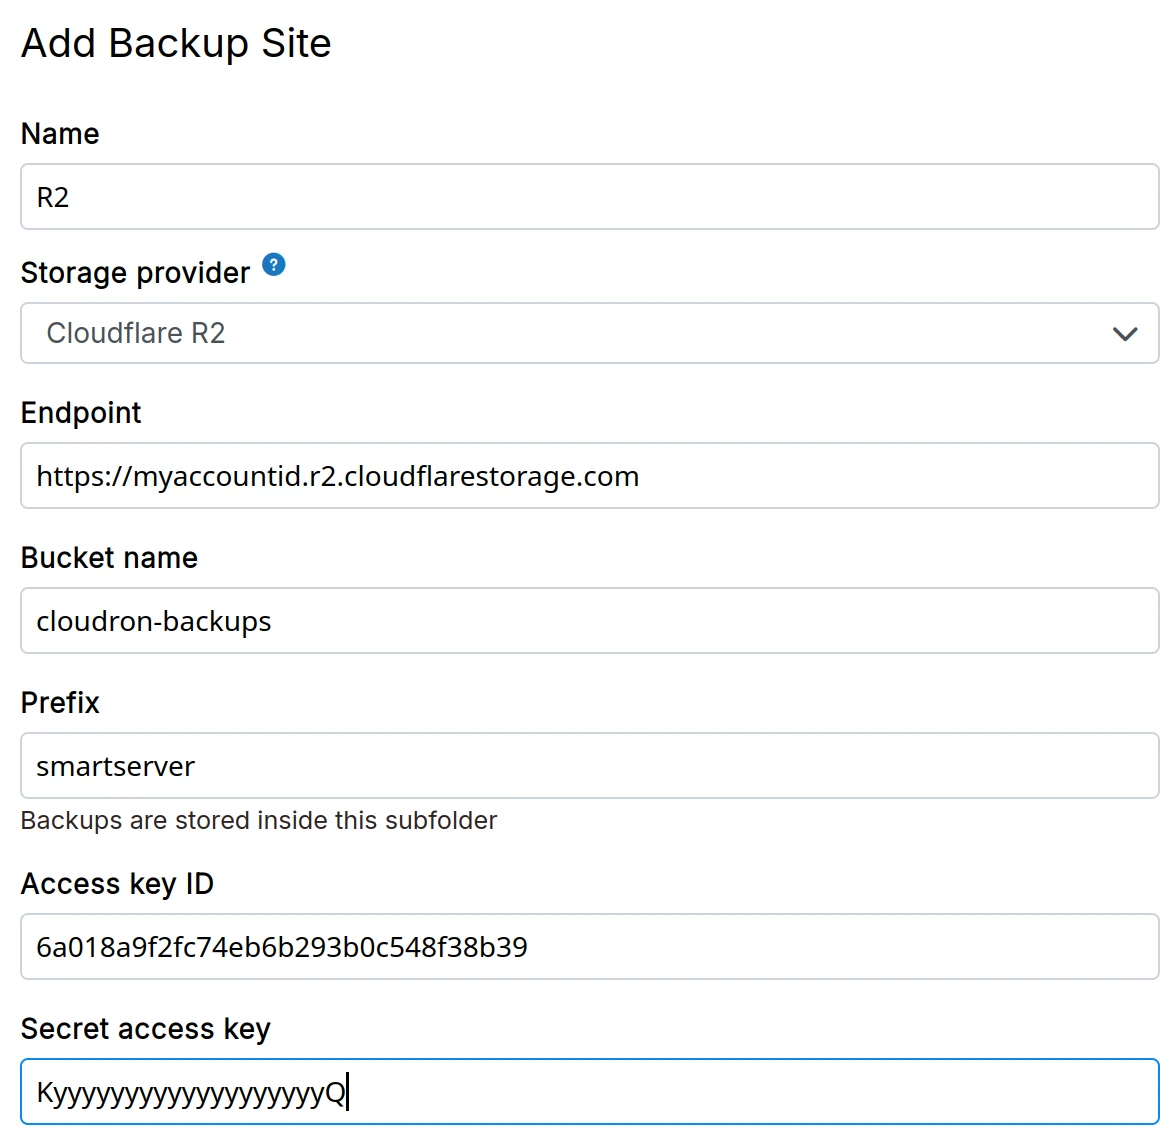
Cloudflare dashboard shows a URL that contains the the bucket name in the end. On Cloudron, you should set the Endpoint
without the bucket name in the end.
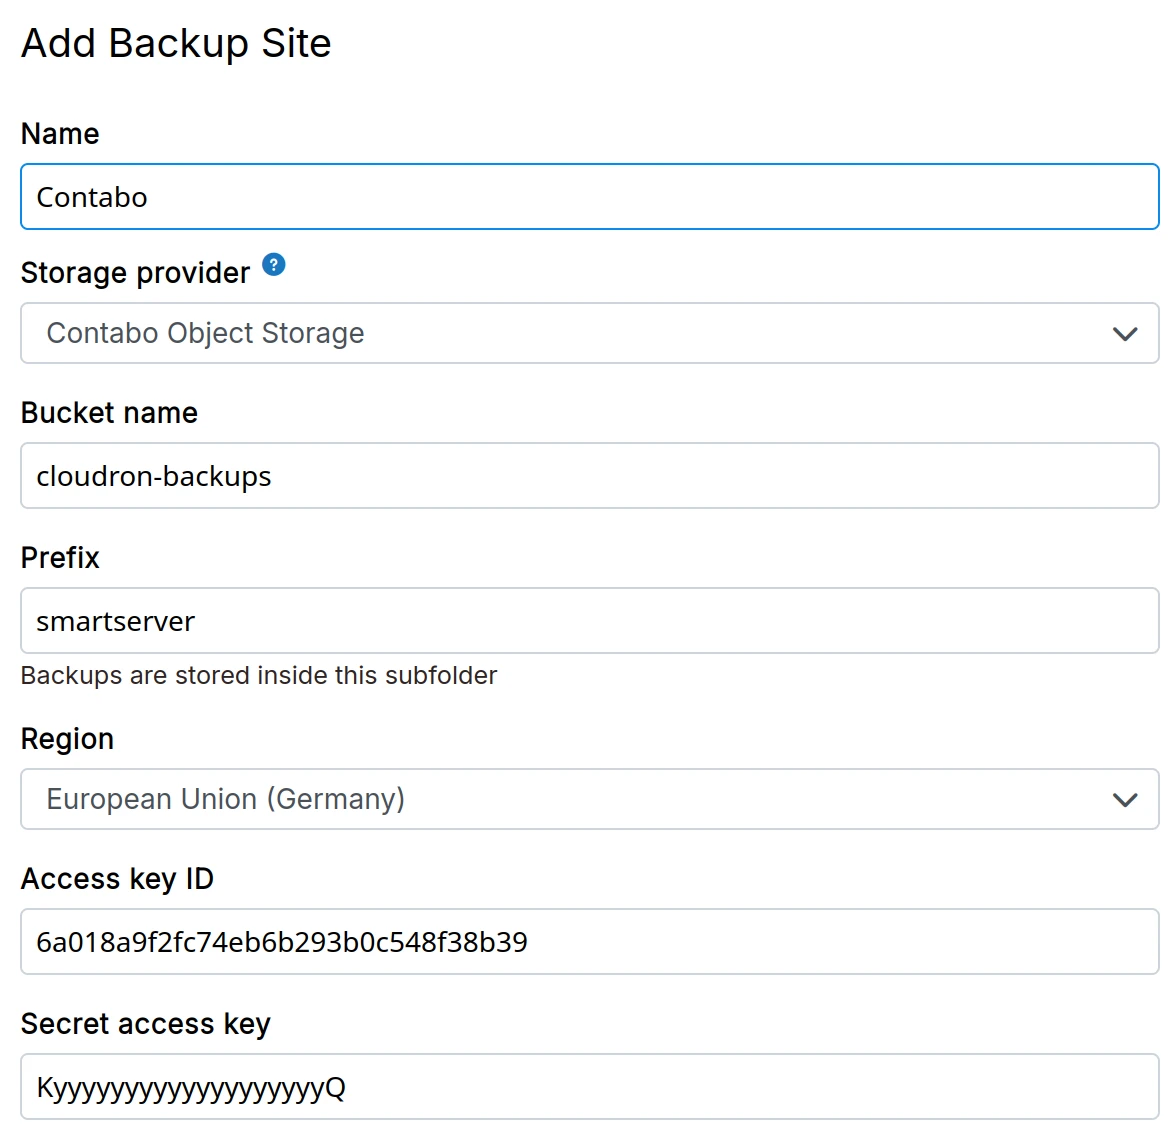
Contabo object storage
-
Create a Contabot Storage bucket.
-
Obtain S3 credentials for the storage.
-
In the dashboard, choose
Contabo Object Storagefrom the drop down.
DigitalOcean spaces
-
Create a DigitalOcean Spaces bucket in your preferred region following this guide.
-
Create DigitalOcean Spaces access key and secret key following this guide.
-
In the dashboard, choose
DigitalOcean Spacesfrom the drop down.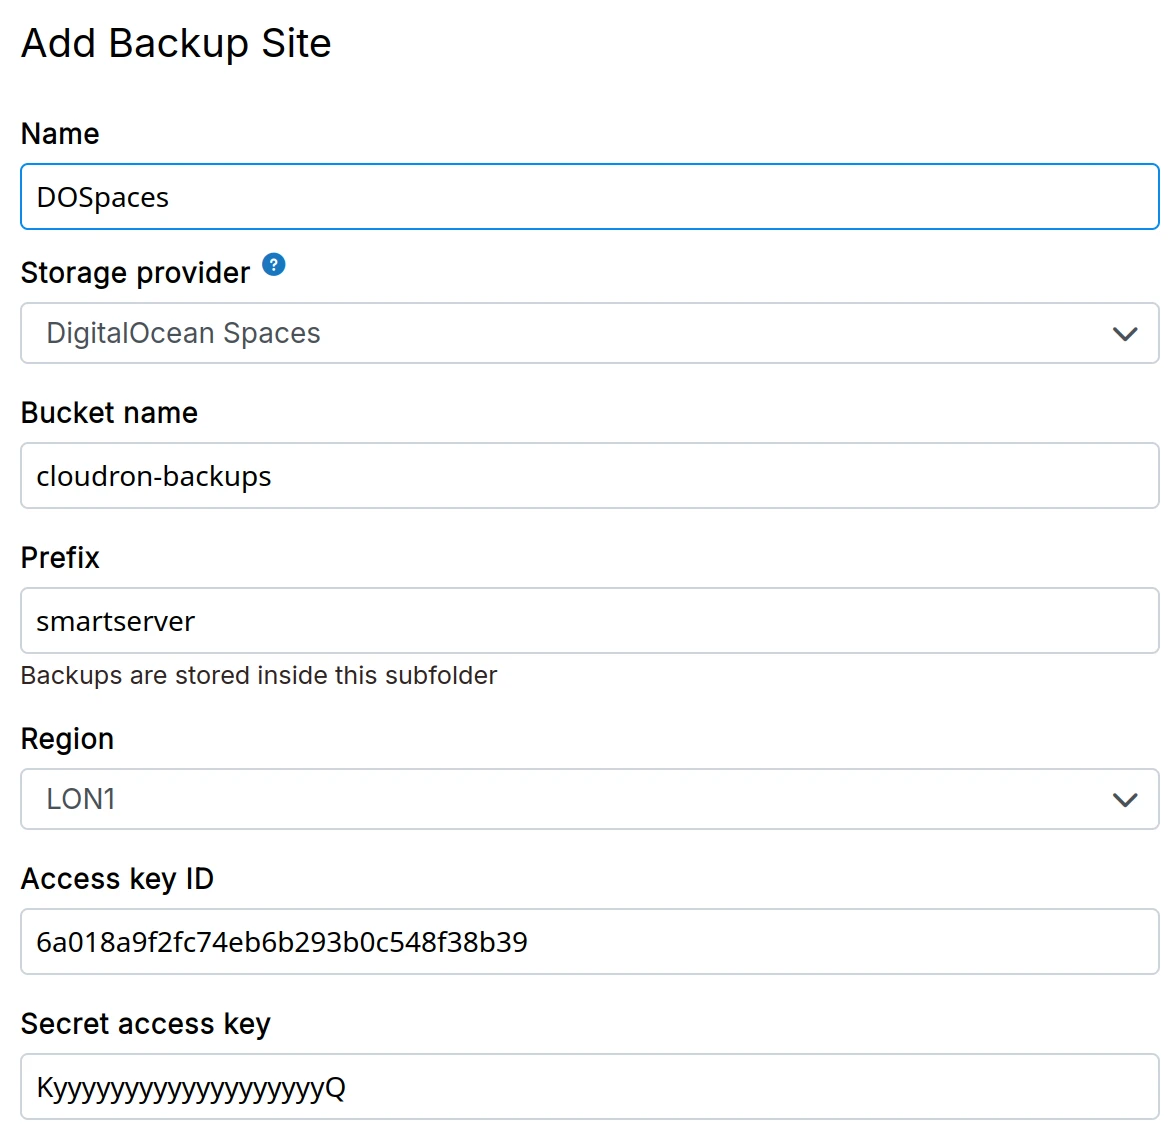
In our tests, we hit a few issues including missing implementation for copying large files (> 5GB), severe rate limits and poor performance when deleting objects. If you plan on using this provider, keep an eye on your backups. Cloudron will notify admins by email when backups fail.
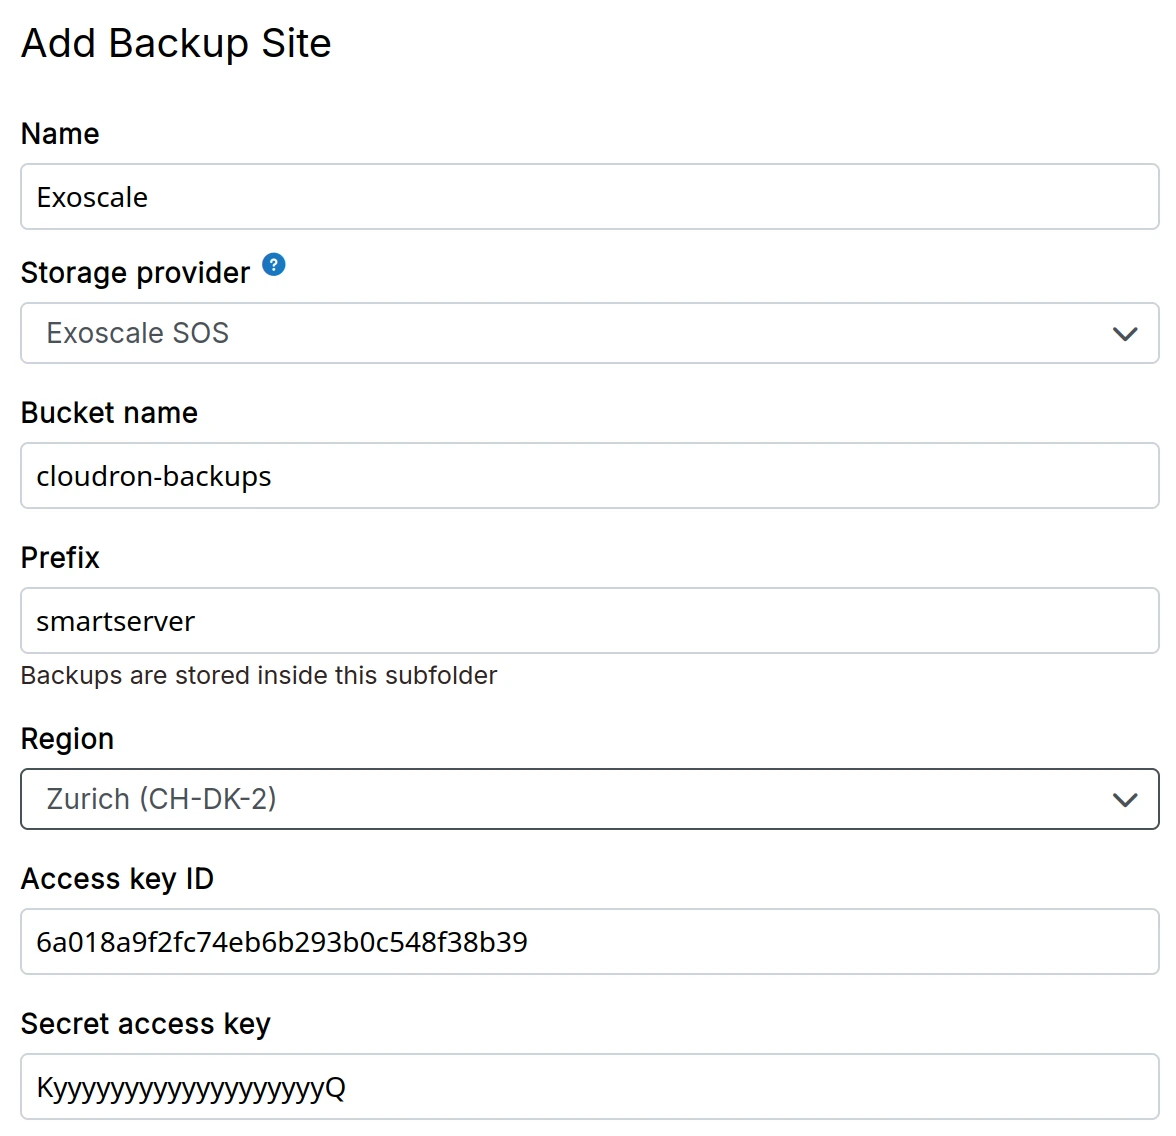
Exoscale SOS
-
Create a Exoscale SOS bucket
-
Create Access key and Secret Access Key from the Exoscale dashboard
-
In the dashboard, choose
Exoscale SOSfrom the drop down.
EXT4
-
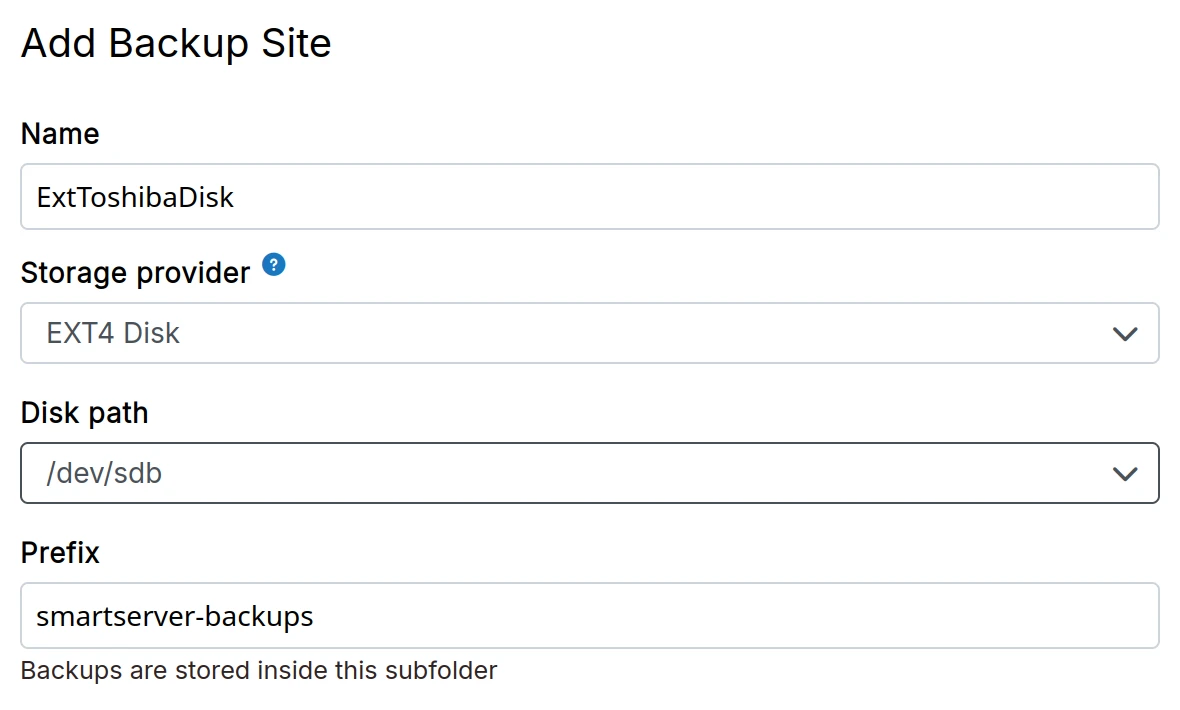
Attach an external EXT4 hard disk to the server. Depending on where your server is located, this can be a DigitalOcean Block Storage, AWS Elastic Block Store, Linode Block Storage.
-
If required, format it using
mkfs.ext4 /dev/<device>. Then, runblkidorlsblkto get the UUID of the disk. -
In the dashboard, choose
EXT4 Mountfrom the drop down.
/etc/fstab entryWhen choosing this storage provider, do not add an /etc/fstab entry for the mount point. Cloudron will add and manage
a systemd mount point.
Filesystem
- Create a directory on the server where backups will be stored.
Having backups reside in the same physical disk as the platform server is dangerous. For this reason, Cloudron will show a warning when you use this provider.
-
In the dashboard, choose
Filesystemfrom the drop down.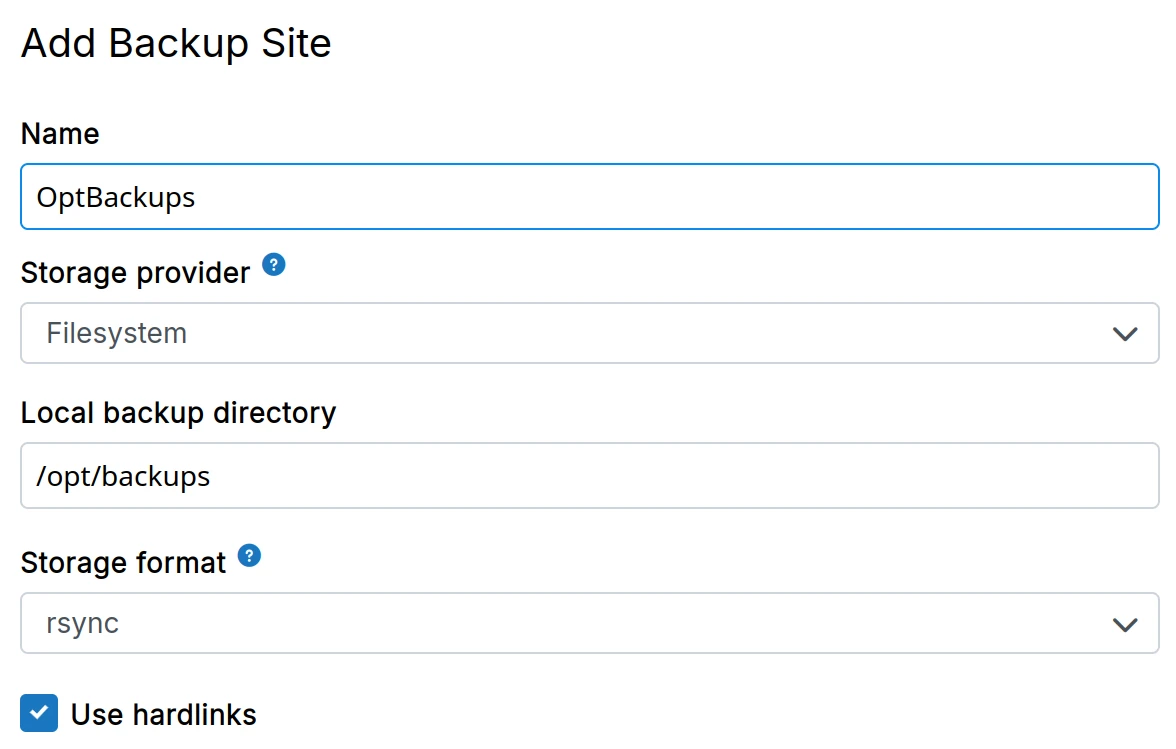
The Use hardlinks option can be checked to make the platform use hardlinks
'same' files across backups to conserve space. This option has little to no effect when using the tgz format.
Filesystem (mountpoint)
Use this provider, when the built-in providers (EXT4, CIFS, NFS, SSHFS) don't work for you.
-
Setup a mount point manually on the server.
-
In the dashboard, choose
Filesystem (mountpoint)from the drop down. This option differs from theFilesystemprovider in that it checks if the backup directory is mounted before a backup. This check ensure that if the mount is down, Cloudron is not backing up to the local hard disk.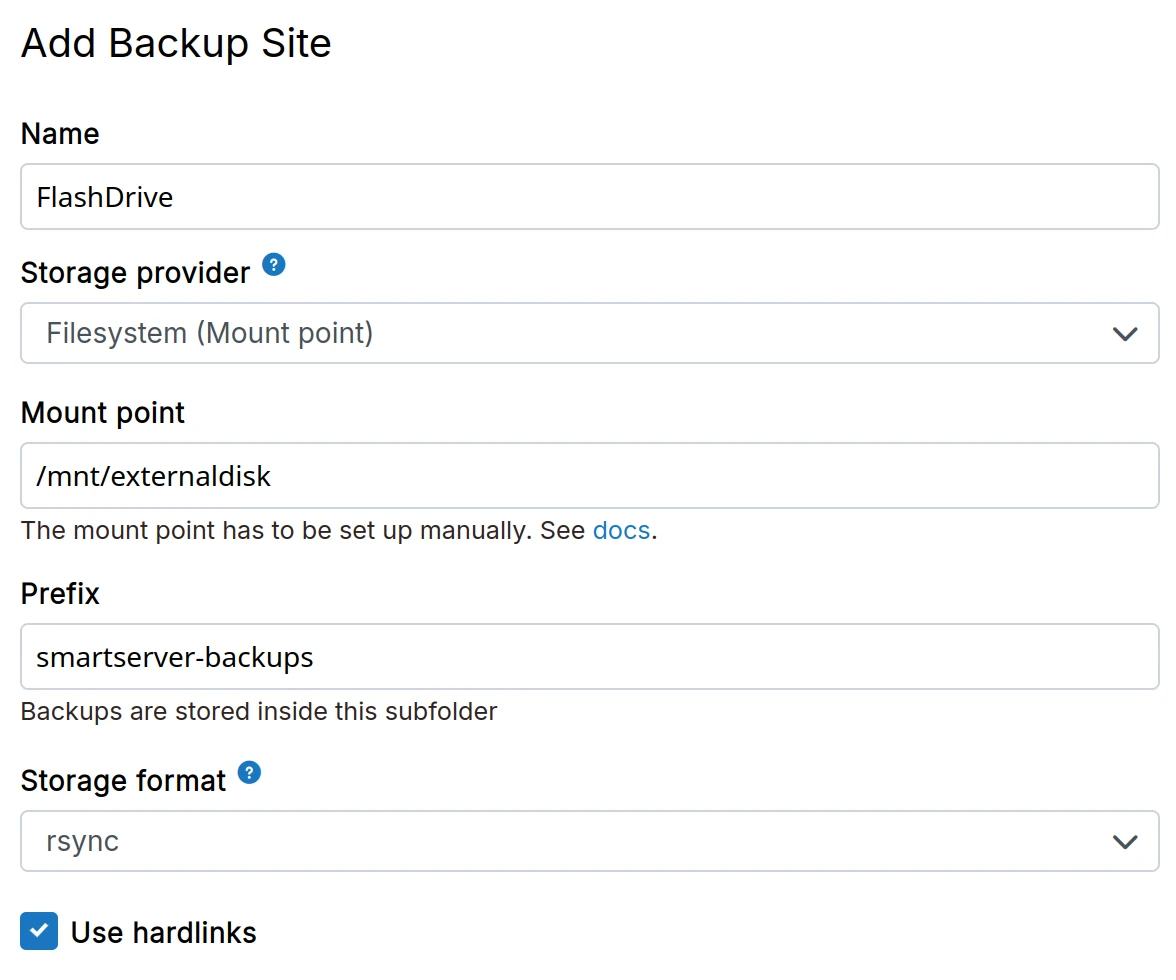
Google Cloud Storage
-
Create a Cloud Storage bucket following this guide.
-
Create a service account key in JSON format.
-
In the dashboard, choose
Google Cloud Storagefrom the drop down.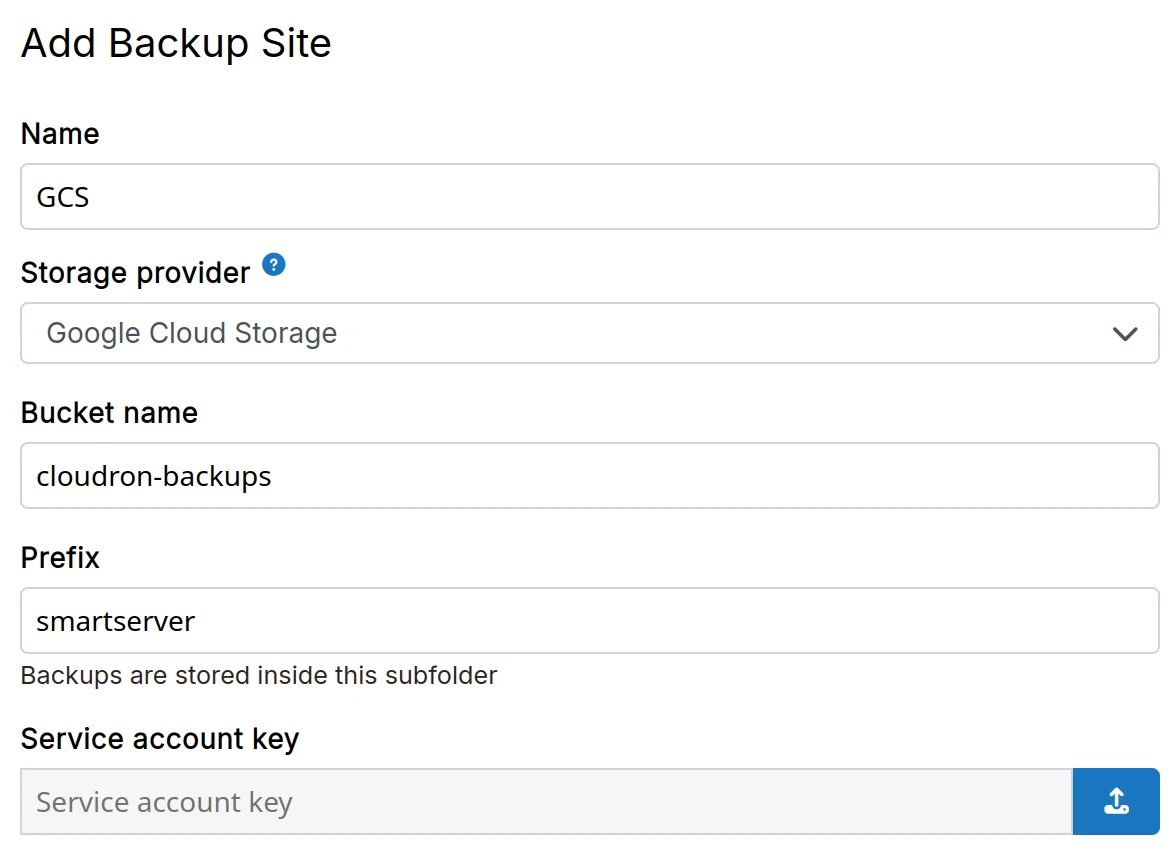
Hetzner object storage
-
Create a Object Storage bucket following this guide.
-
Create S3 API keys
-
In the dashboard, choose
Hetzner Object Storagefrom the drop down.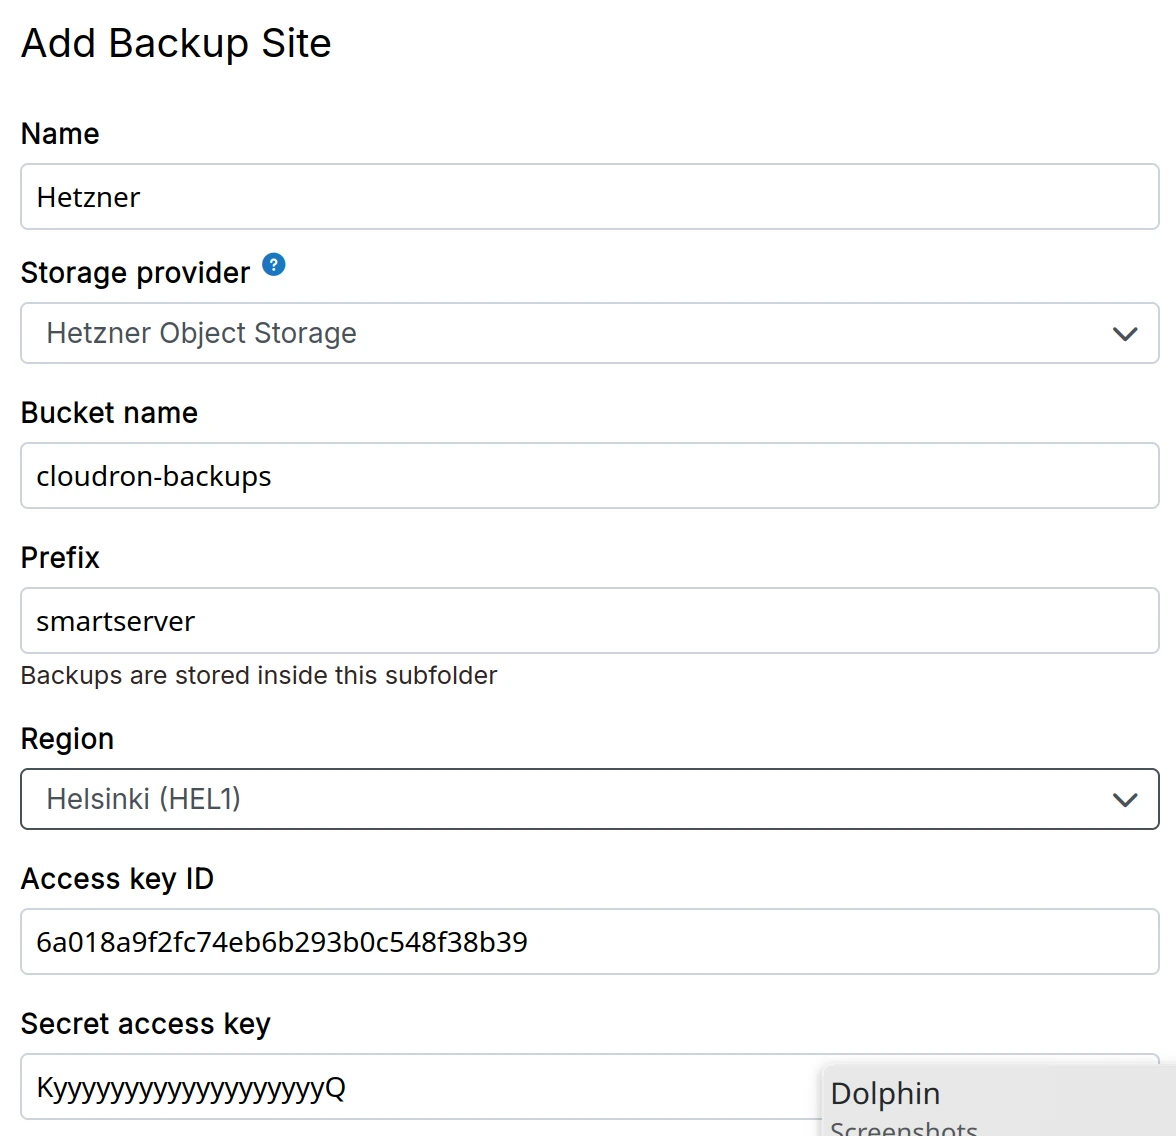
IDrive e2
-
Create a IDrive e2 Storage bucket
-
Create Access key and Secret Access Key from the IDrive e2 Dashboard
-
In the dashboard, choose
IDrive e2from the drop down.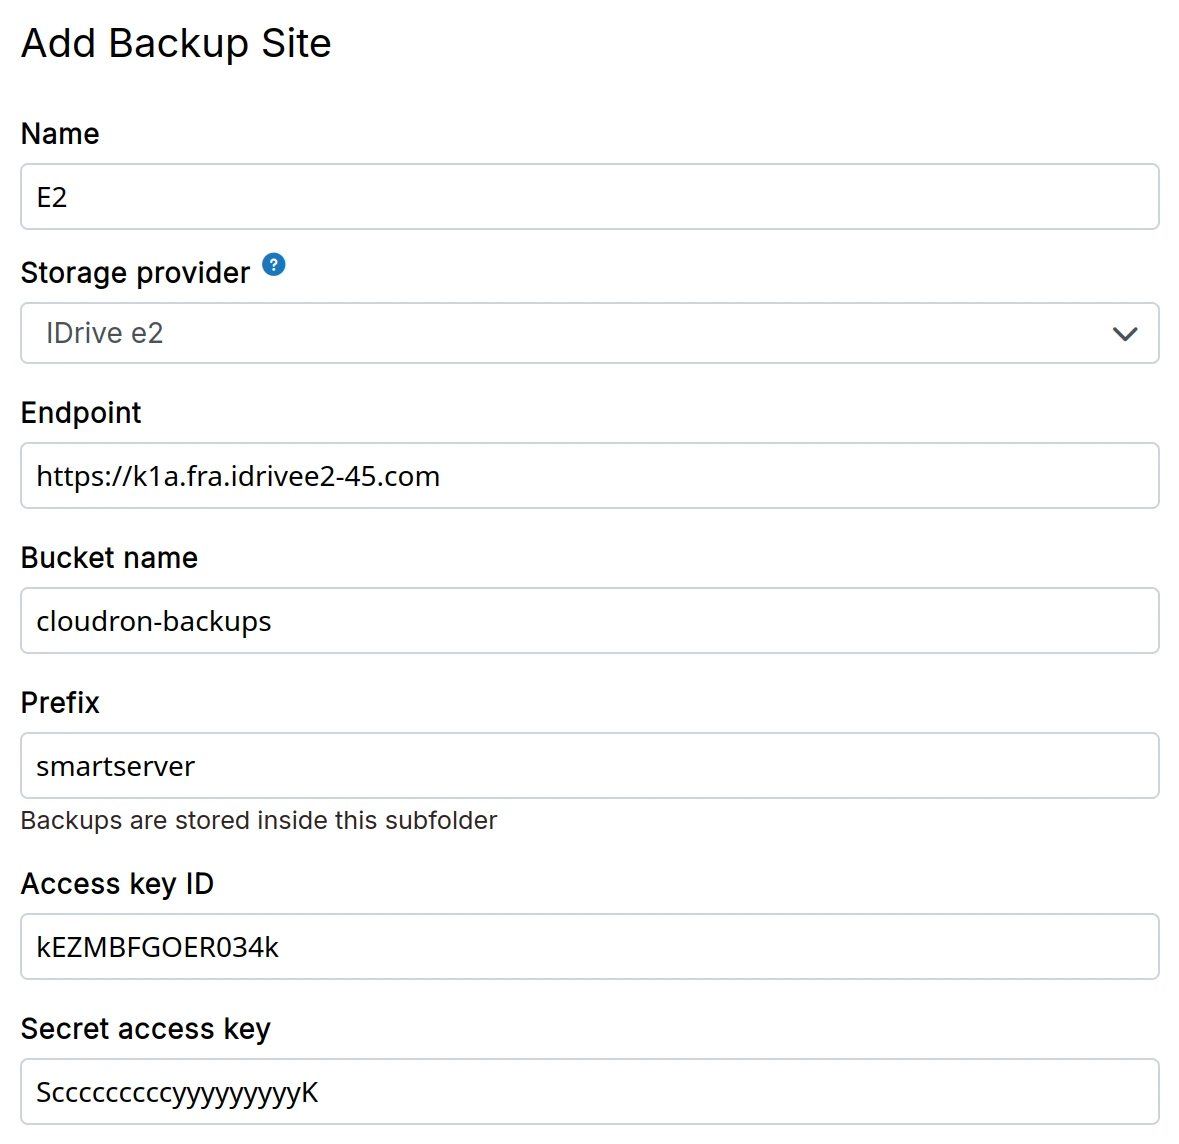
IONOS (Profitbricks)
-
Create a bucket in the S3 Web Console
-
Create Object Storage Keys in the S3 Key Management
-
In the dashboard, choose
IONOS (Profitbricks)from the drop down.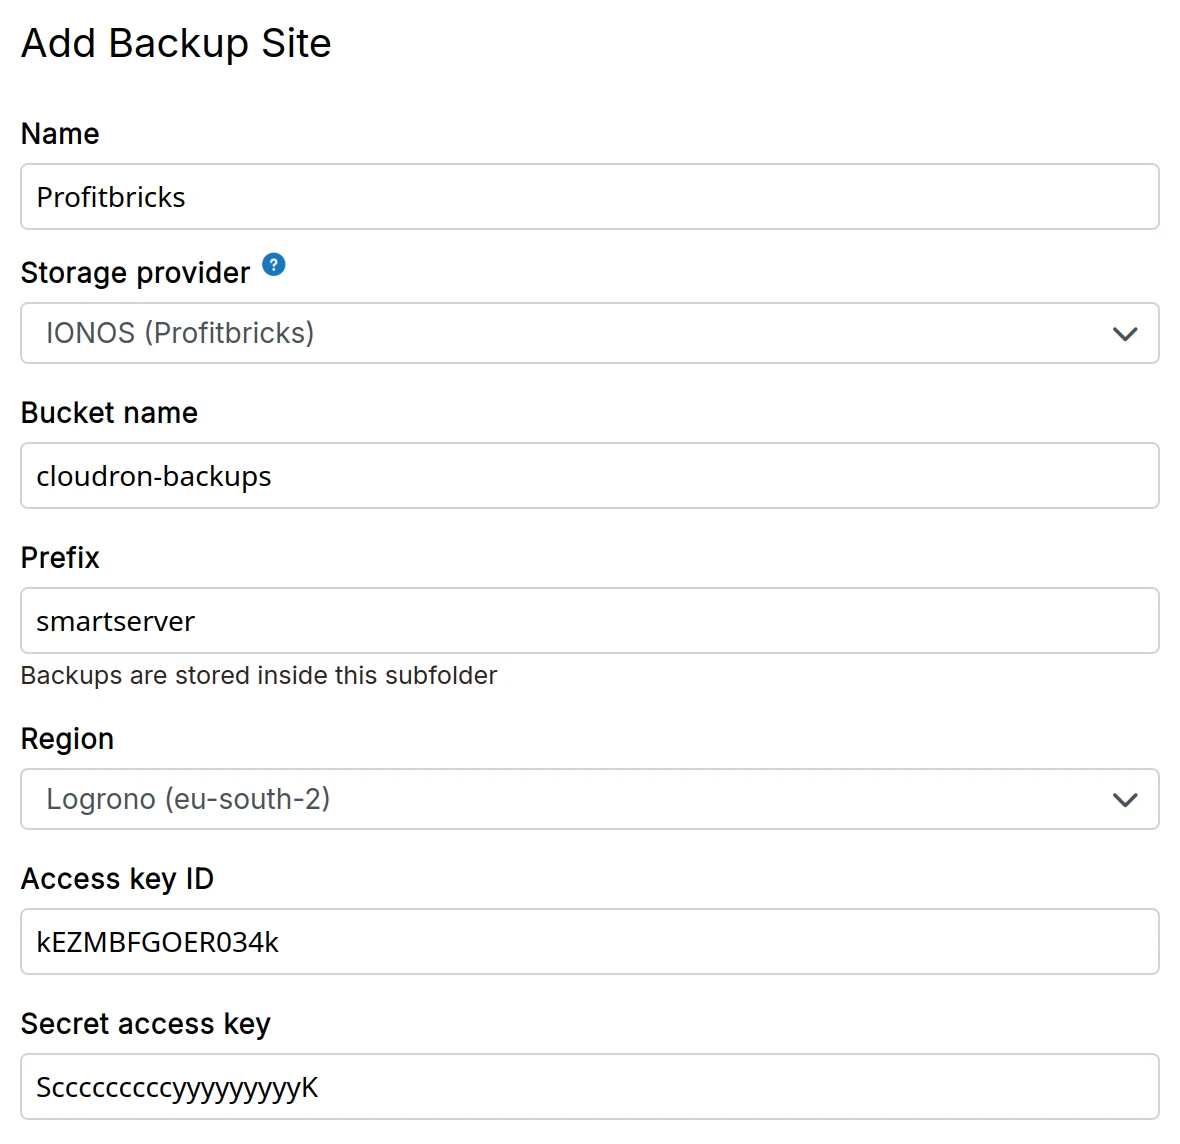
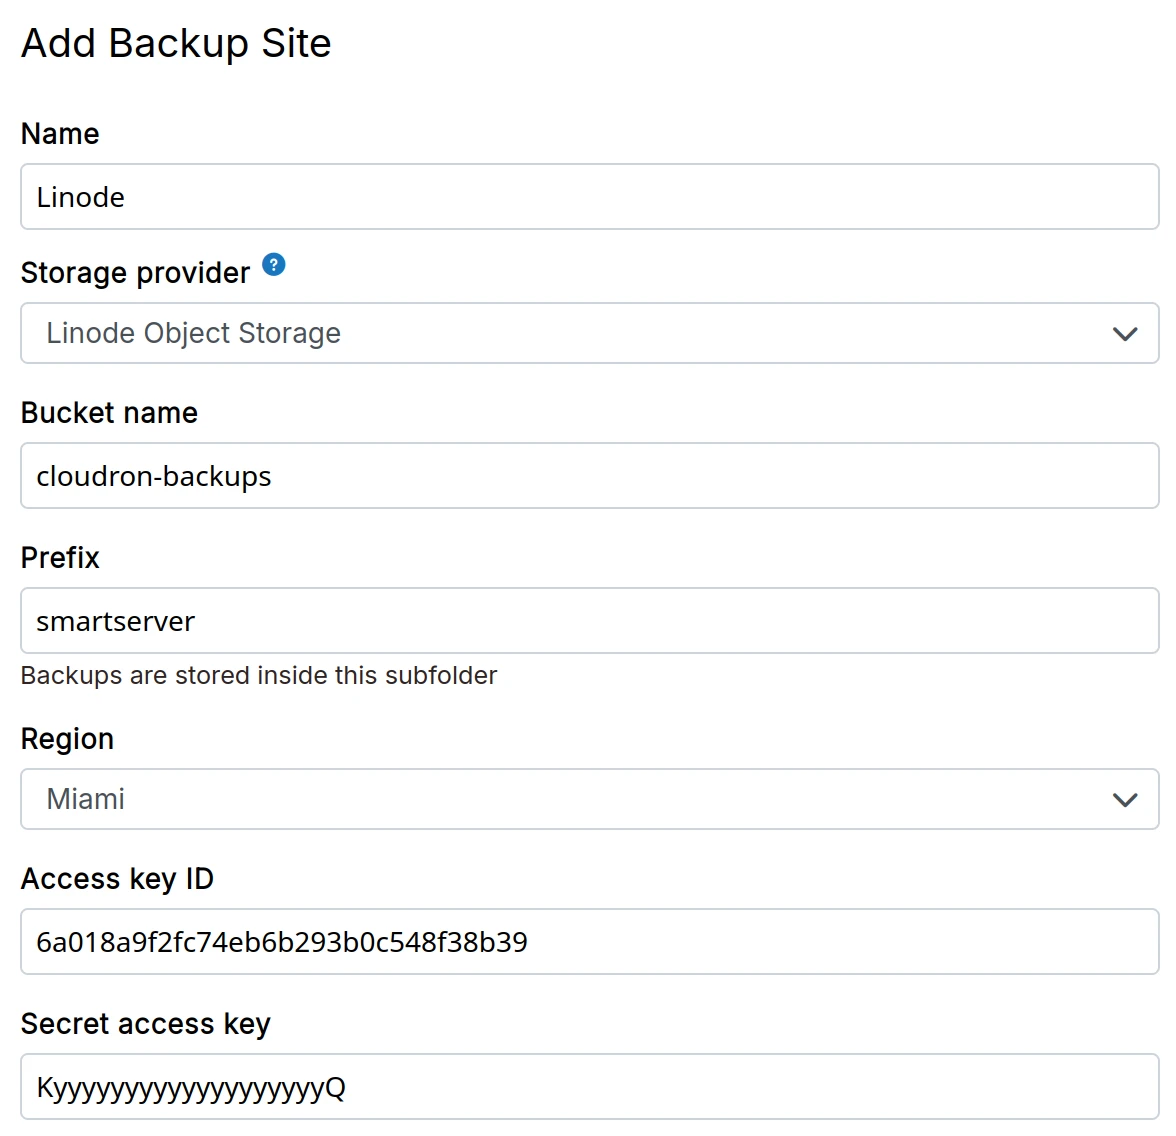
Linode object storage
-
Create a Linode Object Storage bucket
-
Create Access key and Secret Access Key from the Linode dashboard
-
In the dashboard, choose
Linode Object Storagefrom the drop down.
MinIO
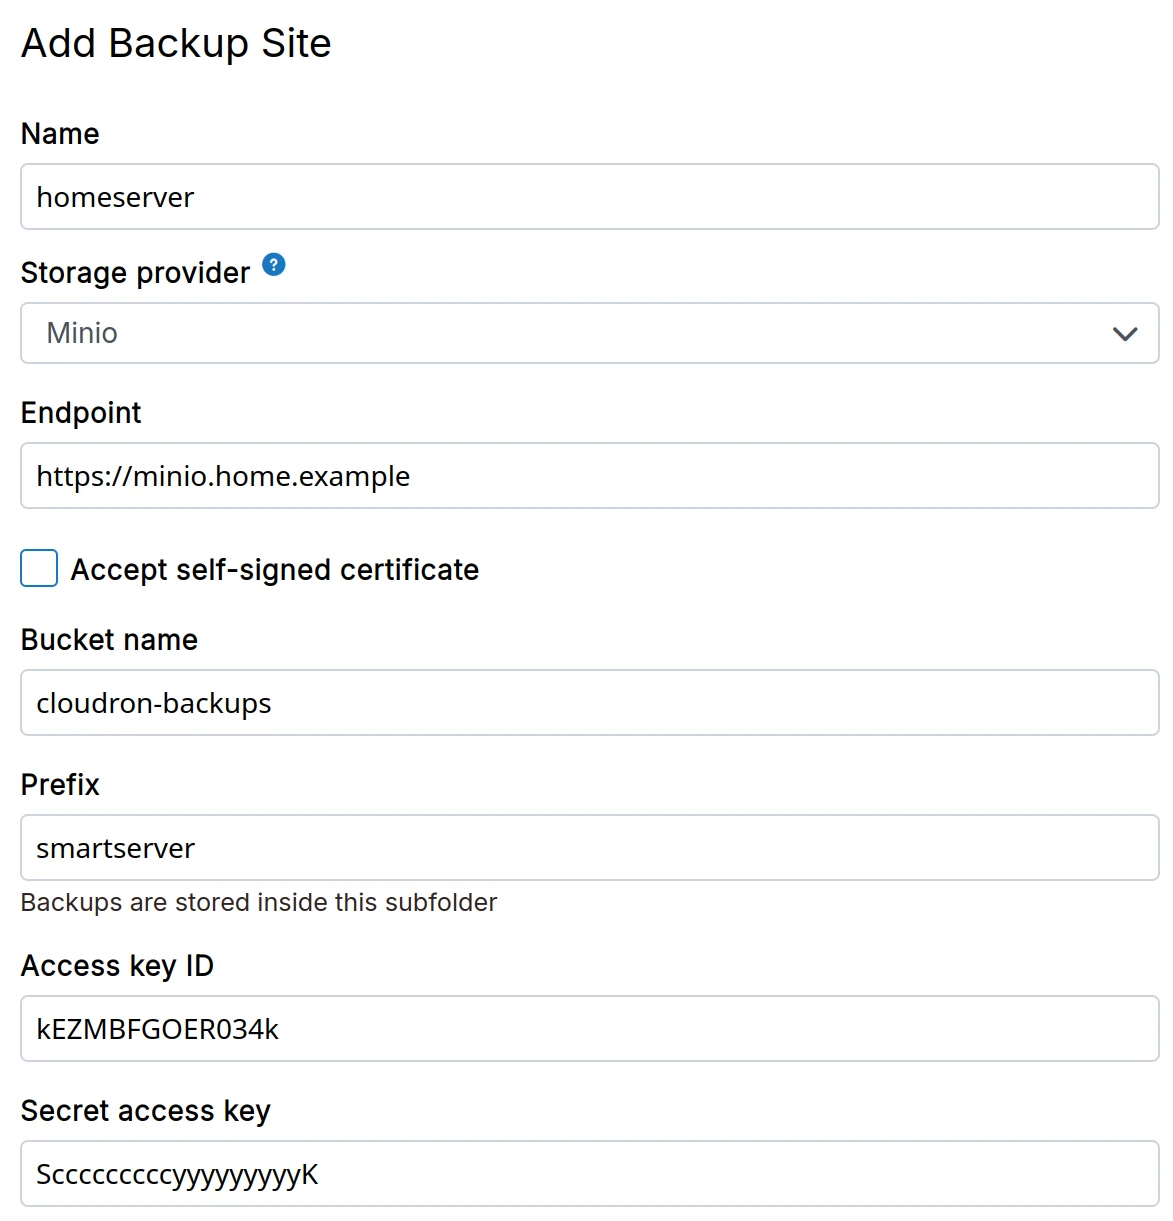
- Install Minio following the installation instructions.
Do not set up Minio on the same server as Cloudron. Using the same server will inevitably cause data loss if something goes wrong with the server's disk. The Minio app is meant for storing assets, not backups.
-
Create a bucket on Minio using the Minio CLI or the web interface.
-
In the dashboard, choose
Miniofrom the drop down.- The
Endpointfield can also contain a custom port. For example,http://192.168.10.113:9000. - For HTTPS installations using a self-signed certificate, select the
Accept Self-Signed certificateoption.
- The
NFS
-
Setup an external NFSv4 server. If you need help setting up a NFSv4 server, see this article or this guide.
-
In the dashboard, choose
NFS mountfrom the drop down.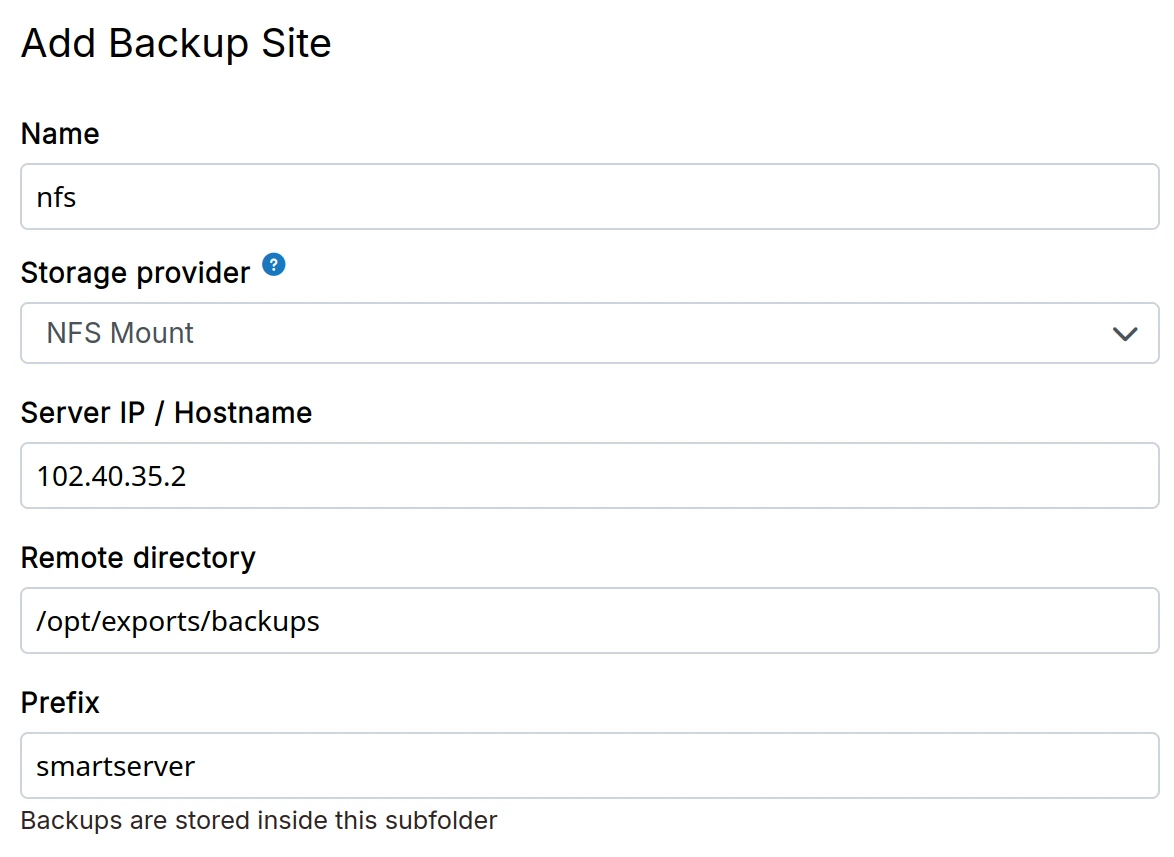
NFS traffic is unencrypted and can be tampered. Use NFS mounts only on secure private networks. Use encryption to make the backup setup secure.
OVH object storage
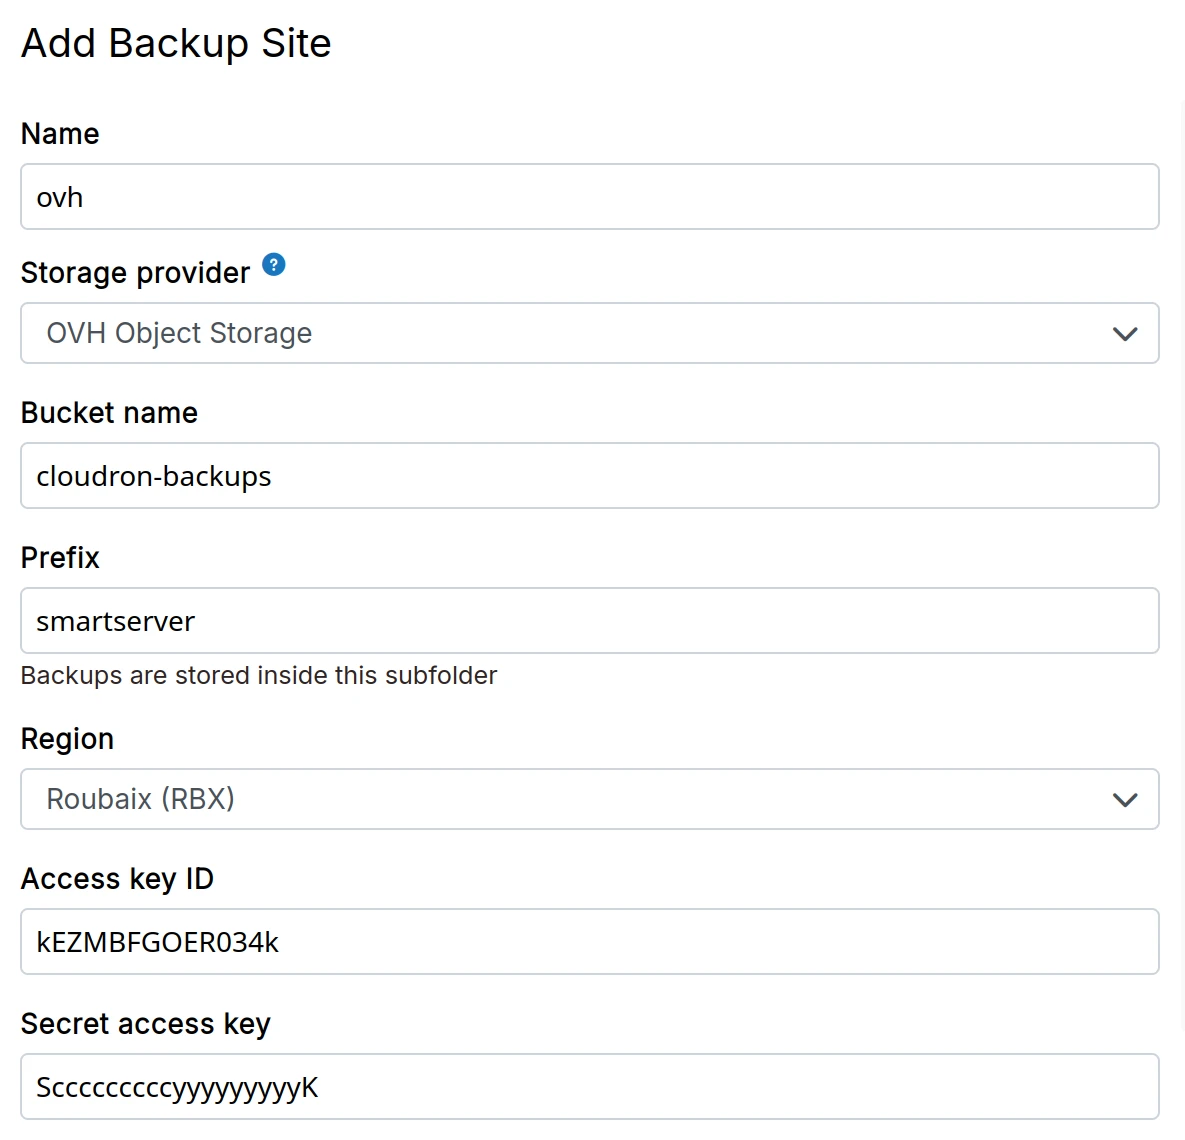
OVH Public Cloud has OpenStack Swift Object Storage and supports S3 API. Getting S3 credentials is a bit convoluted, but possible as follows:
-
Download the OpenStack RC file from horizon interface
-
source openrc.shand thenopenstack ec2 credentials createto get the access key and secret -
In the dashboard, choose
OVH Object Storagefrom the drop down.
Scaleway object storage
-
Create a Scaleway Object Storage bucket.
-
Create access key and secret key from the credentials section
-
In the dashboard, choose
Scaleway Object Storagefrom the drop down.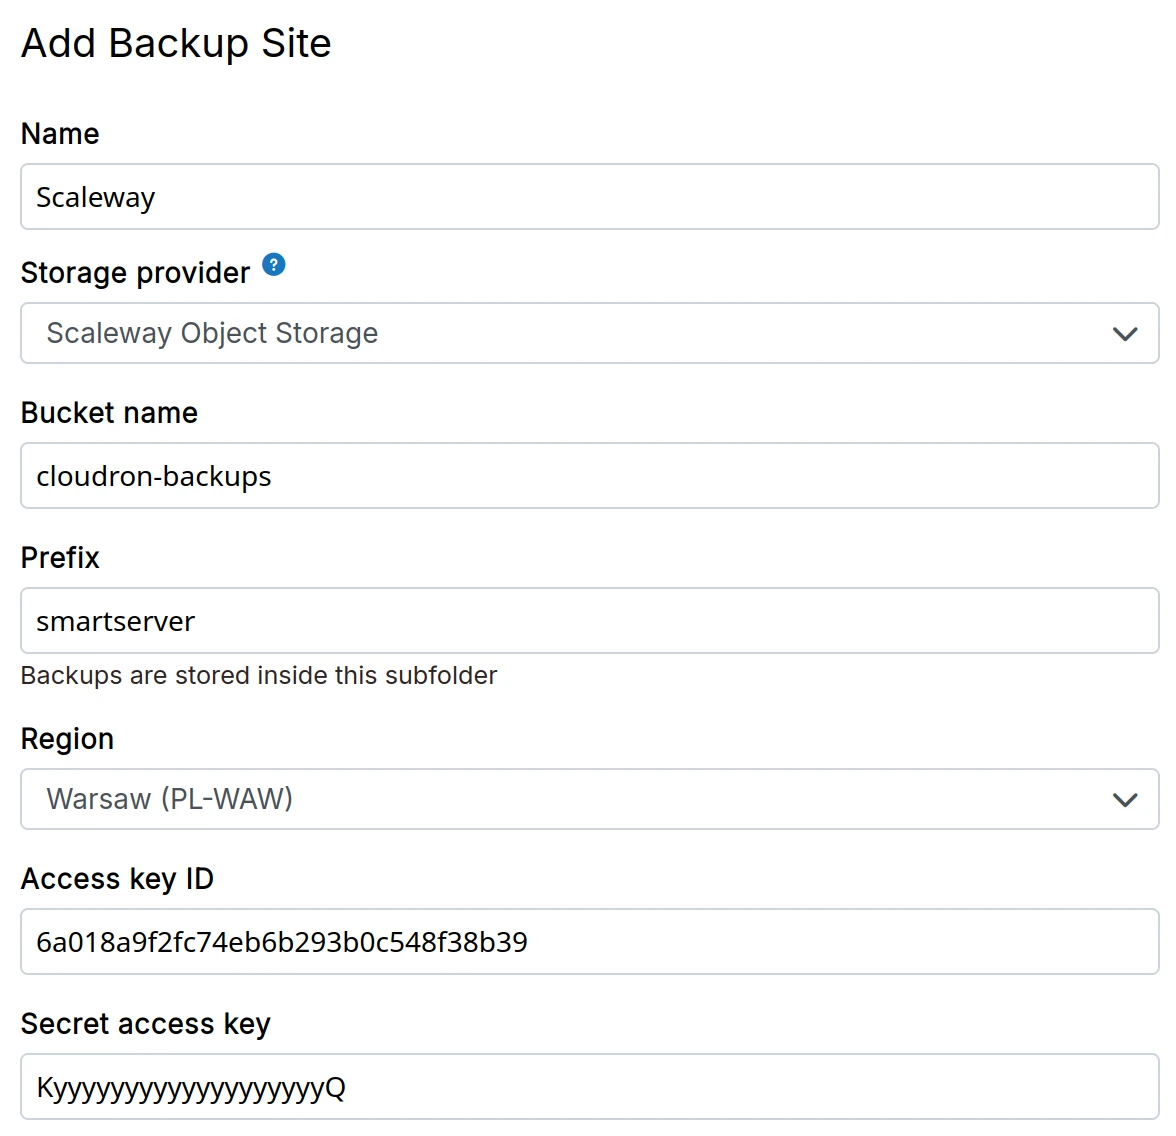
The Storage Class must be set to STANDARD . Setting it to GLACIER will result in an error
because server side copy operation is not supported in that mode.
Part Size
Scaleway Object Storage - Managing multipart uploads has a maximum part size of 5 MB to 5 GB and the number of parts must be between 1 and 1000.
If your backup is failing with the error InvalidArgument: Part number must be an integer between 1 and 1000, inclusive, edit your Backup Site configuration and increase the Part Size to a higher value.
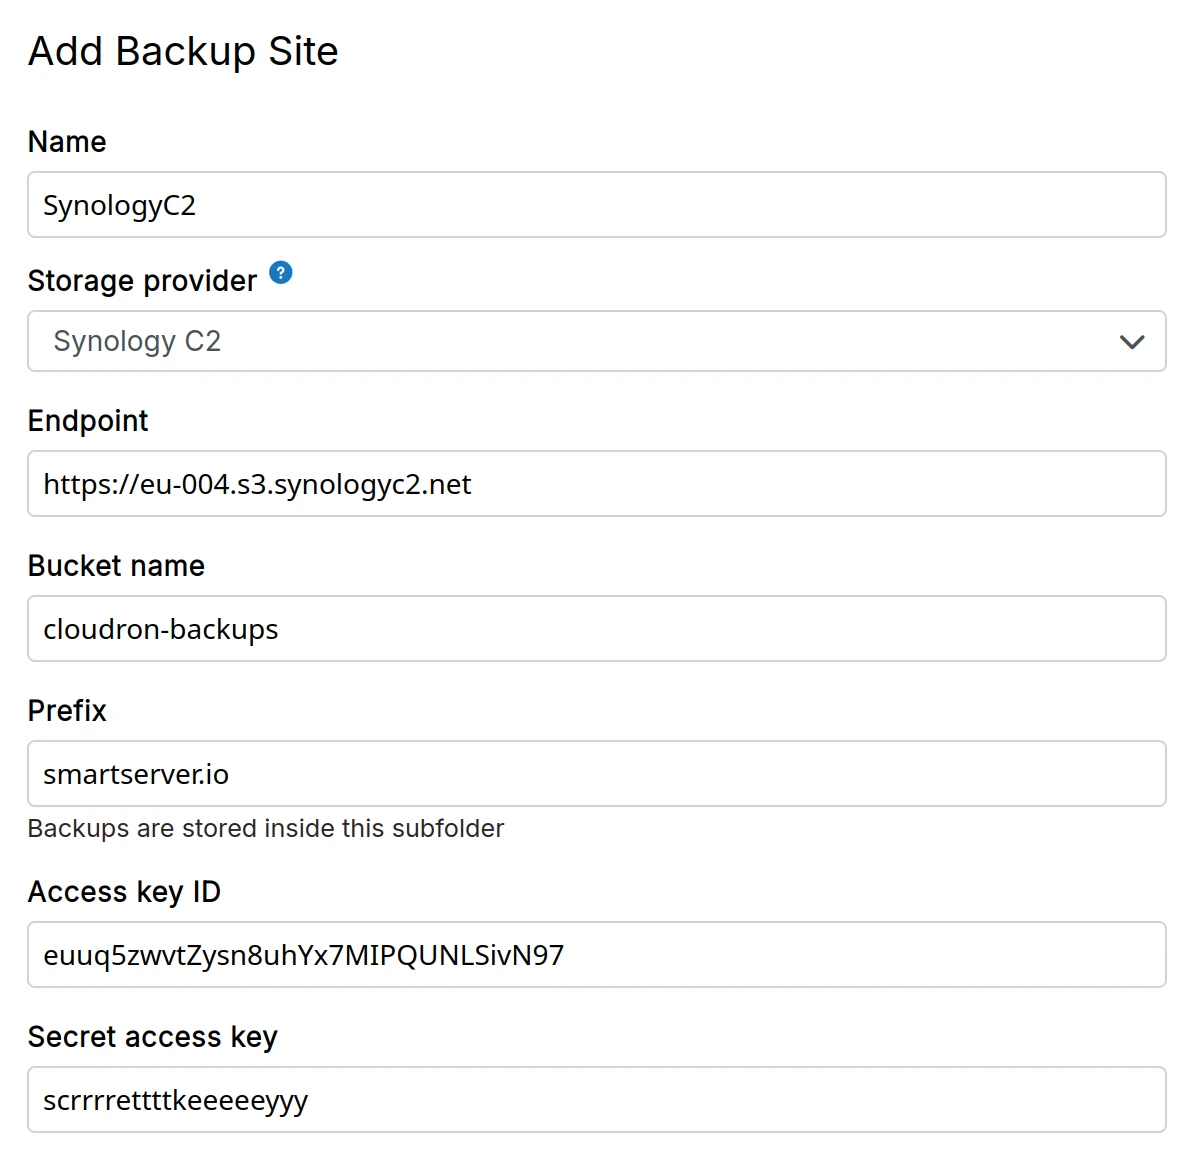
Synology C2 object storage
-
Create a Synology C2 Object Storage bucket.
-
Generate access key and secret key from the C2 Object Storage console.
-
In the dashboard, choose
Synology C2from the dropdown. -
Use the endpoint URL format:
https://<region>.synologyc2.netwhere<region>is your bucket's region (e.g.,eu-002).
SSHFS
-
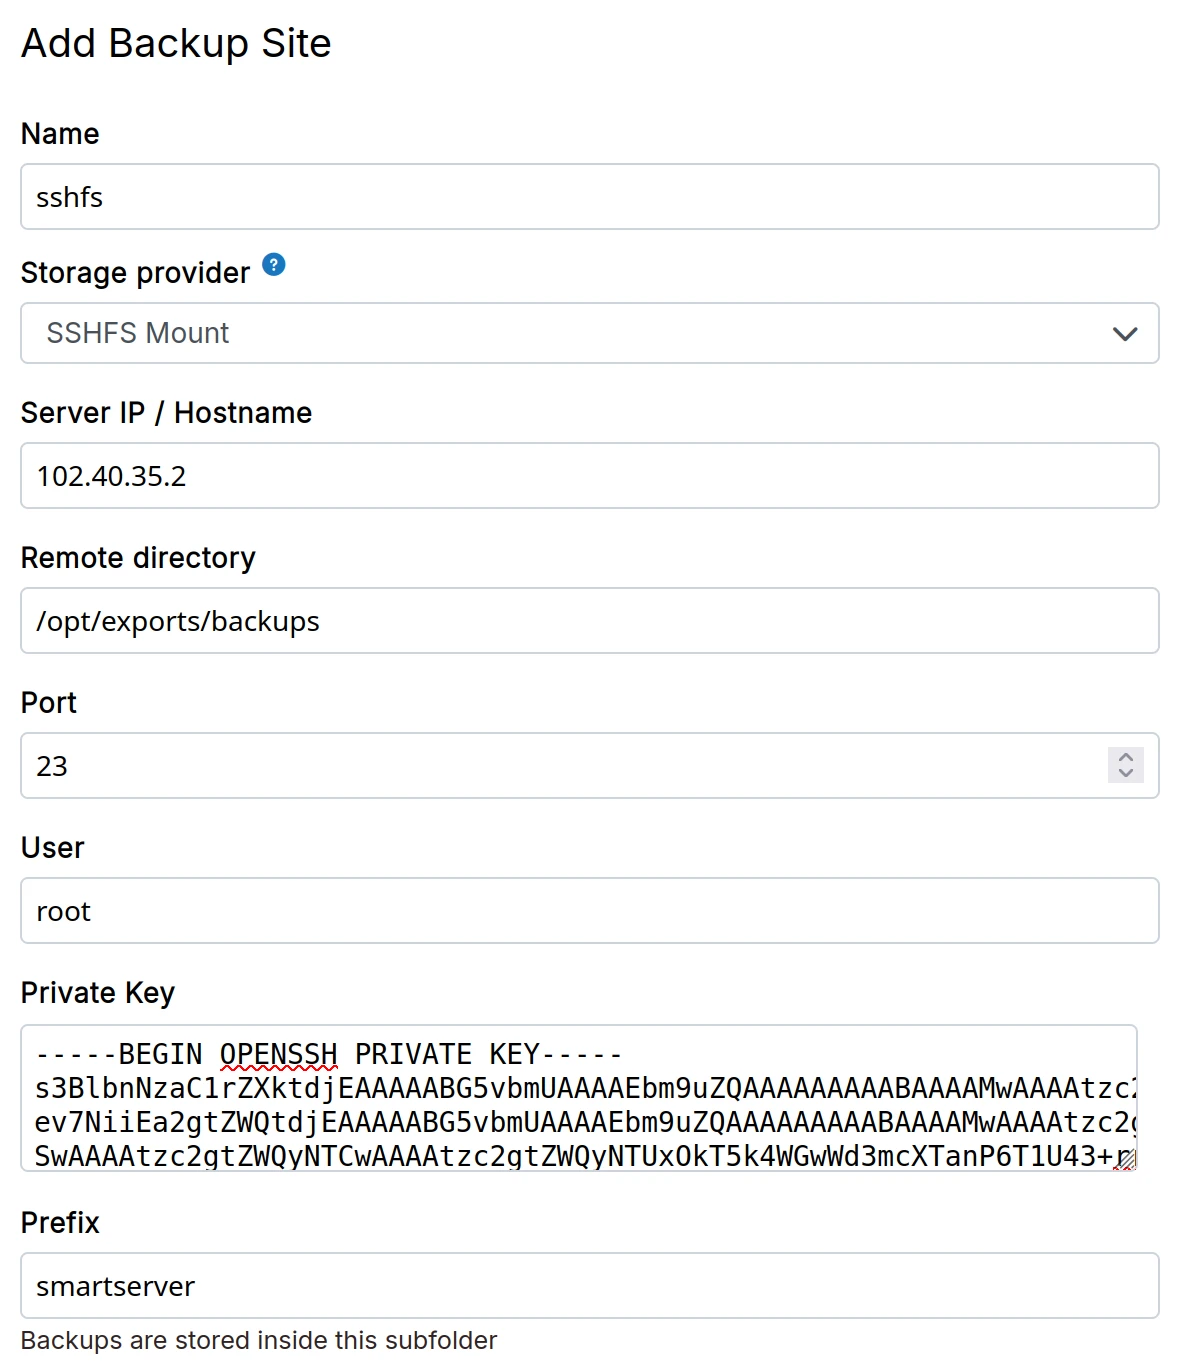
Setup an external server and make sure SFTP is enabled in the sshd configuration of the server.
-
In the dashboard, choose
SSHFS mountfrom the drop down. -
Make sure the private ssh-key does not have a password.
When using Hetzner Storage Box, the Remote Directory is /home for the main account.
We have found sub accounts to be unreliable with SSHFS. We recommend using CIFS instead if you want to use subaccounts.
UpCloud object storage
-
Create a UpCloud Object Storage.
-
Create a bucket inside the Object Storage.
-
Click the S3 API Access link to get access credentials.
-
In the dashboard, choose
UpCloud Object Storagefrom the down down.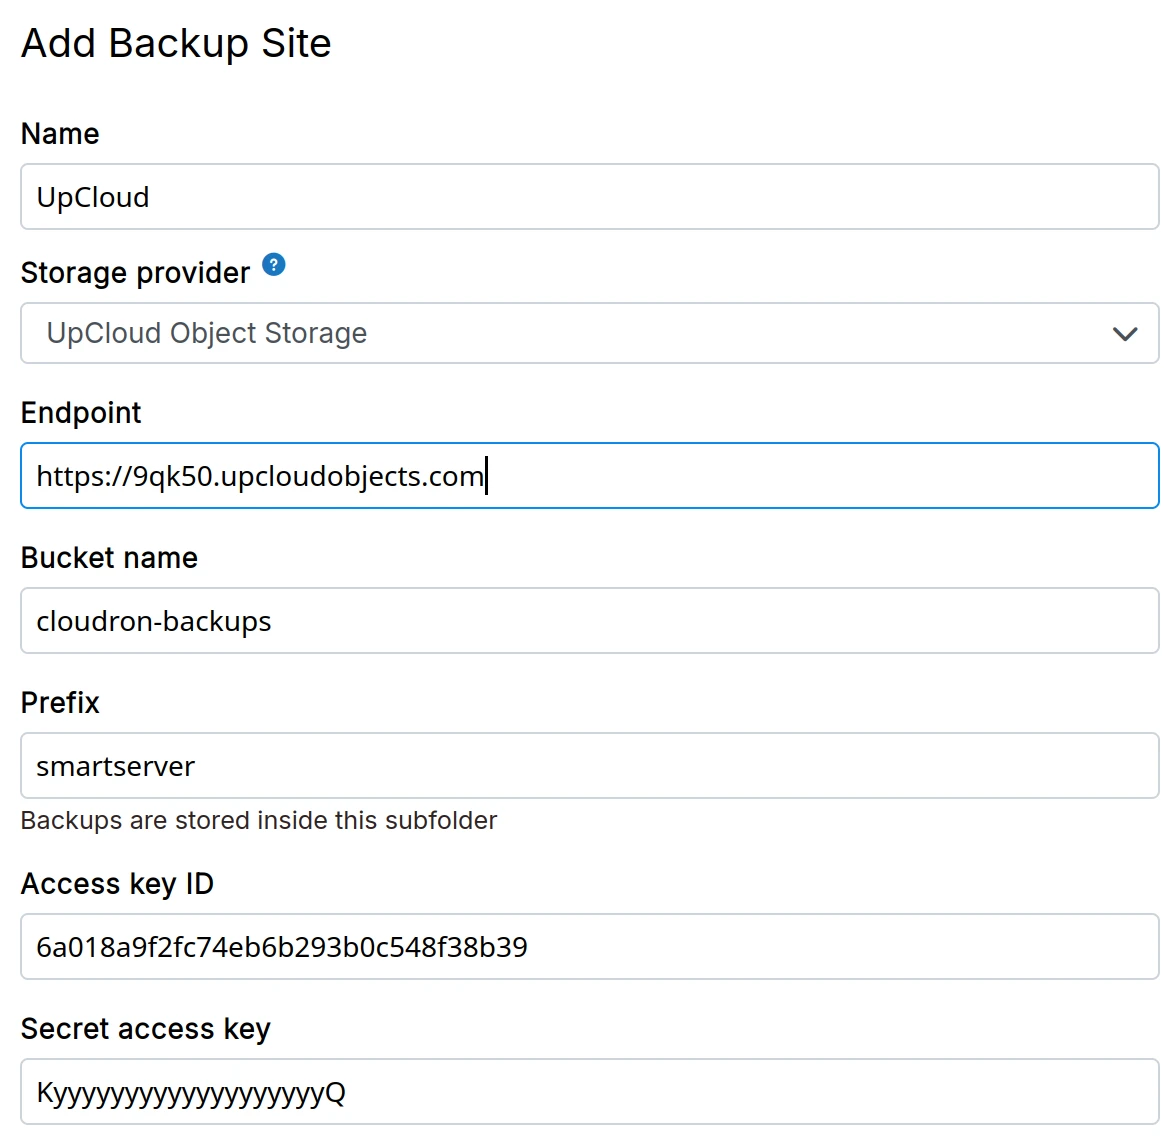
Some regions of UpCloud, like NYC and CHI, do not implement the multipart copy operation. This
restriction prevents large files (5GB) from being copied. For tgz format, if the backup is more than
5GB, the backup will fail. For rsync format, files greater than 5GB will not backup properly.
Vultr object storage
-
Create a Vultr Object Storage bucket
-
Make a note of the access key and secret key listed in the bucket management UI.
-
In the dashboard, choose
Vultr Object Storagefrom the drop down.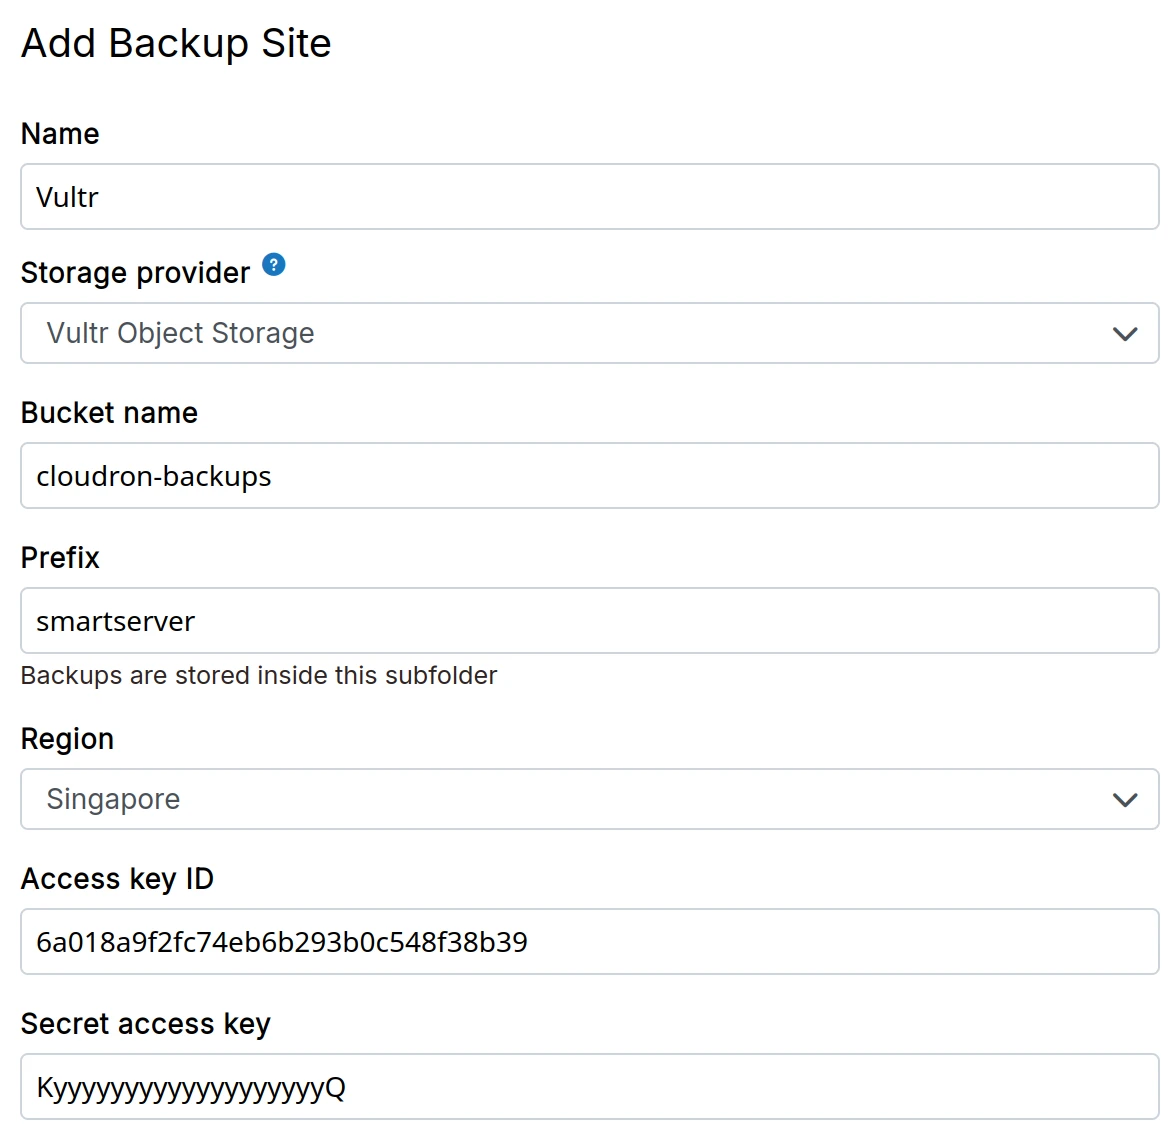
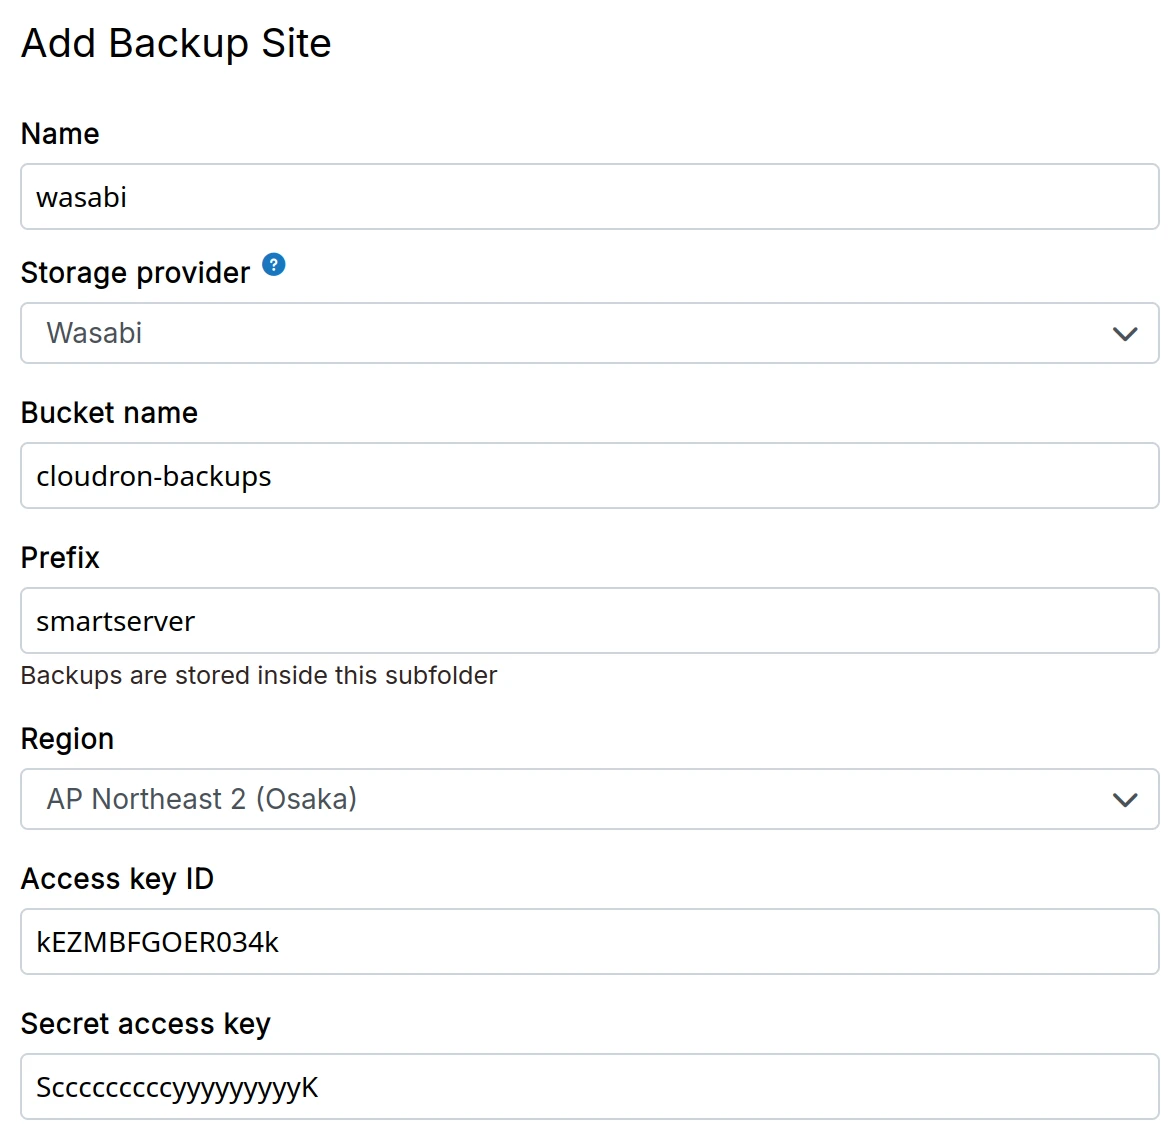
Wasabi
-
Create a Wasabi bucket
-
Create Access key and Secret Access Key from the Wasabi dashboard
-
In the dashboard, choose
Wasabifrom the drop down.
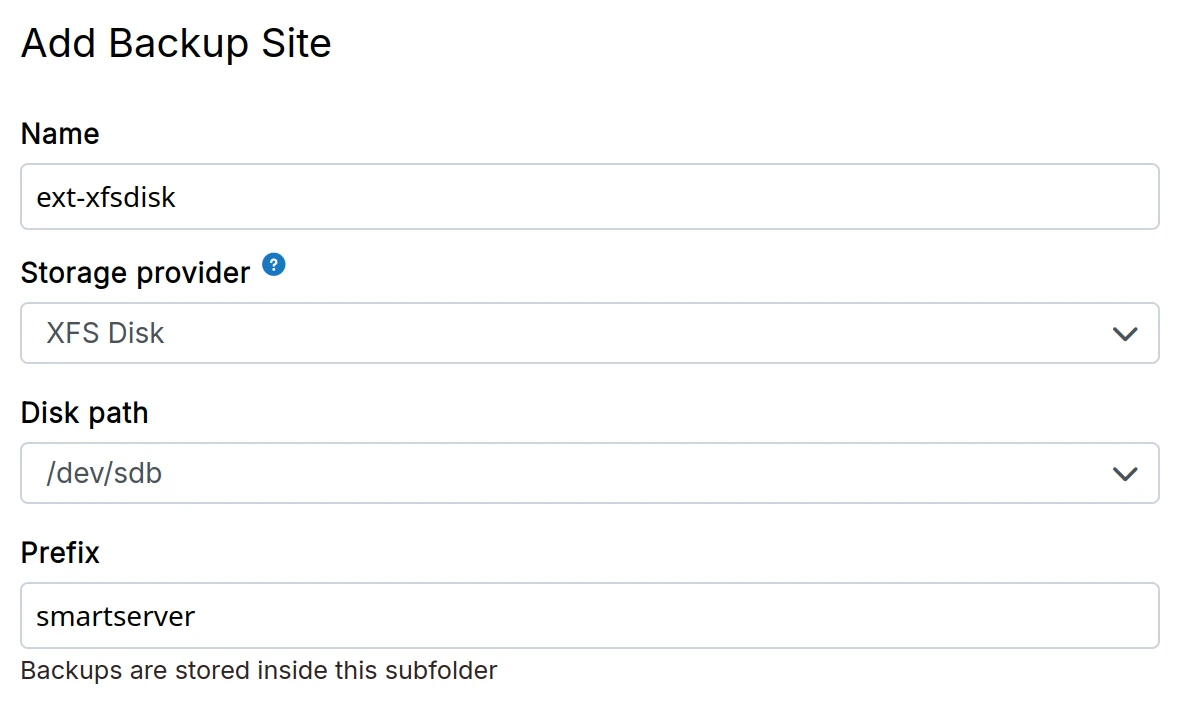
XFS
-
Attach an external XFS hard disk to the server. Depending on where your server is located, this can be a DigitalOcean Block Storage, AWS Elastic Block Store, Linode Block Storage.
-
If required, format it using
mkfs.xfs /dev/<device>. Then, runblkidorlsblkto get the UUID of the disk. -
In the dashboard, choose
XFS Mountfrom the drop down.
/etc/fstab entryWhen choosing this storage provider, do not add an /etc/fstab entry for the mount point. Cloudron will add and manage
a systemd mount point.
Backup formats
Cloudron supports two backup formats - tgz (default) and rsync. The tgz format stores
all the backup information in a single tarball whereas the rsync format stores all backup
information as files inside a directory.
The contents of the tgz file when extracted to disk match the contents of the
rsync directory exactly. Both formats are complete and portable.
Tgz format
The tgz format uploads an app's backup as a gzipped tarball. This format is very efficient when
having a large number of small number files.
This format has the following caveats:
-
Most Cloud storage API require the content length to be known in advance before uploading data. For this reason, Cloudron uploads big backups in chunks. However, chunked (multi-part) uploads cannot be parallelized and also take up as much RAM as the chunk size.
-
tgzbackup uploads are not incremental. This means that if an app generated 10GB of data, Cloudron has to upload 10GB every time it makes a new backup.
Rsync format
The rsync format uploads individual files to the backup storage. It keeps track of what
was copied the last time around, detects what changed locally and uploads only the changed files
on every backup. Note that despite uploading 'incrementally', tgz format can be significantly
faster when uploading a large number of small files (like source code repositories) because
of the large number HTTP requests that need to be made for each file.
This format has the following caveats:
-
By tracking the files that were uploaded the last time around, Cloudron minimizes uploads when using the rsync format. To make sure that each backup directory is "self contained" (i.e. can be copied without additional tools), Cloudron issues a 'remote copy' request for each file.
-
File uploads and remote copies are parallelized.
-
When using backends like Filesystem, CIFS, EXT4, NFS & SSHFS, the rsync format can hardlink 'same' files across backups to conserve space. Note that while the protocols themselves support hardlinks, support for hardlinks depends ultimately on the remote file system.
-
When encryption is enabled, file names are optionally encrypted.
Encryption
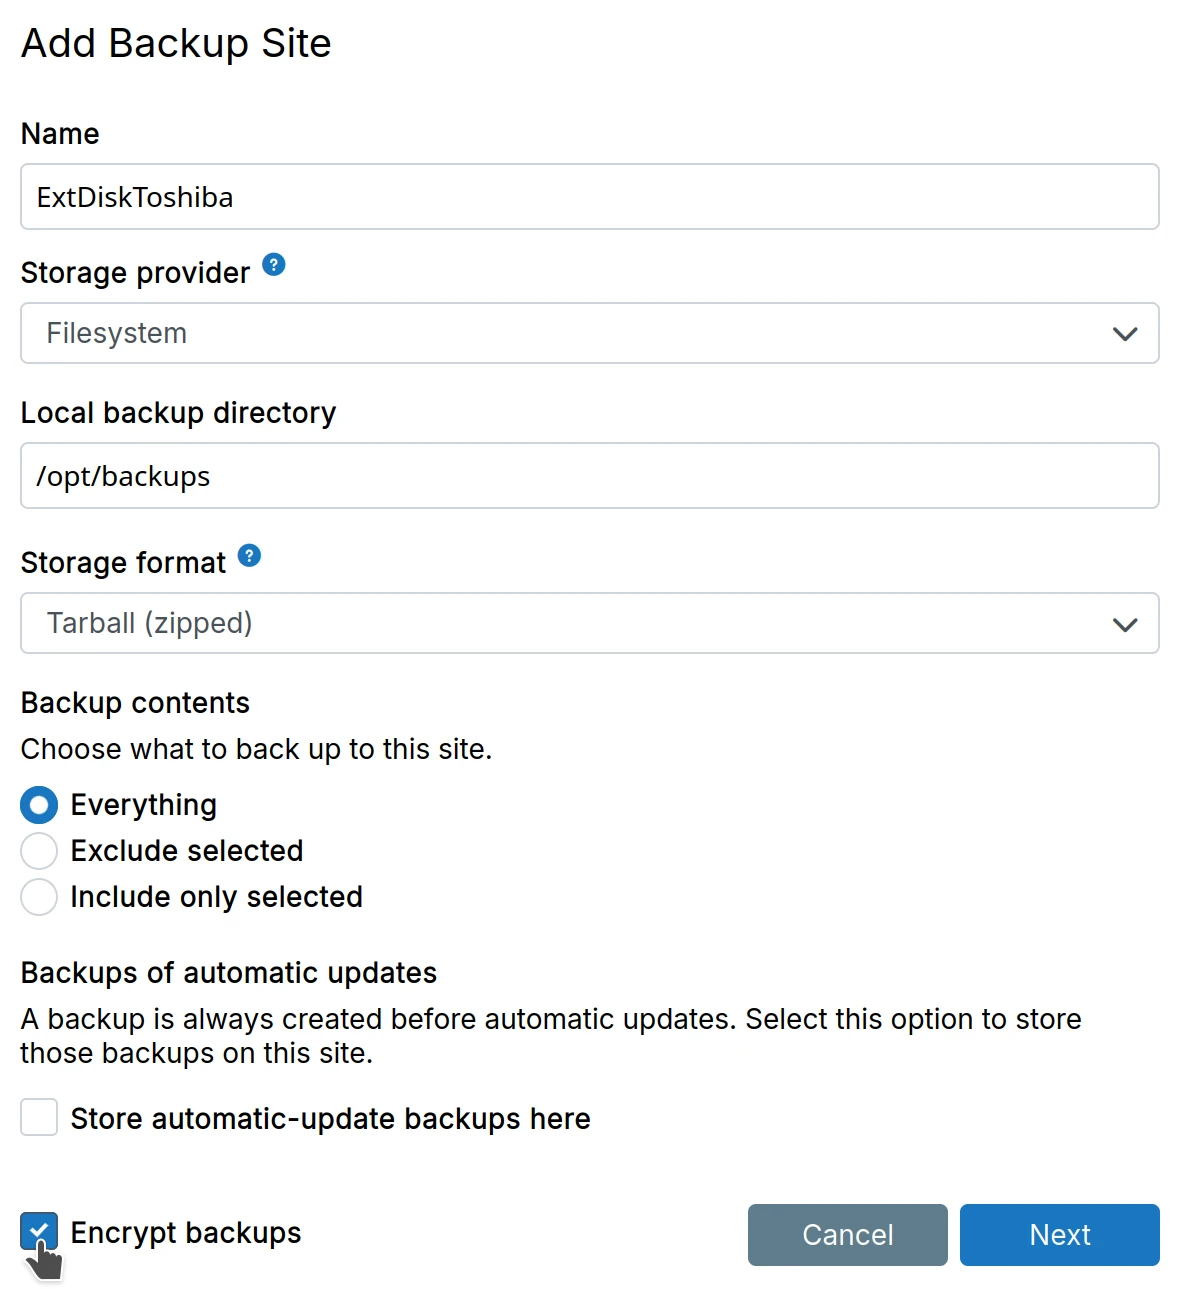
Backups can be optionally encrypted (AES-256-CBC) with a secret key. When encryption is enabled, Cloudron will encrypt both the filename and its contents.
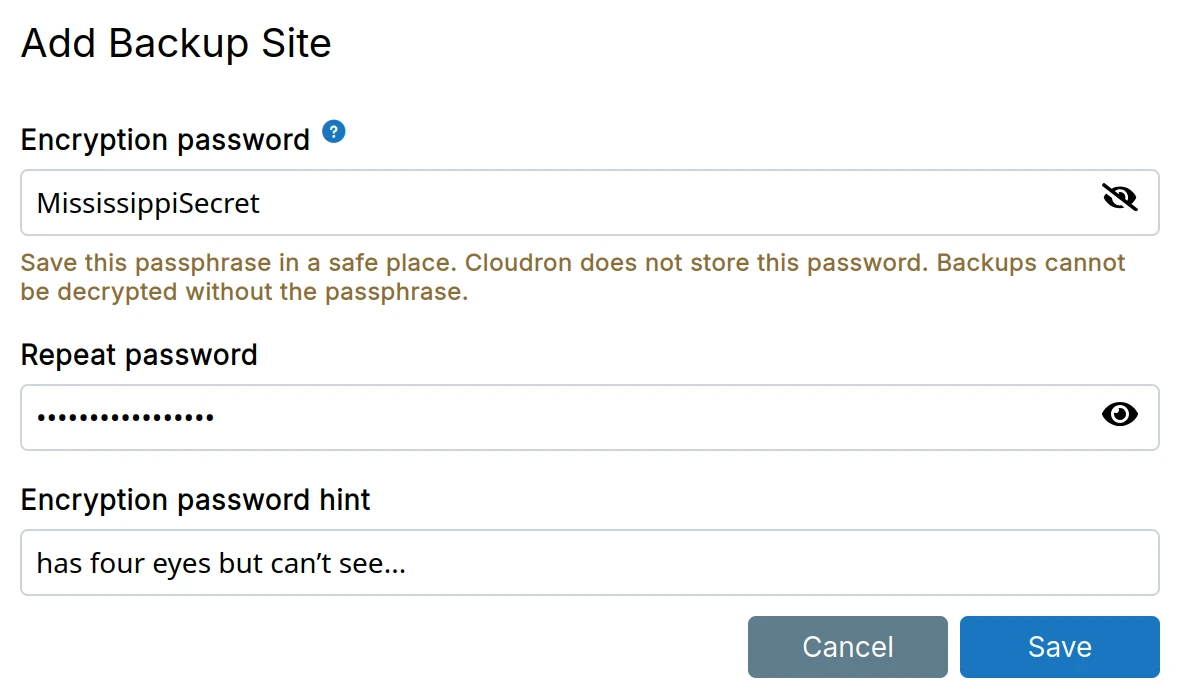
Encryption imposes some filename length limitations:
- File names can be max 156 bytes. See this comment for an explanation. If backups are failing because of
KeyTooLongerrors, you can run the following command in Web Terminal to detect the offending file and rename it to something shorter:
cd /app/data
find . -type f -printf "%f\n" | awk '{ print length(), $0 | "sort -rn" }' | less
- Backup backends like S3 have a max object path length of 1024. Each file name in a path adds approximately 20 bytes of overhead. A directory 10 levels deep adds 200 bytes of overhead. Filename encryption can be optionally turned off.
Cloudron does not save a copy of the password in the database. If you lose the password, the backups cannot be decrypted.
Filenames
When using encryption with the rsync format, file names can be optionally encrypted.
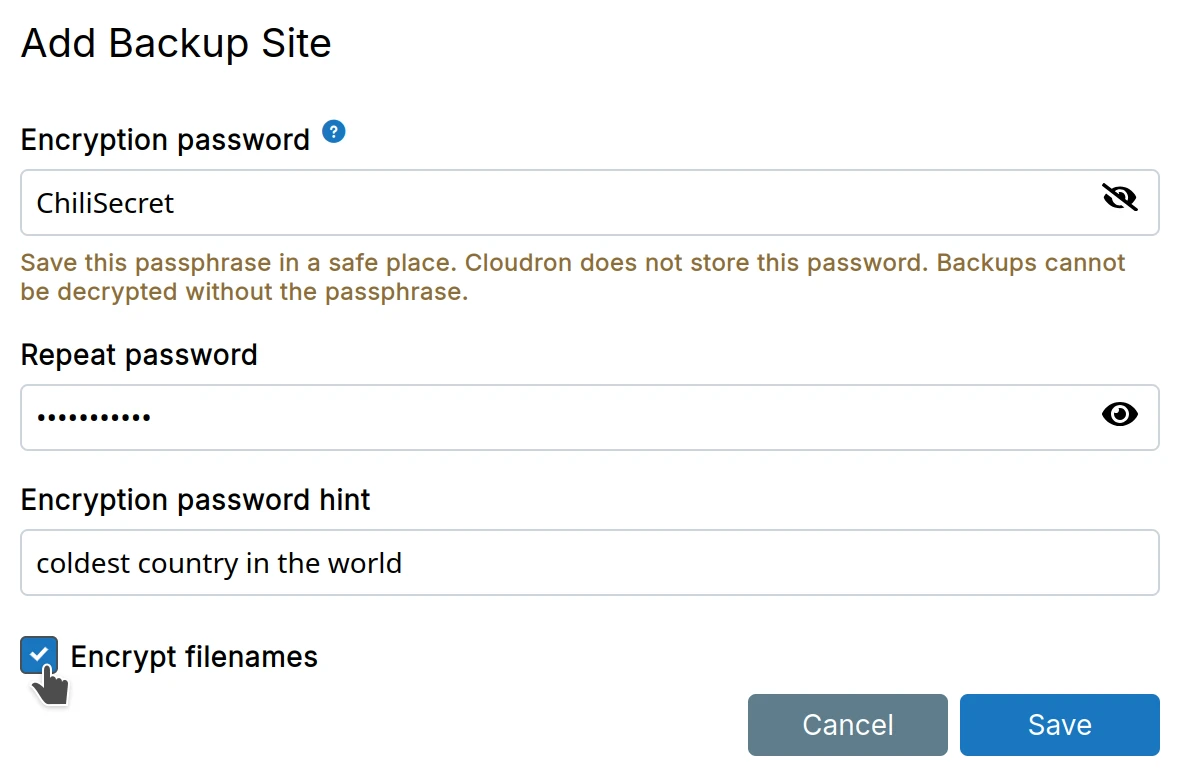
Linux file system has a maximum path size of 4096. However, most storage backends have a max key size which is far less. For example, the max size of keys in S3 is 1024. If you have long file names (full path), then you can turn off encryption of file names. In addition, when backing up to a filesystem like EXT4, each path segment is individually encrypted and the length of each encrypted segment must be less than 255.
File format
The Cloudron CLI tool has subcommands like backup encrypt, backup decrypt, backup encrypt-filename and backup decrypt-filename that can help inspect encrypted files. See the Decrypt backups for more information.
Four 32 byte keys are derived from the password via scrypt with a hardcoded salt:
- Key for encrypting files
- Key for the HMAC digest of encrypted file
- Key for encrypting file names
- Key for the HMAC digest of the file name for deriving its IV (see below)
Each encrypted file has:
- A 4 byte magic
CBV2(Cloudron Backup v2) - A 16 byte IV. This IV is completely random per file.
- File encrypted used AES-256-CBC
- A 32 byte HMAC of the IV and encrypted blocks
Each encrypted filename has:
- A 16 byte IV. This IV is derived from HMAC of the filename. This is done this way because the sync algorithm requires the encryption to be deterministic to locate the file upstream.
- Filename encrypted using AES-256-CBC
Backup stats
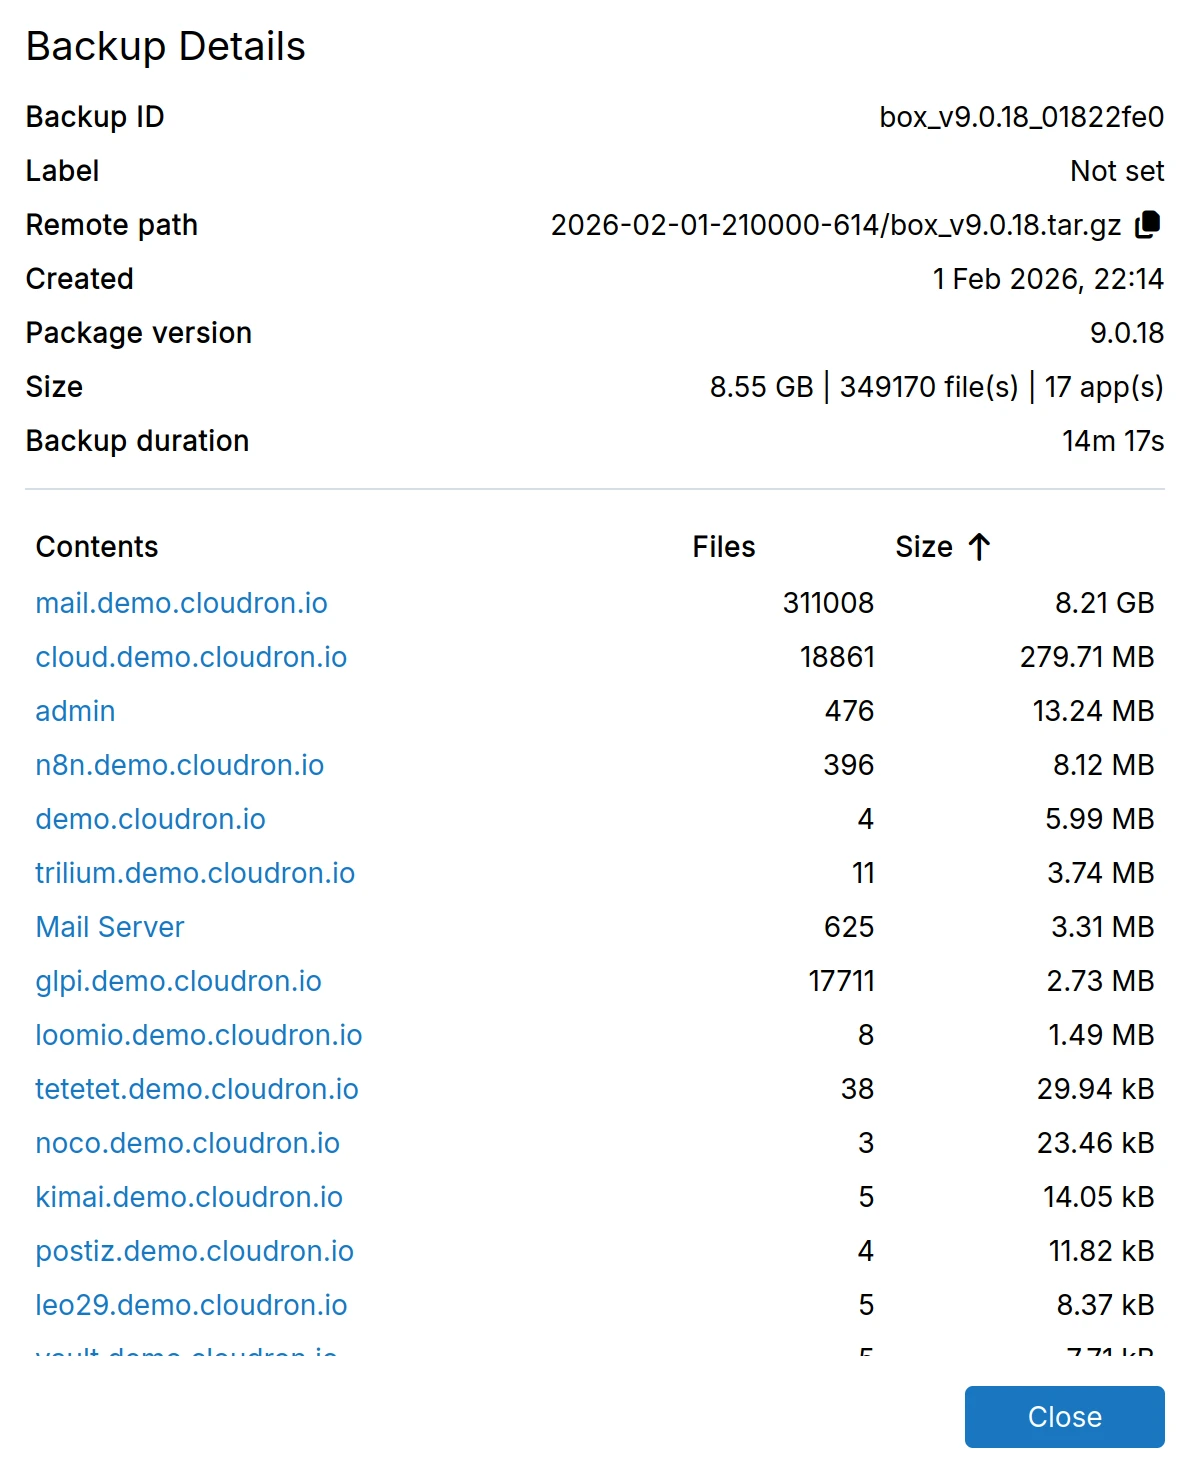
Each backup tracks statistics including size, file count, app count, and the duration it took to create the backup. View these details in the backup info dialog.
Backup integrity
Each backup stores a .backupinfo file alongside it in remote storage. This file is unencrypted for accessibility and contains integrity information for verification.
For tgz format, the file contains:
- Count of files inside the tgz
- SHA256 checksum of the tgz
For rsync format, the file contains:
- Size of each uploaded file
- SHA256 checksum of each uploaded file
- Count of files uploaded
A signature of this file is stored in the database to detect corruption or tampering of the integrity file itself.
This allows detection of corrupted or incomplete backups before restoration, ensuring only valid backups are used.
Schedule
The backup schedule & retention policy can be set in the Backup Site -> Schedule & Retention.
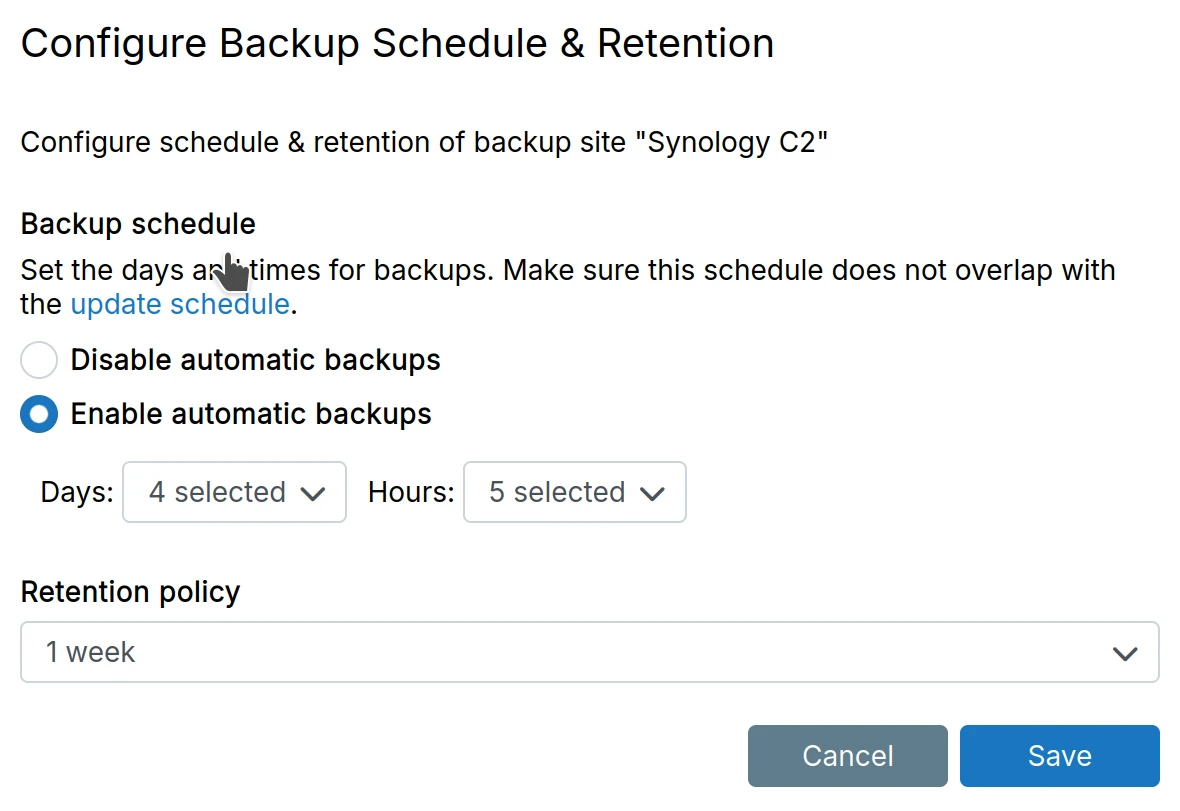
The Backup Interval determines how often backups are created. If a backup fails (because
the external service is down or some network error), Cloudron retries sooner than the backup interval. This
ensures that a backup is created for every interval duration.
-
The backup process runs with a nice of 15. This gives it low priority when the platform is doing other things.
-
The backup task runs with a configurable memory limit. This memory limit is configured in
Backups->Configure->Advanced. -
A 12-hour timeout applies for the backup to complete.
Retention policy
The Retention Policy determines how backups are retained. For example, a retention policy of 1 week deletes all
backups older than a week. The policy 7 daily keeps a single backup for each day for the last 7 days.
If 5 backups were created today, Cloudron removes 4 of them. It does not mean to keep 7 backups a day. Similarly,
4 weekly keeps a single backup for each week for the last 4 weeks.
The following are some of the important rules used to determine if a backup should be retained:
-
For installed apps and box backups, the latest backup is always retained regardless of the policy. This ensures at least one backup remains preserved even if all backups fall outside the retention policy. This also preserves the latest backup of stopped apps when not referenced by any box backup.
-
An app backup created right before an app updates is marked as special and persisted for 3 weeks. Sometimes the app itself works fine but errors/bugs only get noticed after a couple of weeks.
-
For uninstalled apps, the latest backup is removed as per the policy.
-
The latest backup is not counted twice if already part of the policy.
-
Errored and partial backups are removed immediately.
Cleanup backups
The Backup Cleaner runs every night and removes backups based on the Retention Policy.
Cloudron also keeps track of the backups in its database. The Backup Cleaner checks if entries in the
database exist in the storage backend and removes stale entries from the database automatically.
You can trigger the Backup Cleaner using the Cleanup Backups action:
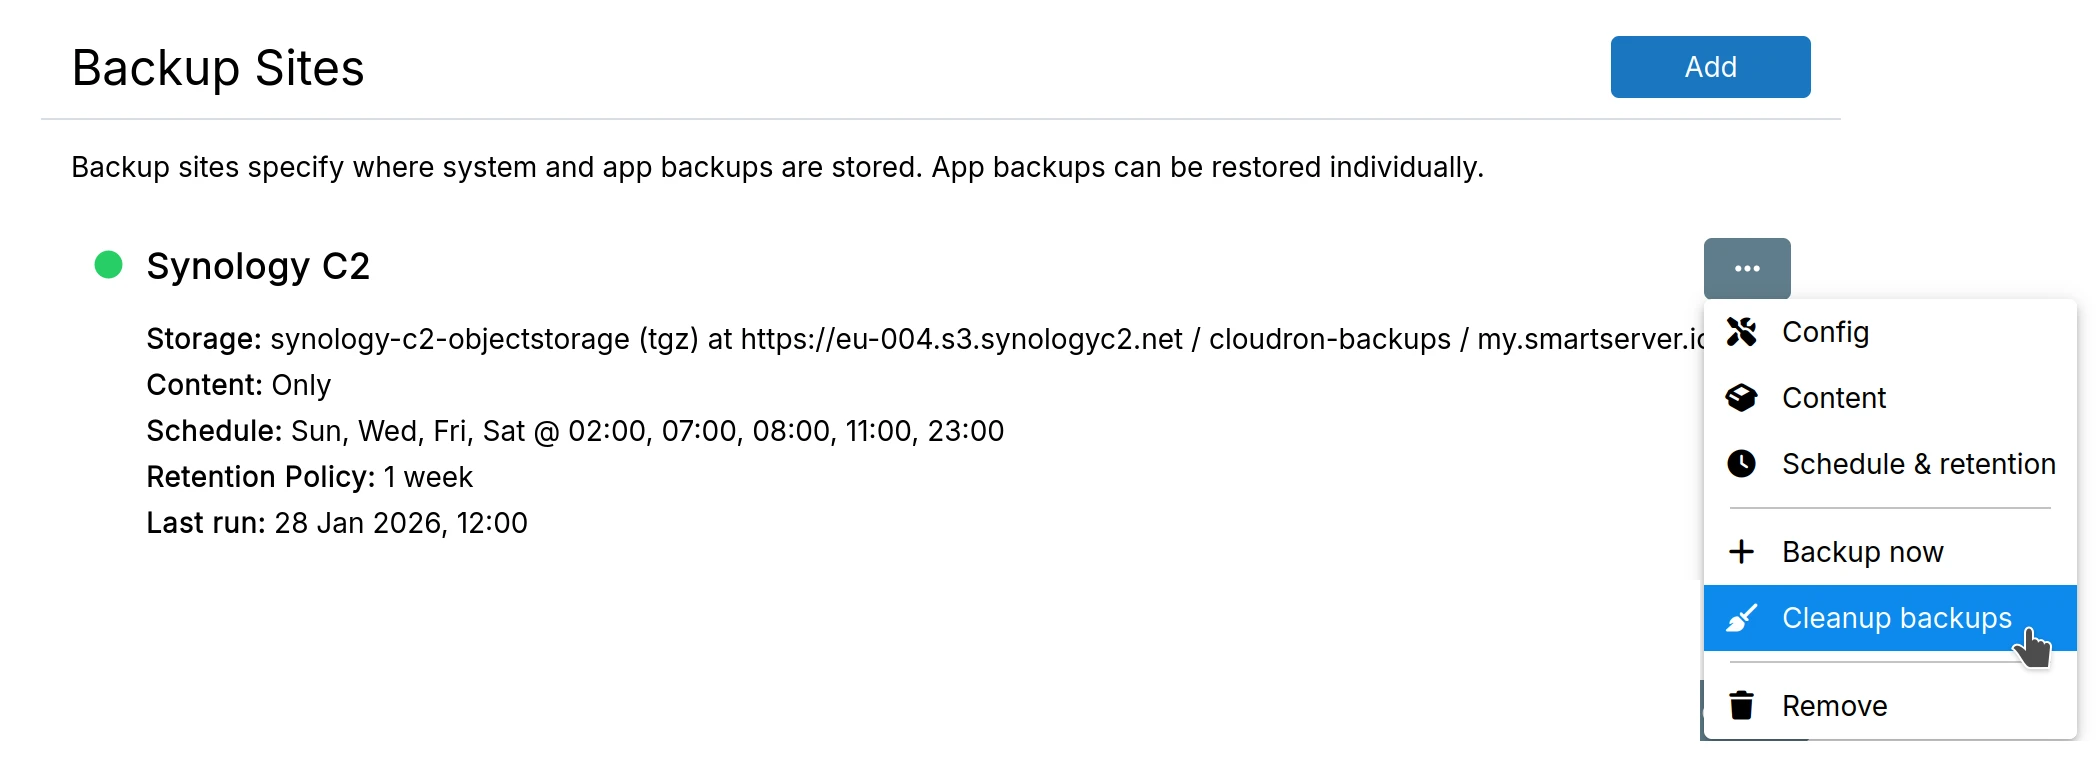
If you click on the Logs button after triggering Cleanup Backups, you will see the exact reason why each
individual backup is retained. In the logs, a box_ prefix indicates that it is a full Cloudron backup where app_ prefix
indicates that it is an app backup.
keepWithinSecsmeans the backup is kept because of the retention policy.referencemeans that this backup is being referenced by another backup. When you make a full Cloudron backup, it takes the backup of each app as well. In this case, each app backup is "referenced" by the parent "box" backup.preserveSecsmeans the backup is kept because it is the backup of a previous version of the app before an app update. We keep these backups for 3 weeks in case an update broke something and it took you some time to figure that something broke.
See backup labels section on how to preserve specific backups regardless of the retention policy.
Old local backups
By default, Cloudron stores backups in the filesystem at /var/backups. If you move backups to an external location, previous
backups have to be deleted manually by SSHing into the server.
- SSH into the server.
- Run
cd /var/backupsto change directory. - There may be several timestamped directories. You can delete them using
rm -rf /var/backups/<timestamped-directory>. - The
snapshotsubdirectory can be removed usingrm -rf /var/backups/snapshot.
Backup labels
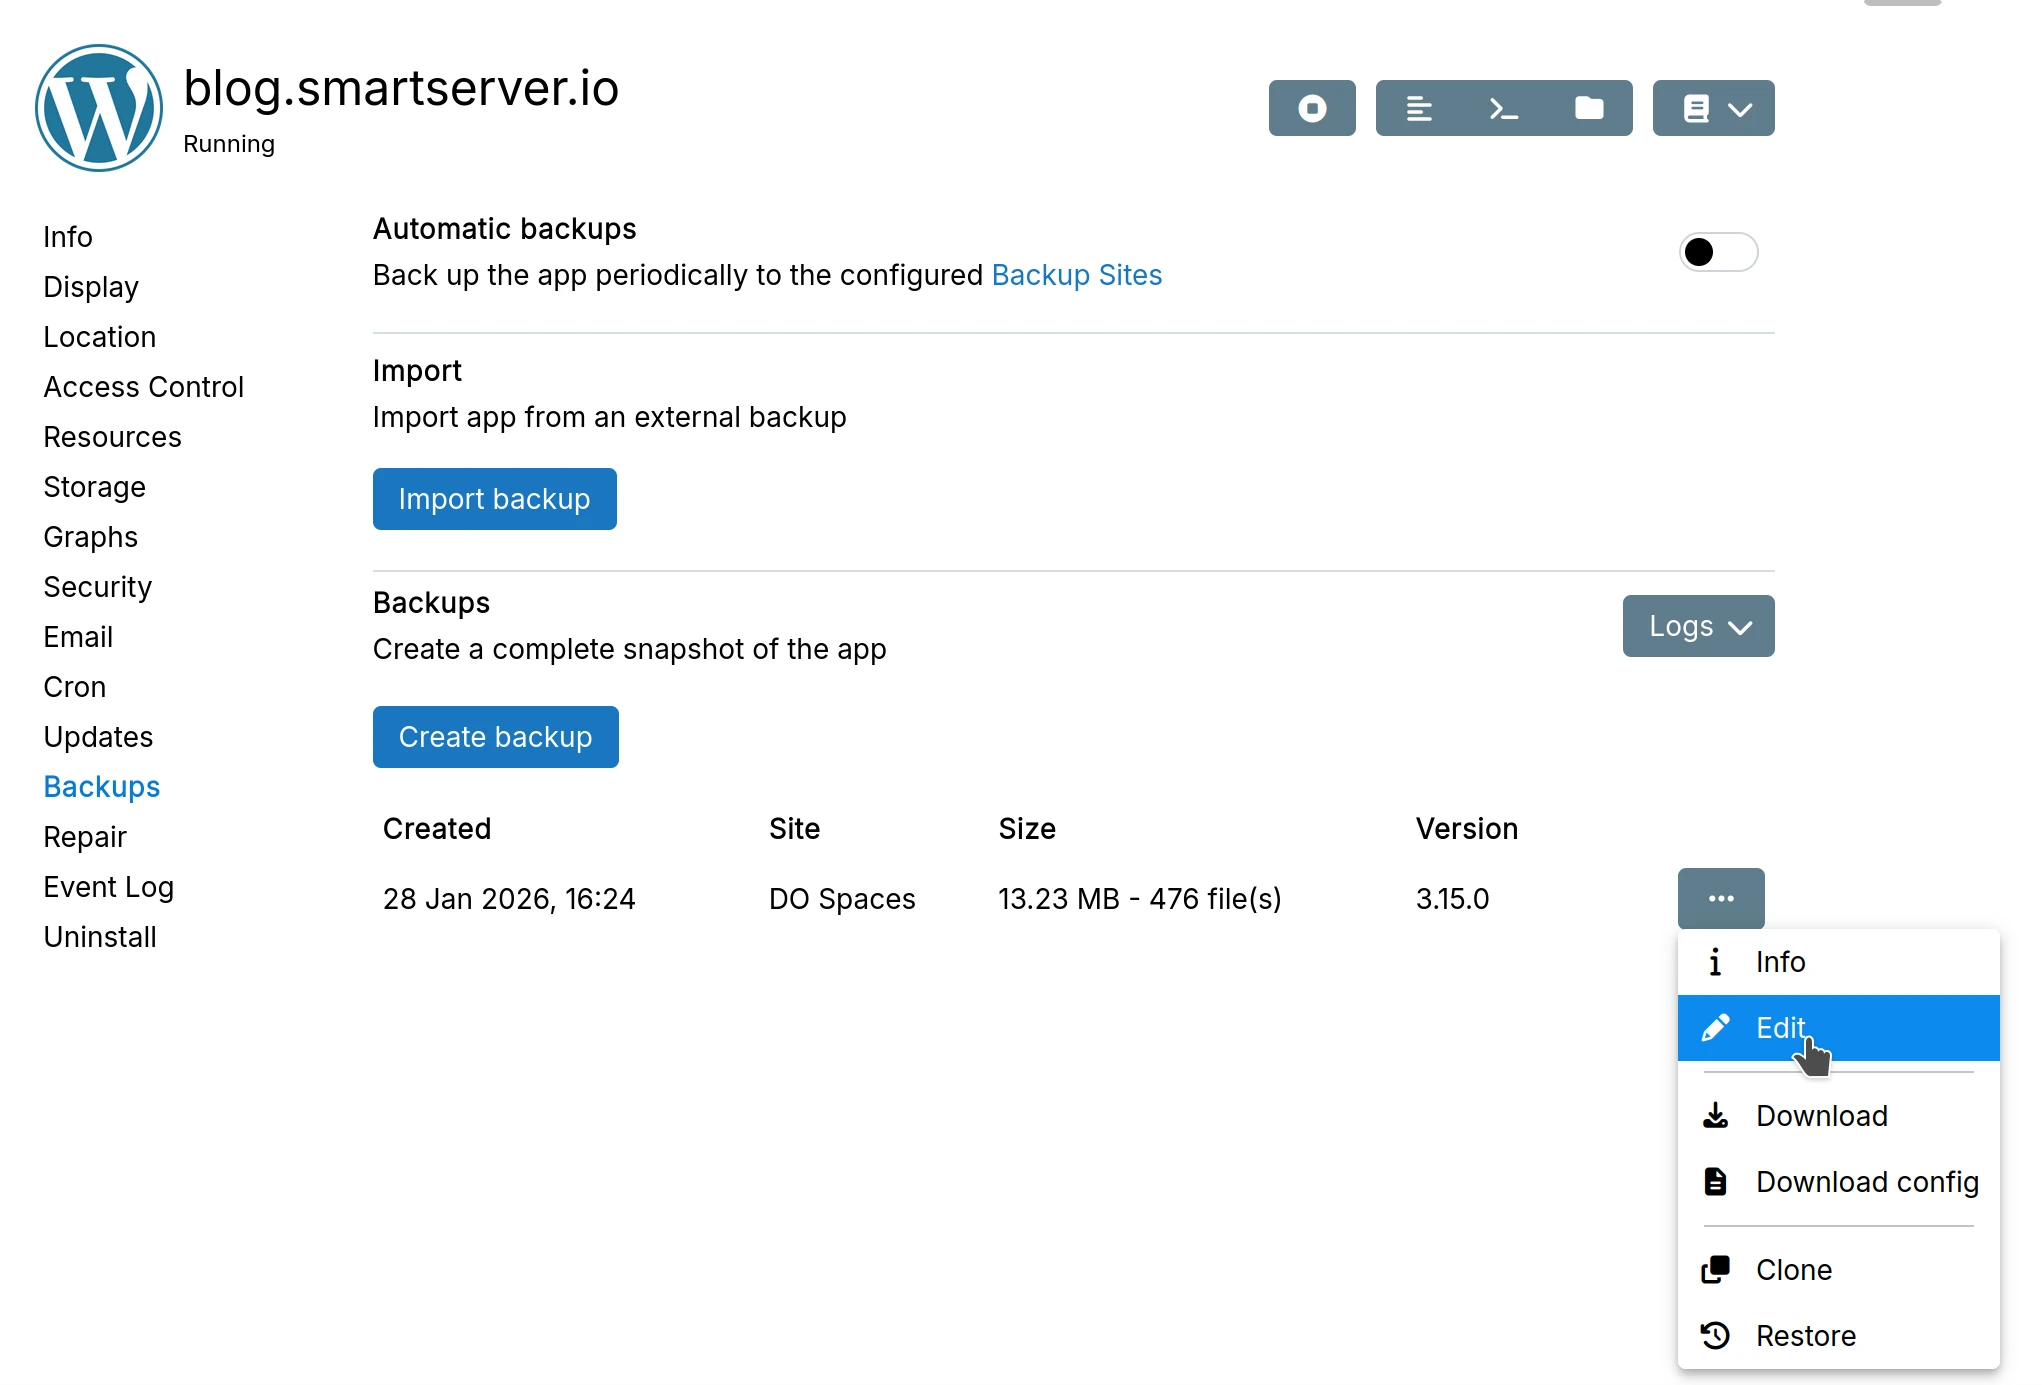
App Backups can be tagged with a label for readability:
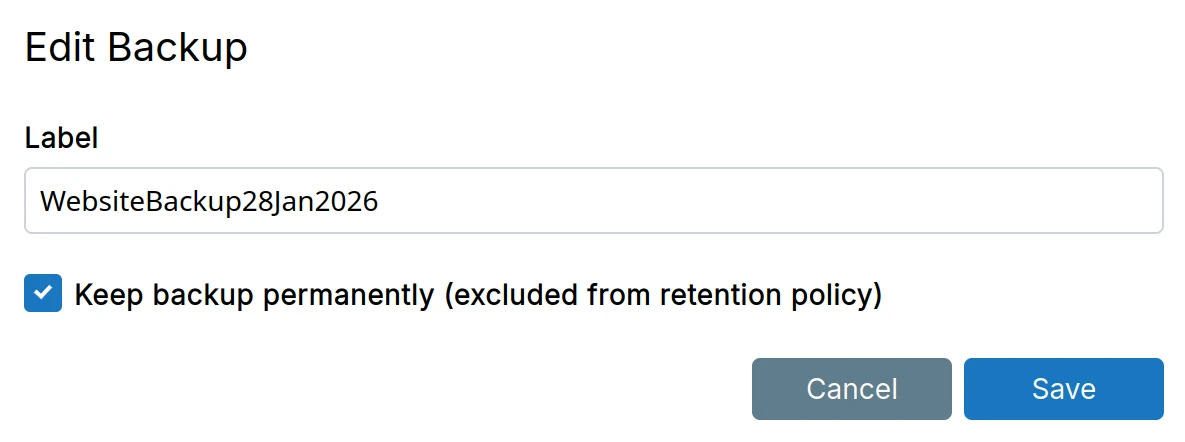
In addition, specific backups can be preserved for posterity using the preserve checkbox:
Snapshot app
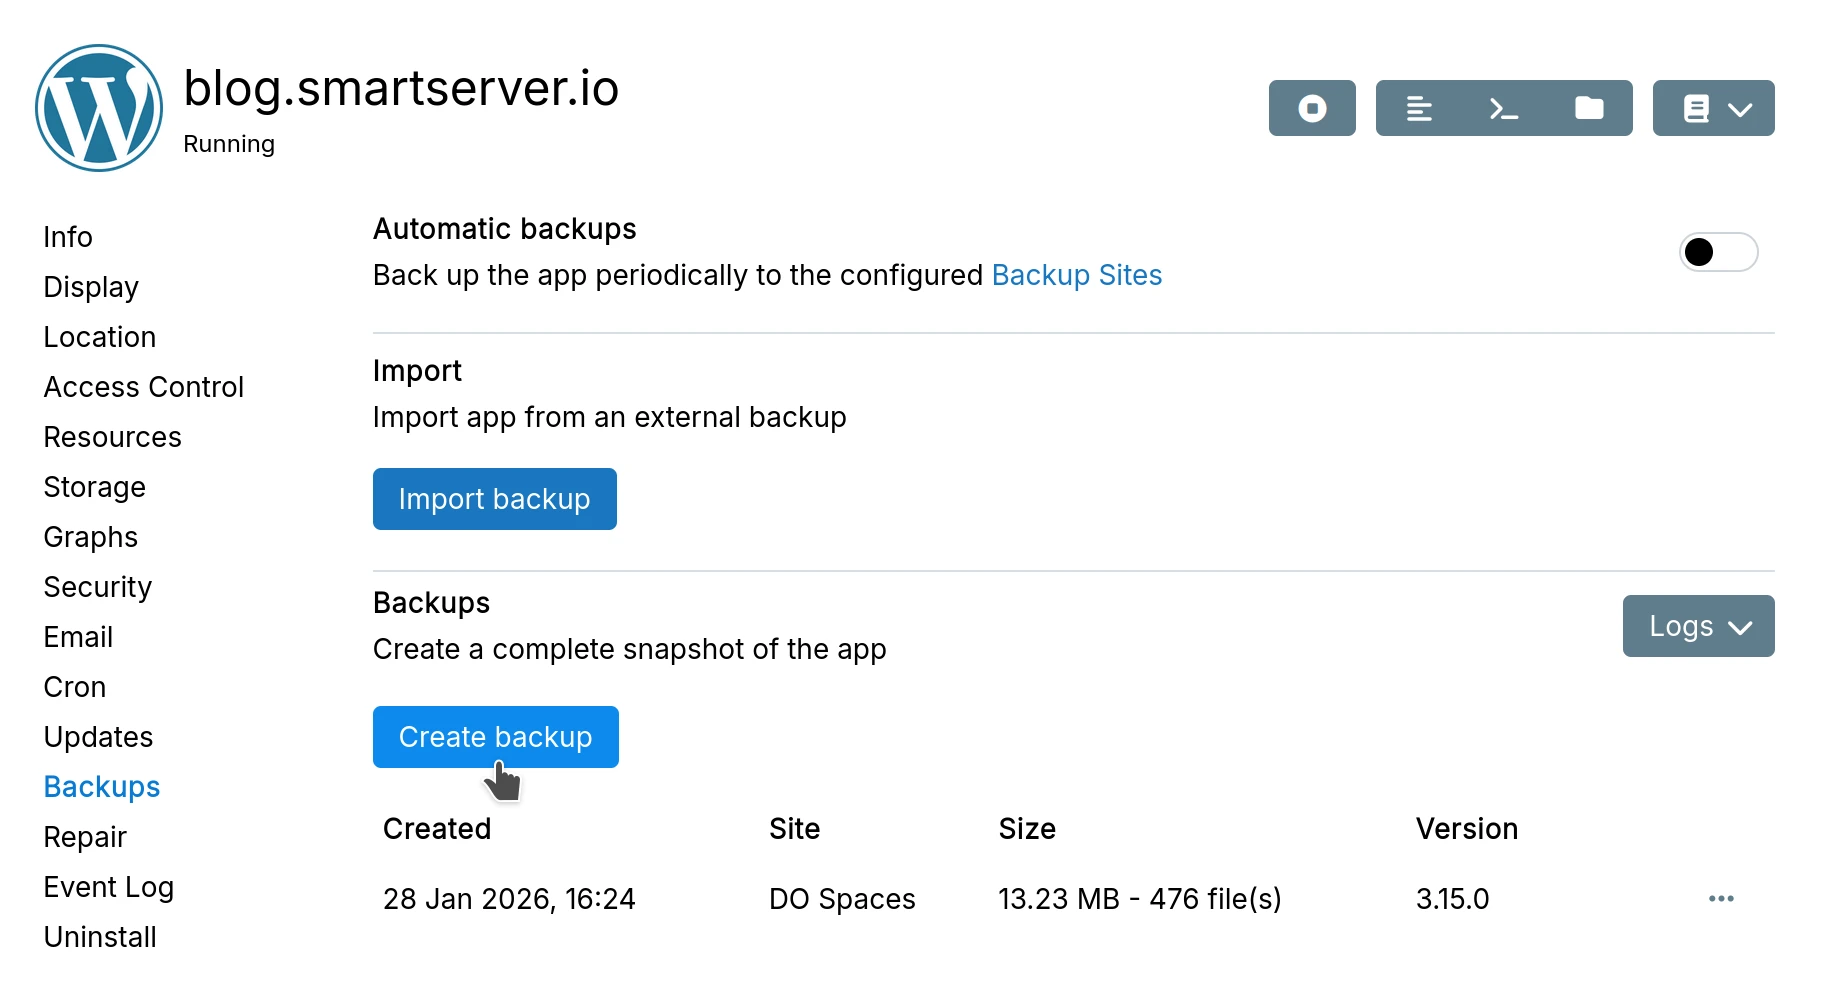
To take a backup of a single, click the Create Backup button in the Backups section of the
app's configure UI.
Concurrency settings
When using one of the cloud storage providers (S3, GCS), the upload, download and copy concurrency can be configured to speed up backup and restore operations.
-
Upload concurrency - the number of file uploads to be done in parallel.
-
Download concurrency - the number of file downloads to be done in parallel.
-
Copy concurrency - the number of remote file copies to be done in parallel. Cloudron conserves bandwidth by not re-uploading unchanged files and instead issues a remote file copy request.
Consider these caveats when tuning these values:
-
Concurrency values are highly dependent on the storage service. These values change from time to time, so providing a standard recommendation is not possible. In general, being conservative is best since backup is just a background task. Some services like Digital Ocean Spaces can only handle 20 copies in parallel before you hit rate limits. Other provides like AWS S3, can comfortably handle 500 copies in parallel.
-
Higher upload concurrency necessarily means you have to increase the memory limit for the backup.
Snapshot Cloudron
To take a backup of Cloudron and all the apps, click the Backup now button in the Settings page:
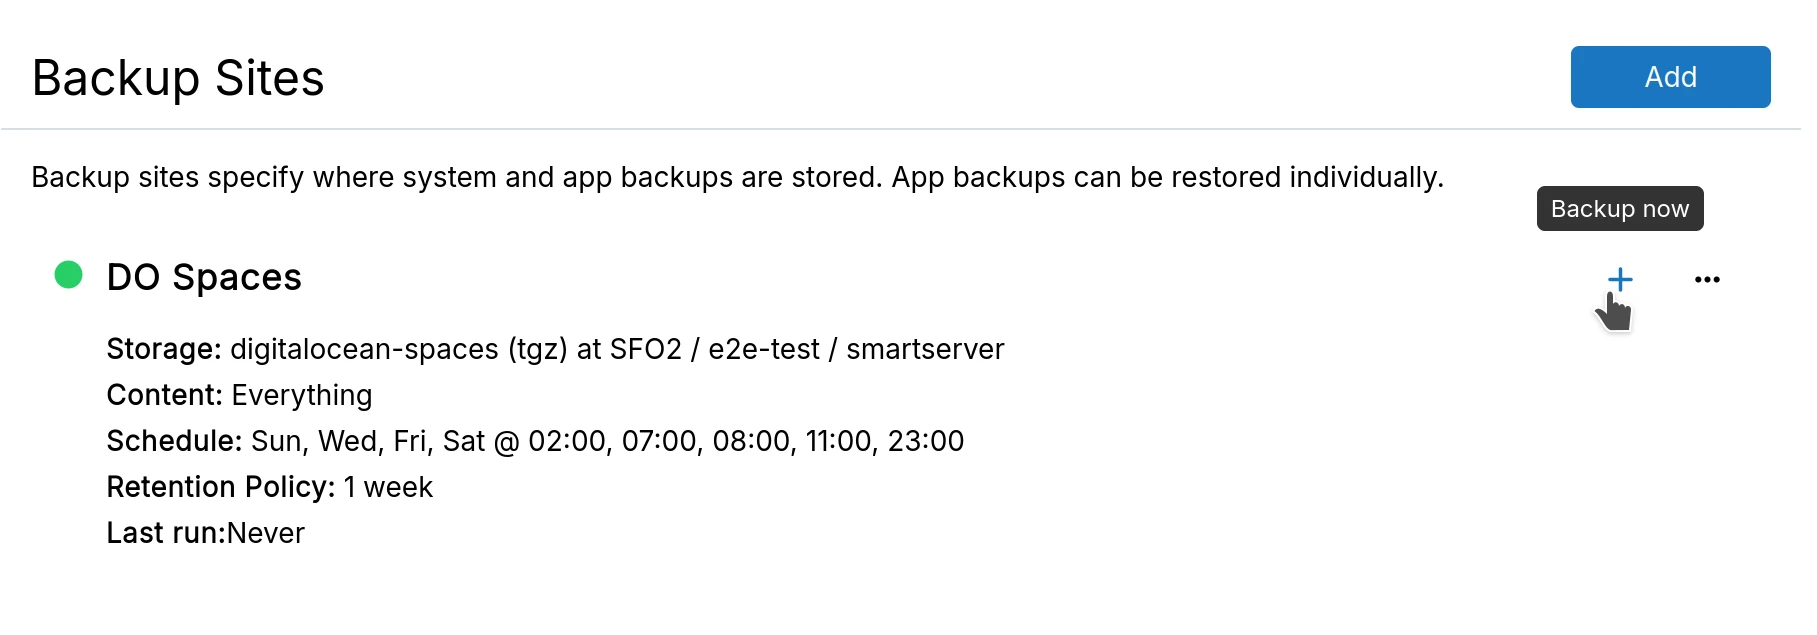
When using the no-op backend, no backups are taken. If backups are stored on the same server, be
sure to download them before making changes in the server.
Disable automatic backups
An app can be excluded from automatic backups from the 'Advanced settings' in the Configure UI:
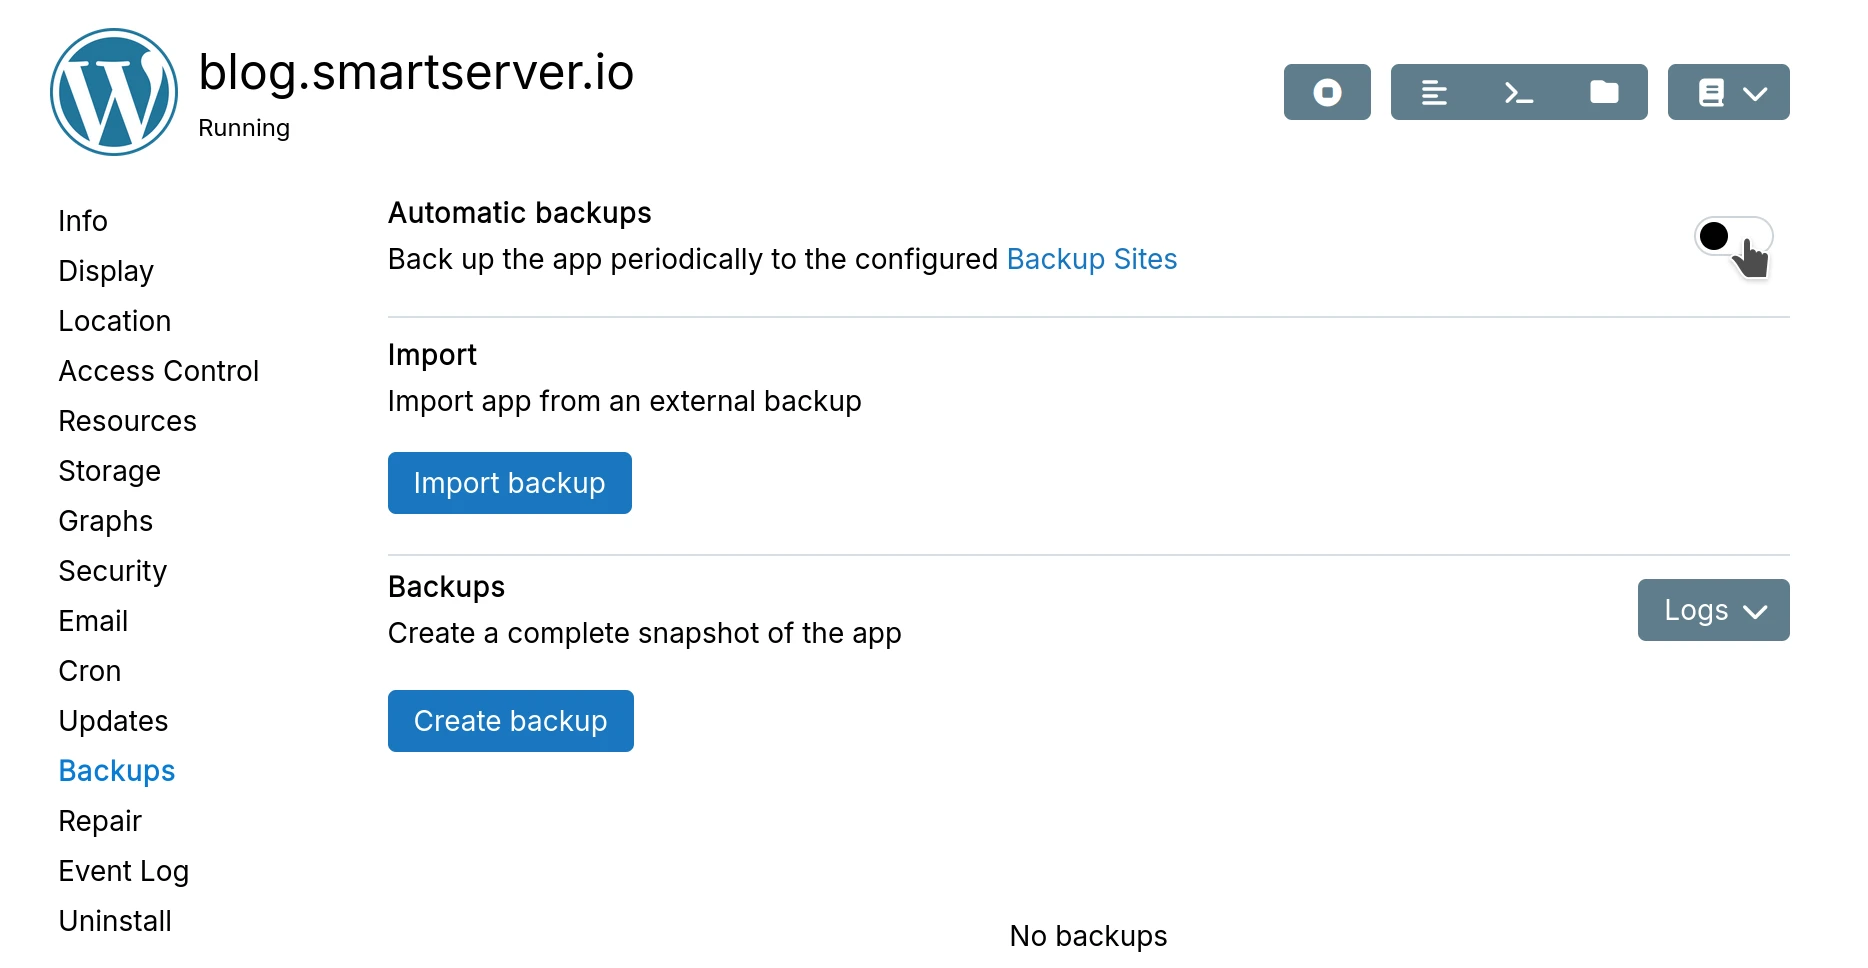
Note that the platform will still create backups before an app or Cloudron update. This is required so that it can be reverted to a sane state should the update fail.
Disabling automatic backup for an app puts the onus on the platform adminstrator to backup the app's files
regularly. This can be done using the Cloudron CLI tool's
cloudron backup create command.
Clone app
To clone an app (create an exact replica on another domain), first create an app backup.
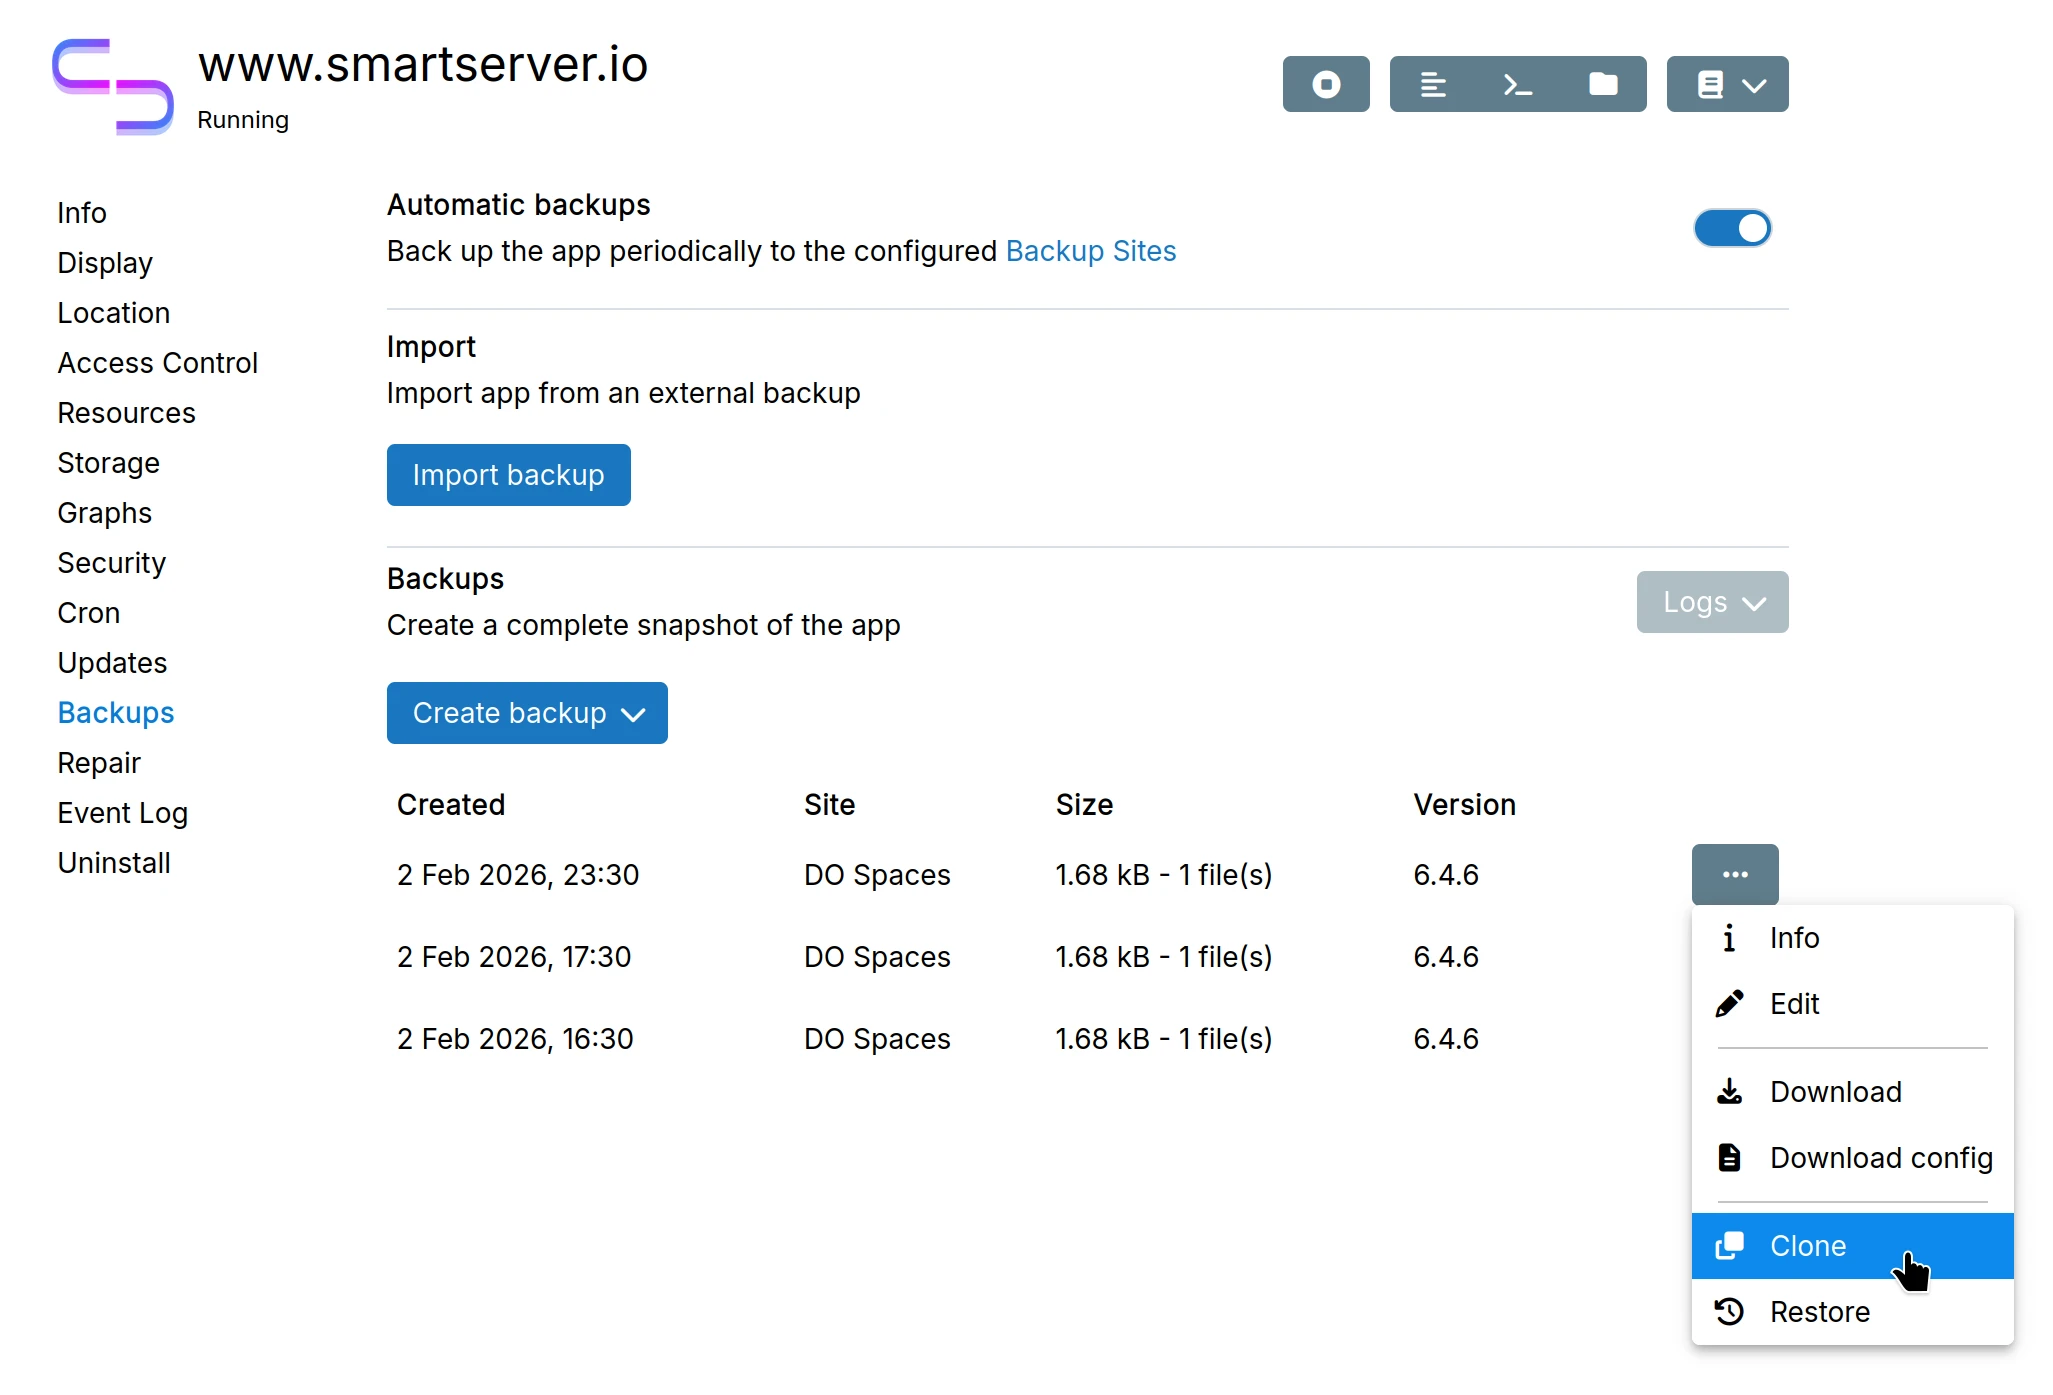
Enter location of the clone:

Restore app
Restore from previous backup:
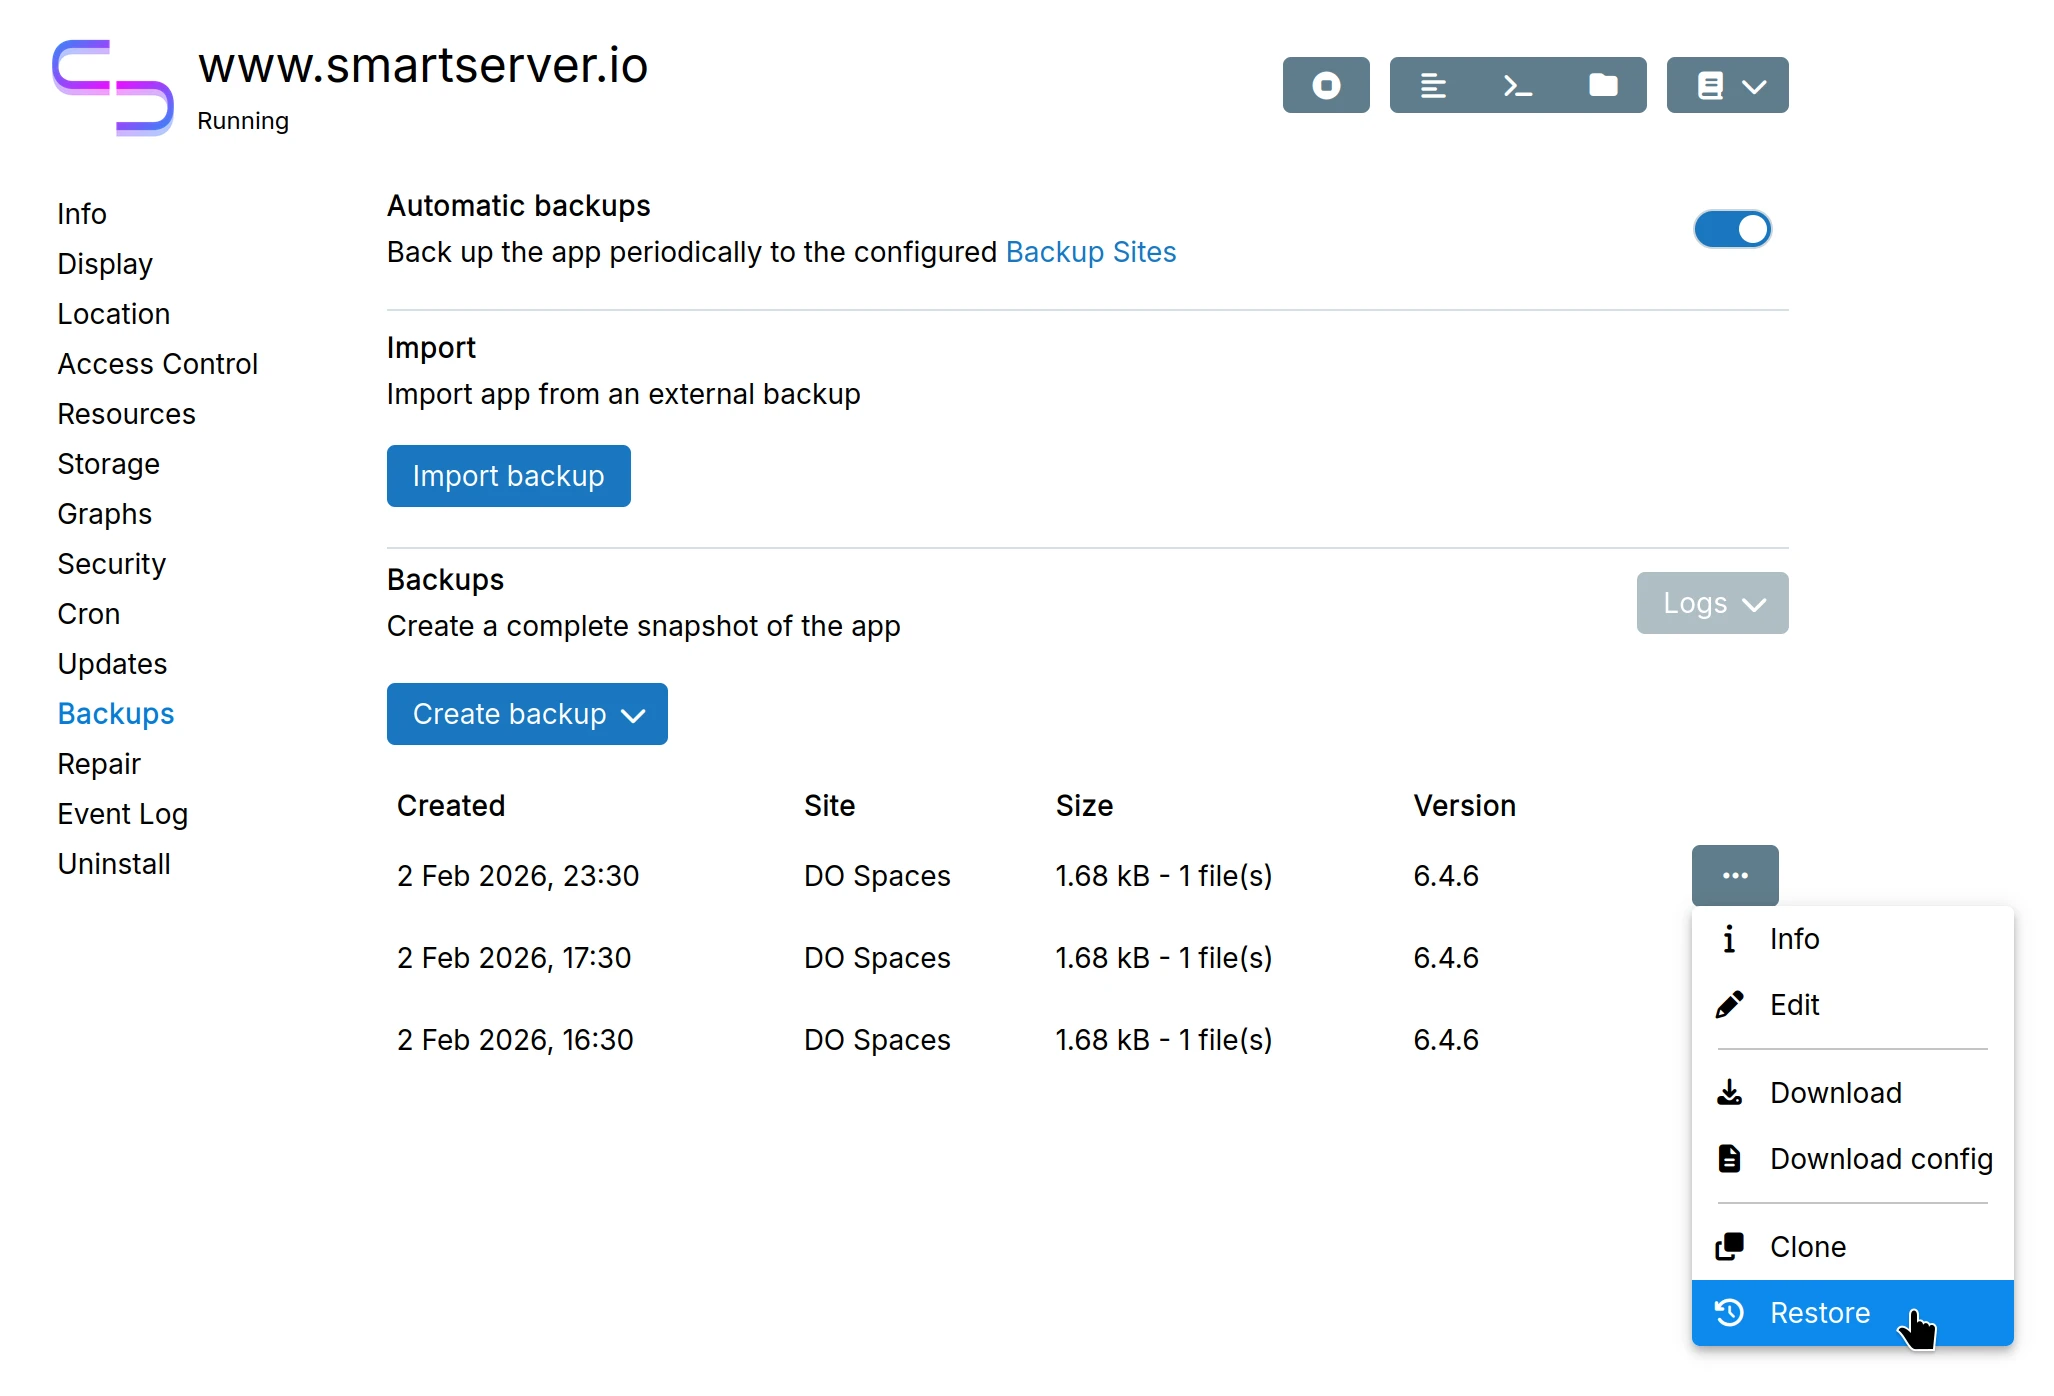
Restoring will also revert the code to the version that was running when the backup was created. This is because the current version of the app may not be able to handle old data.
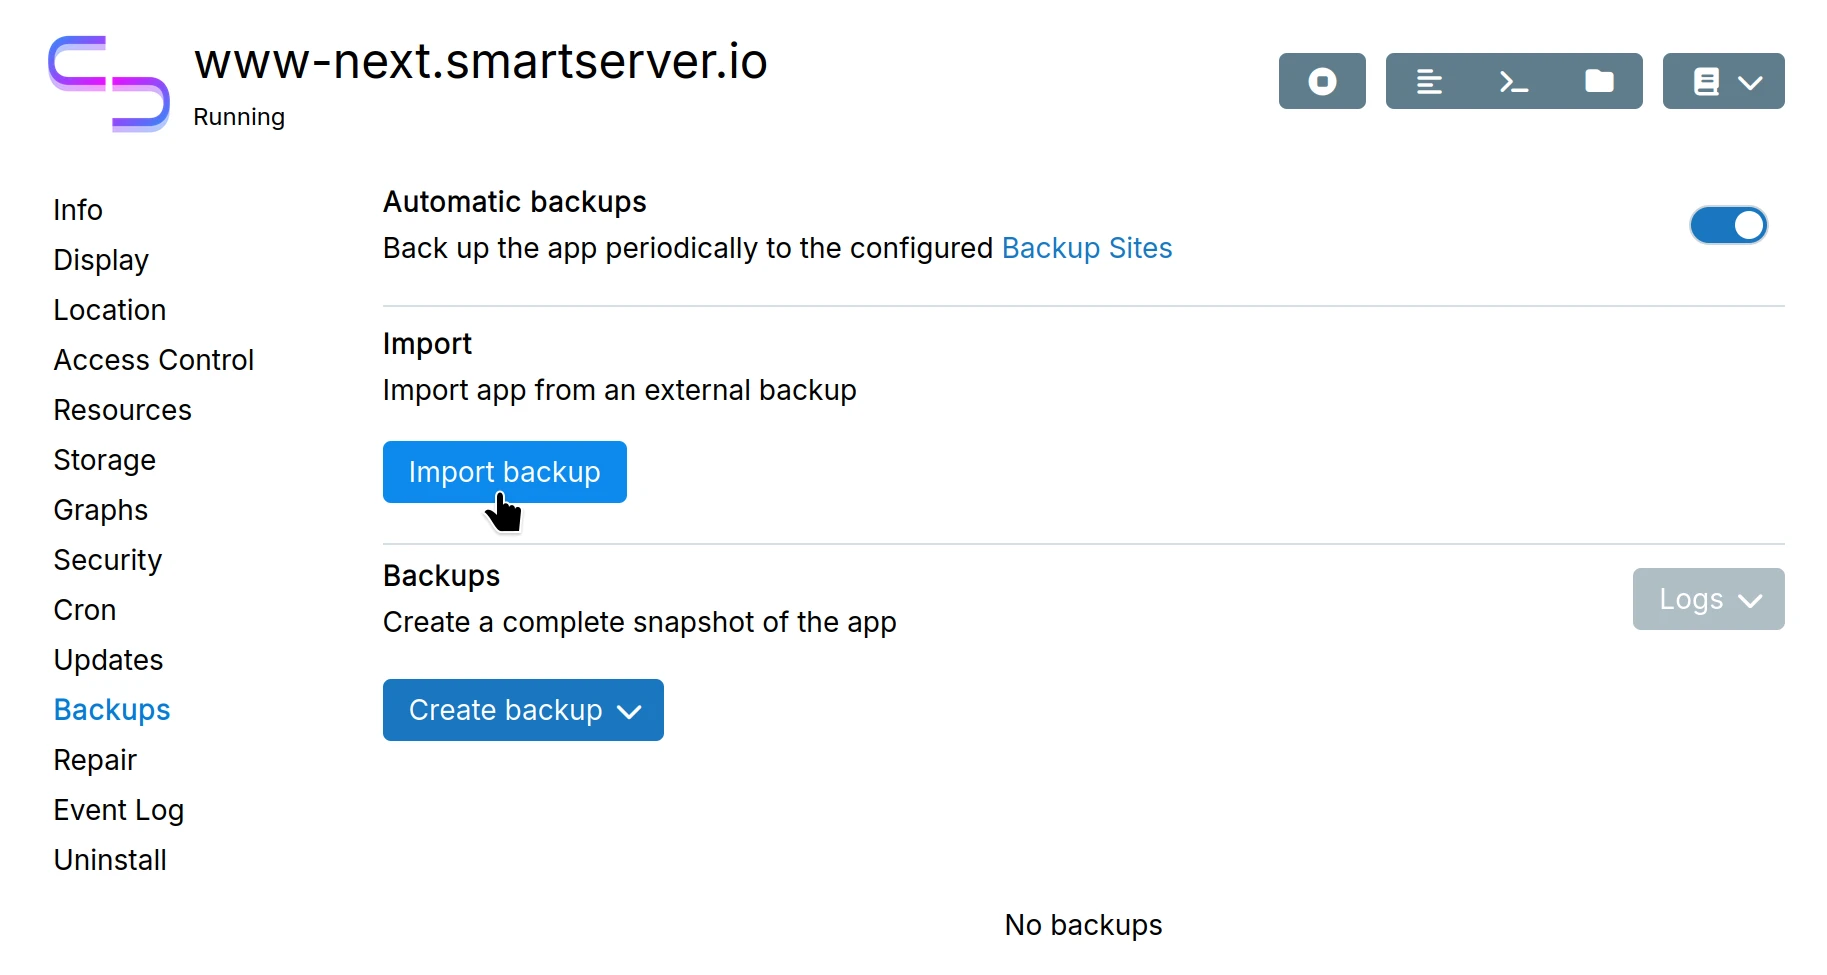
Import app backup
Import app backup helps in two cases:
a) Restore an old uninstalled app - You uninstalled an app but kept the backup and now want to restore it.
b) Migrate from another server - You want to move an app from another server to this one.
Import process
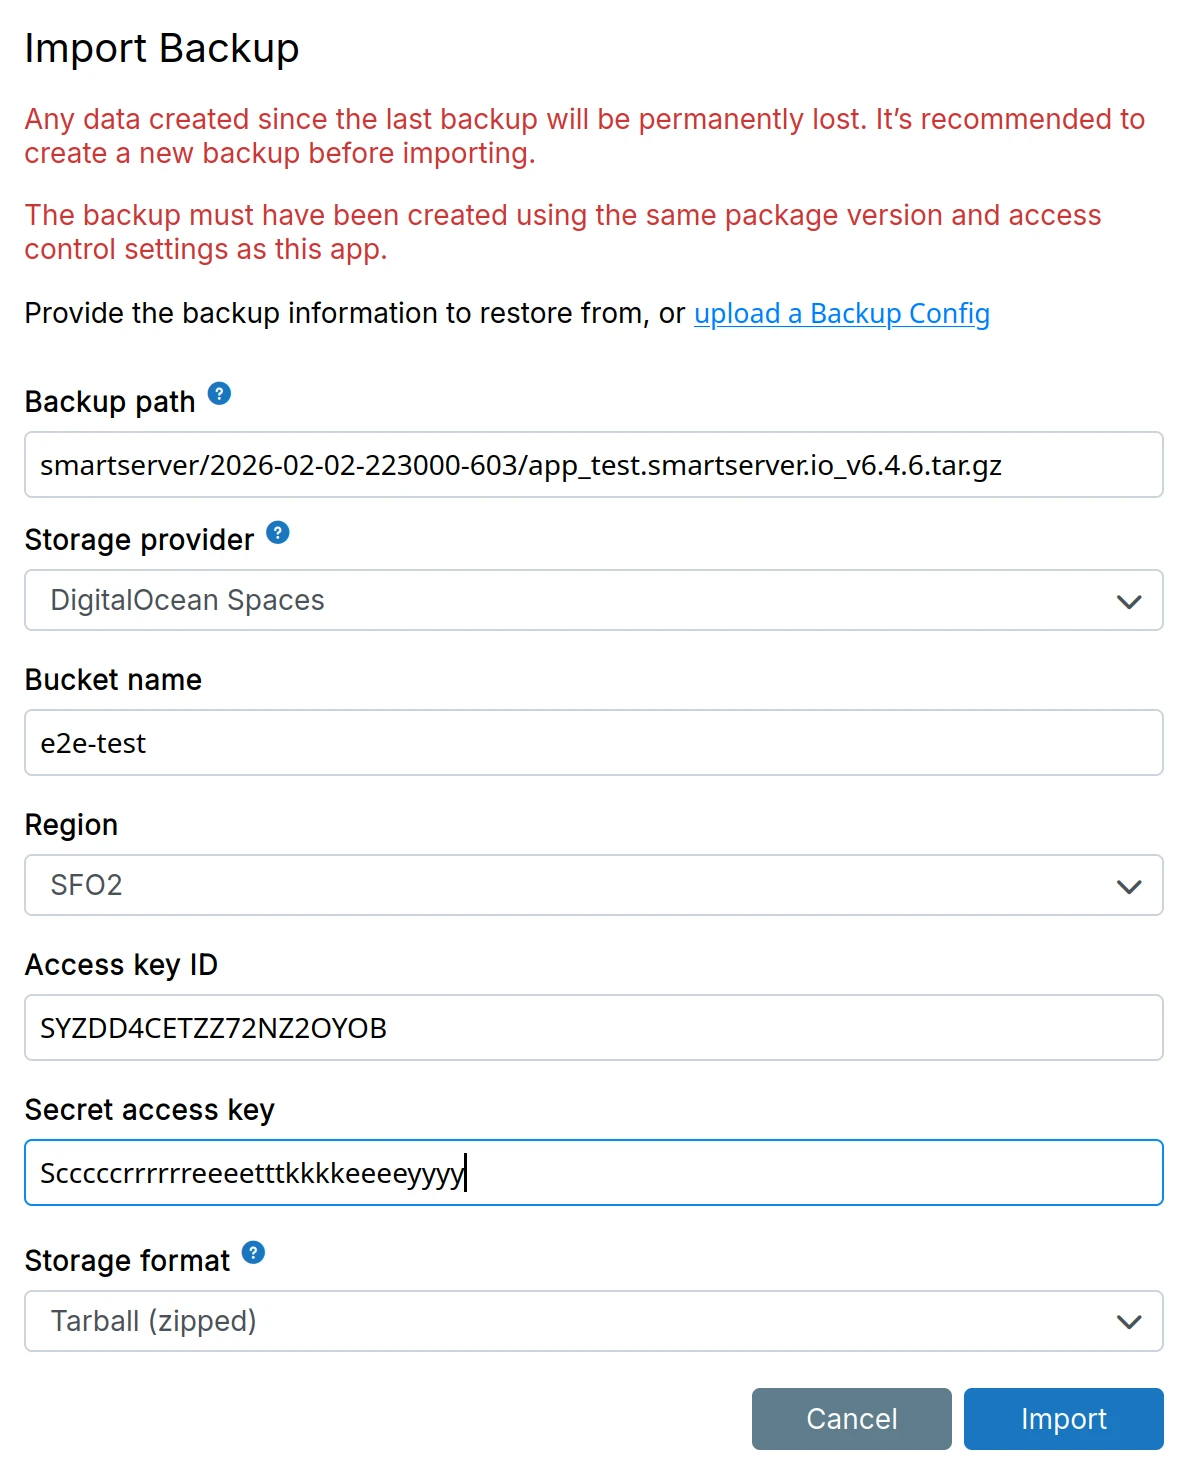
The import form requires backup site credentials and the remote path to the backup.
Case A: Restore uninstalled app
Fill the form manually:
- Enter the backup site credentials (same as your backup site configuration)
- Enter the remote path - the path to the specific backup on your backup site (e.g.,
2024-01-15-143022-456/app_wordpress.example.com_v1.2.3)
Case B: Migrate from another server
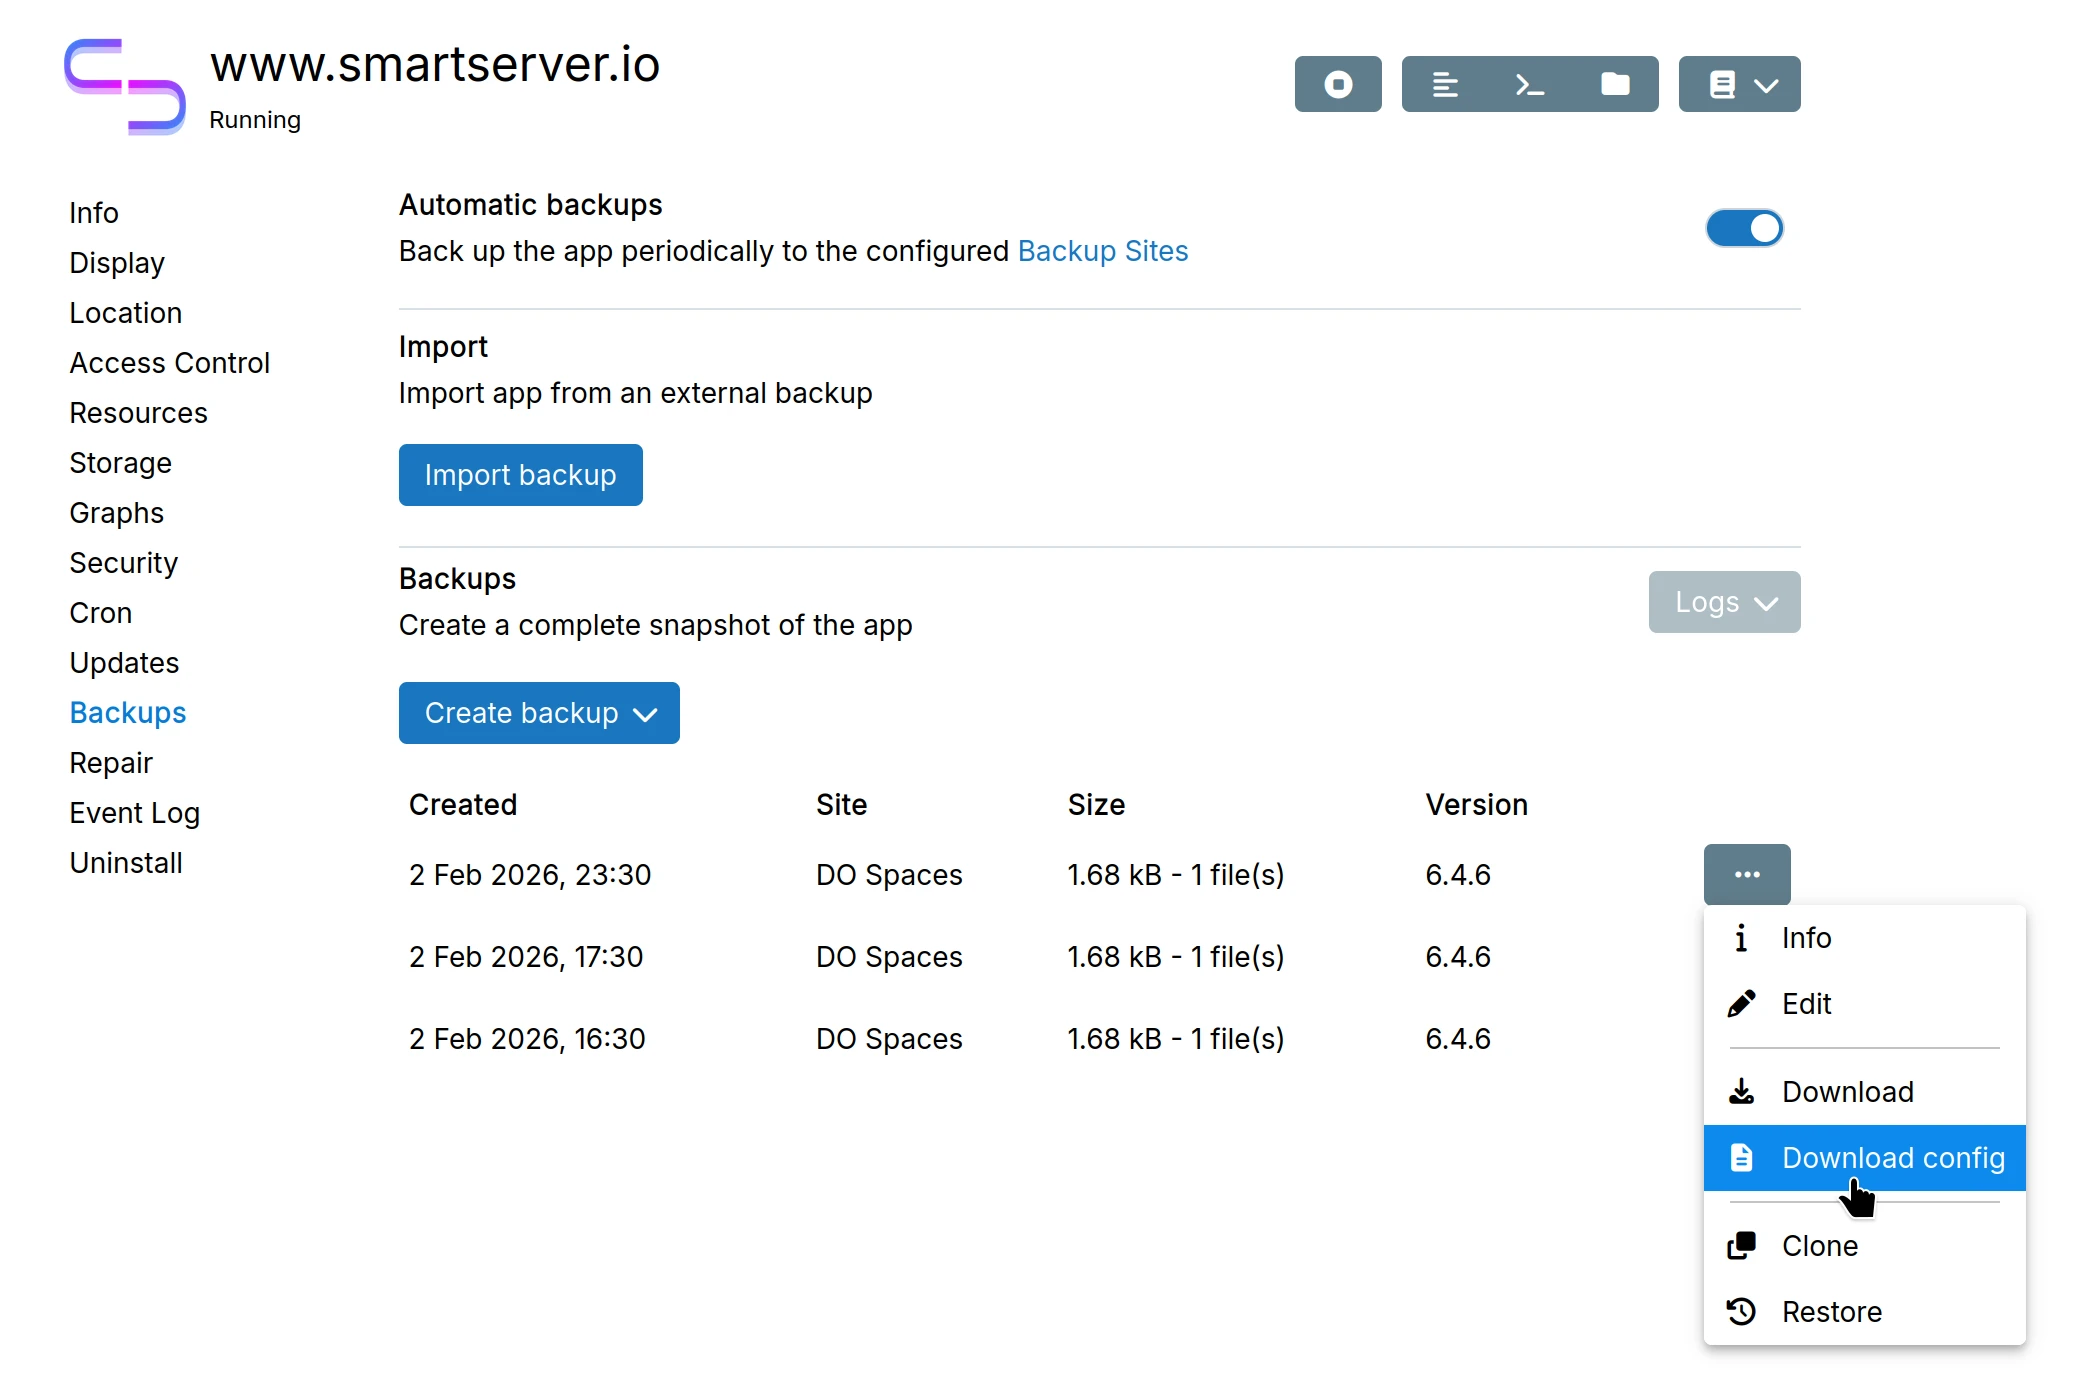
Use the backup configuration file to auto-fill the form:
- On the source server, create a backup of the app
- Download the backup configuration file:
- On the destination server, install the app (same version as source)
- Go to
Backups>Importand upload the backup configuration file to auto-fill the form
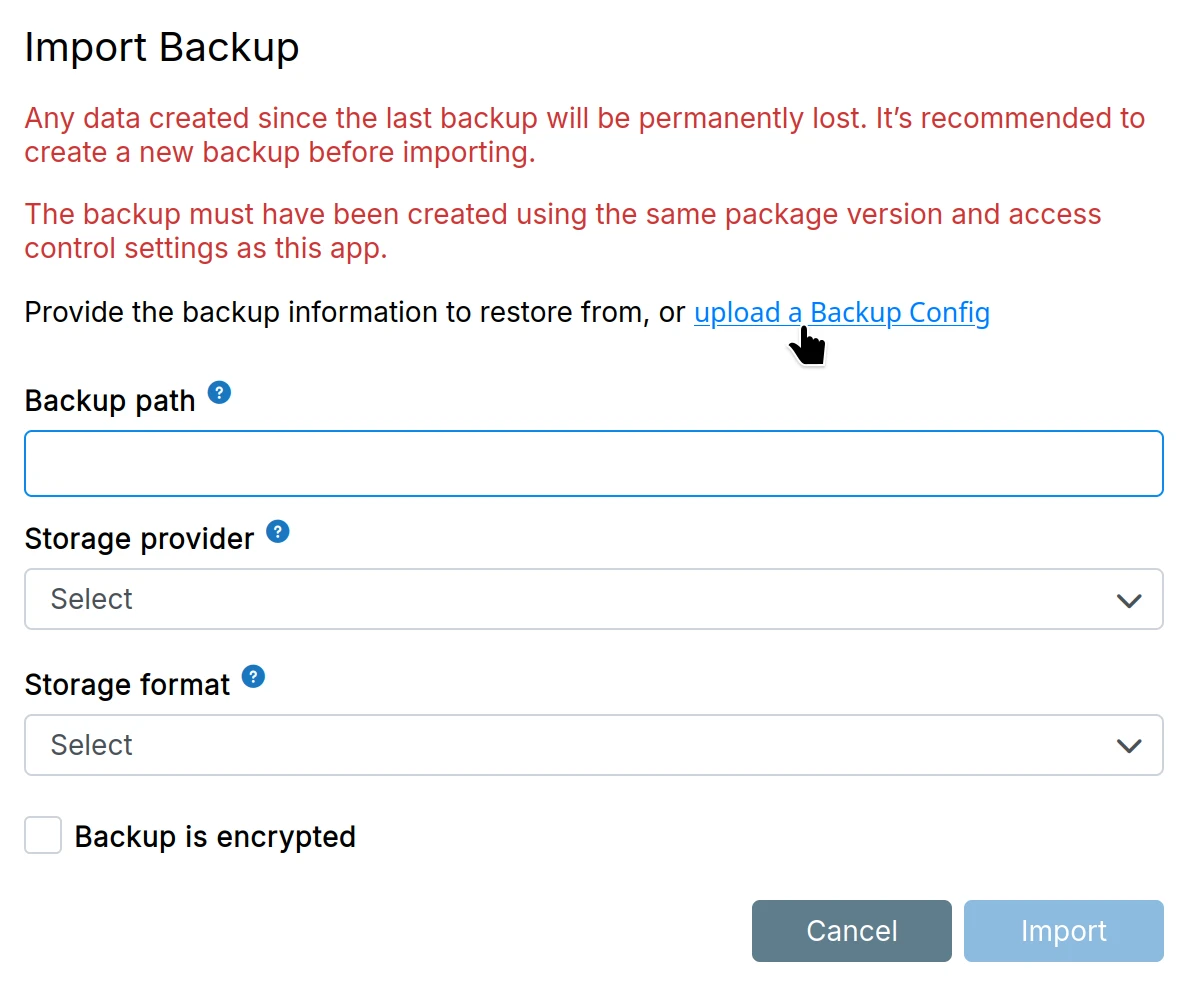
The backup configuration file contains the backup site credentials and the remote path to the specific backup.
Restore email
Specific emails or folders can be restored manually. For example, if a user deleted the "CriticalEmails" folder and needs it restored. Mail is backed up at <backupMount>/snapshot/box/mail/vmail/<mailbox>/mail/ (for tgz format, extract first; rsync format is always uncompressed).
Steps:
- Locate the deleted folder in the backup site at
<backupMount>/snapshot/box/mail/vmail/<mailbox>/mail/.CriticalEmails - Copy the folder to
/home/yellowtent/boxdata/mail/vmail/<mailbox>/mail/.CriticalEmails(replace<mailbox>with the actual email address) - Set permissions to match other folders:
drwxr--r-- ubuntu:ubuntu - Restart the mail service
The restored folder and emails will now appear in the mailbox.
Restore Cloudron
Old server is unavailable. You only have backups.
If your old server is still accessible, use Move Cloudron to another server instead.
The restored server will be an exact clone of the old one - all users, groups, email, apps, DNS settings, and certificates are restored.
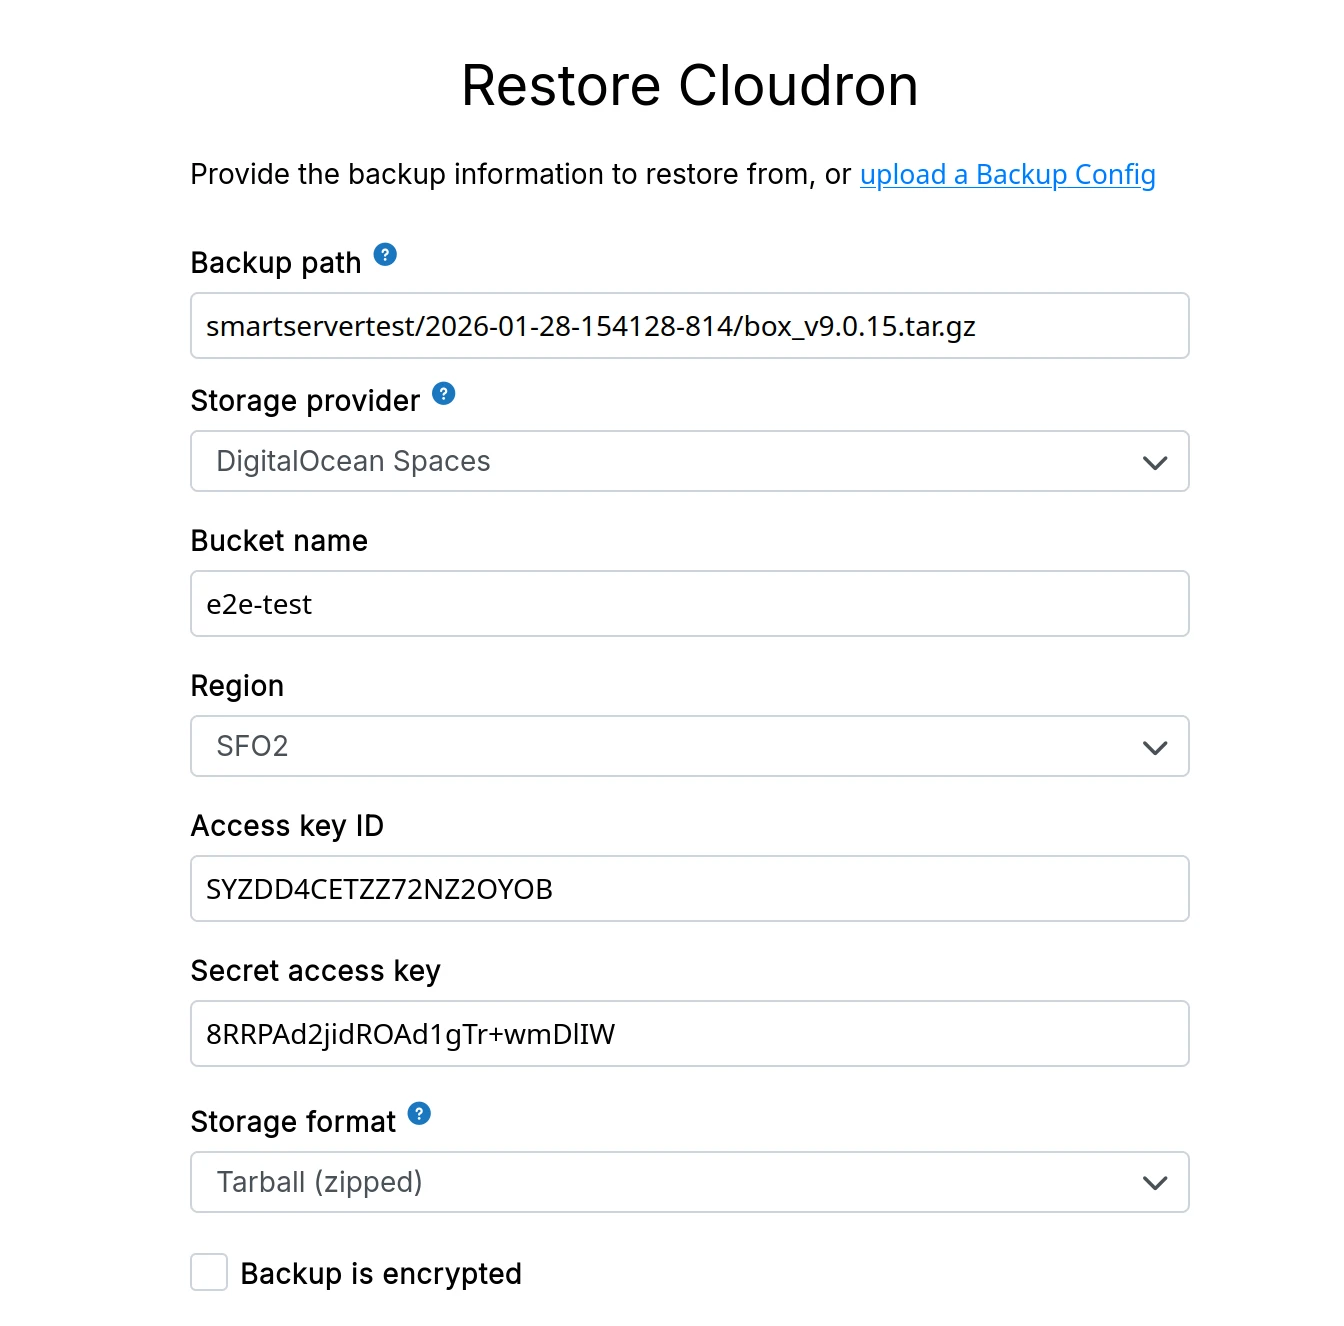
Find the remote path
Find the remote path to your platform backup in your backup storage. The remote path has the format <timestamp>/<box backup filename>, for example:
- tgz format:
2024-08-21-010015-708/box_v8.0.3.tar.gz - rsync format:
2024-08-21-010015-708/box_v8.0.3
Install Cloudron
Install Cloudron on a new server with Ubuntu LTS (20.04/22.04/24.04):
wget https://cloudron.io/cloudron-setup
chmod +x cloudron-setup
./cloudron-setup --version x.y.z # version must match your backup version
The Cloudron version and backup version must match for the restore to work. If you installed the wrong version by mistake, start over with a fresh Ubuntu installation.
Update DNS (if needed)
If your domains use Wildcard, Manual, or No-op DNS provider, manually update the DNS to point to the new server's IP. At minimum, update the dashboard domain (e.g., my.domain.com).
If you don't update DNS for app domains, those app restores will fail. You can trigger their restore later from the Backups section when you're ready to switch the IP.
Start restore
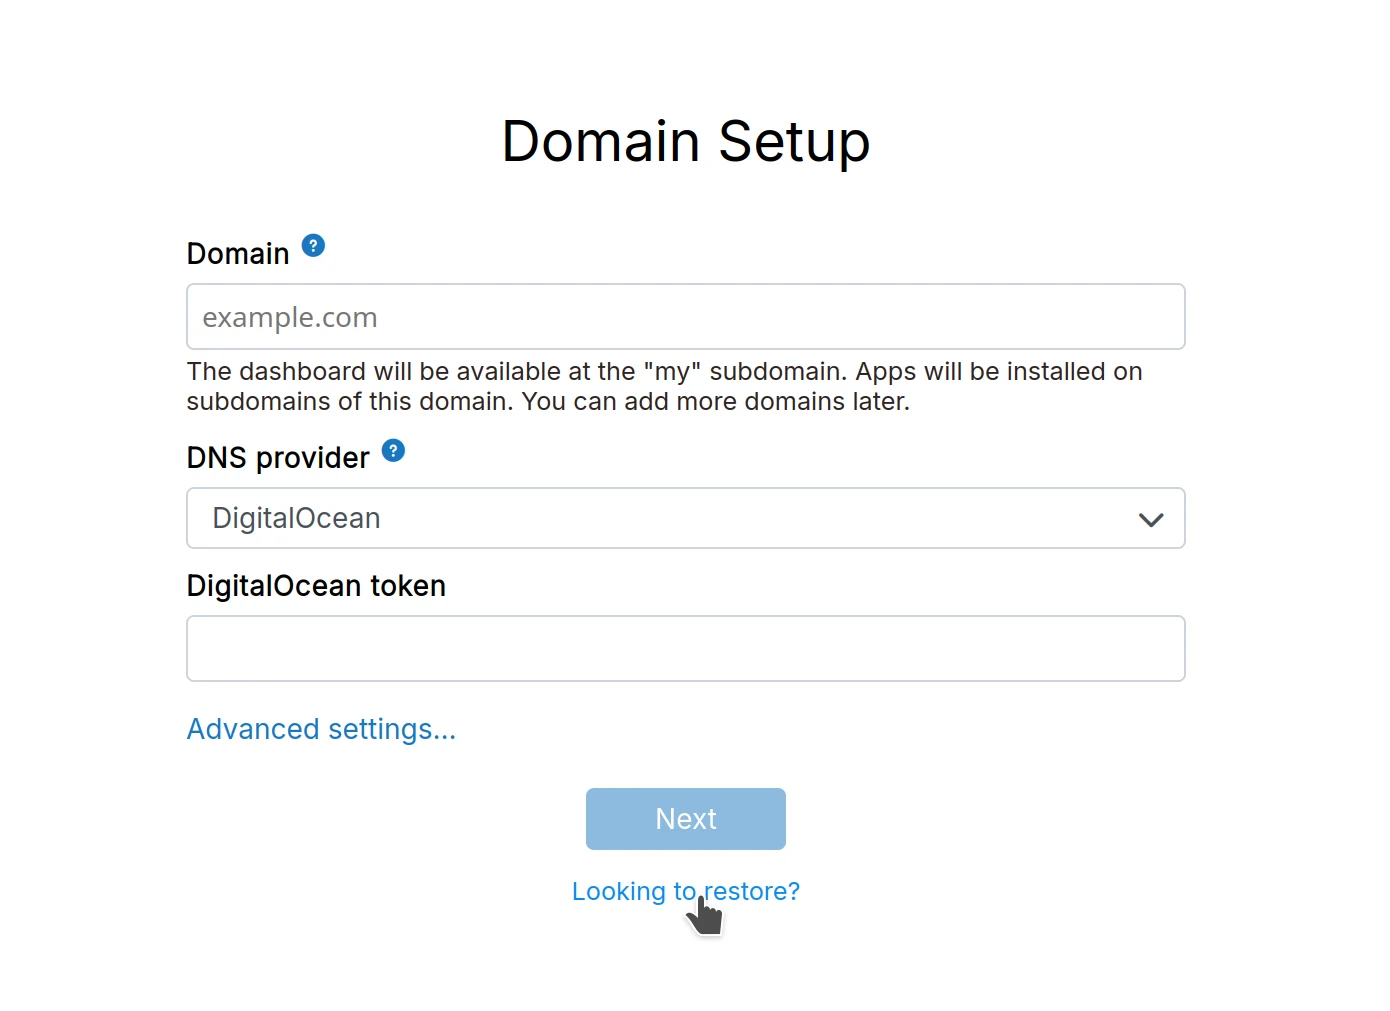
Navigate to http://<ip> and click Looking to restore at the bottom:
Fill in the backup information manually:
When using the filesystem provider, ensure the backups are owned by the yellowtent user and are in the same filesystem location as the old server.
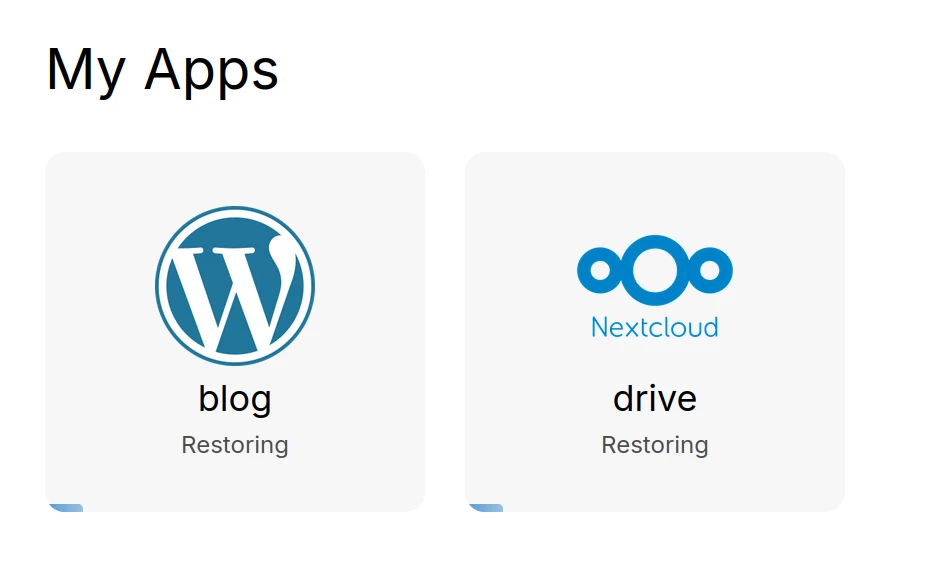
Cloudron will download the backup and start restoring:
Move Cloudron to another server
Old server is still accessible.
If your old server is no longer available, use Restore Cloudron instead.
To migrate to a different server:
Create backup
Take a complete backup.

Use an external service like S3 or Digital Ocean Spaces. This makes backups immediately available for the new server. If using filesystem backups, manually copy backup files to the new server using rsync or scp.
Download backup configuration
Download the backup configuration file from the newly created backup:

Restore on new server
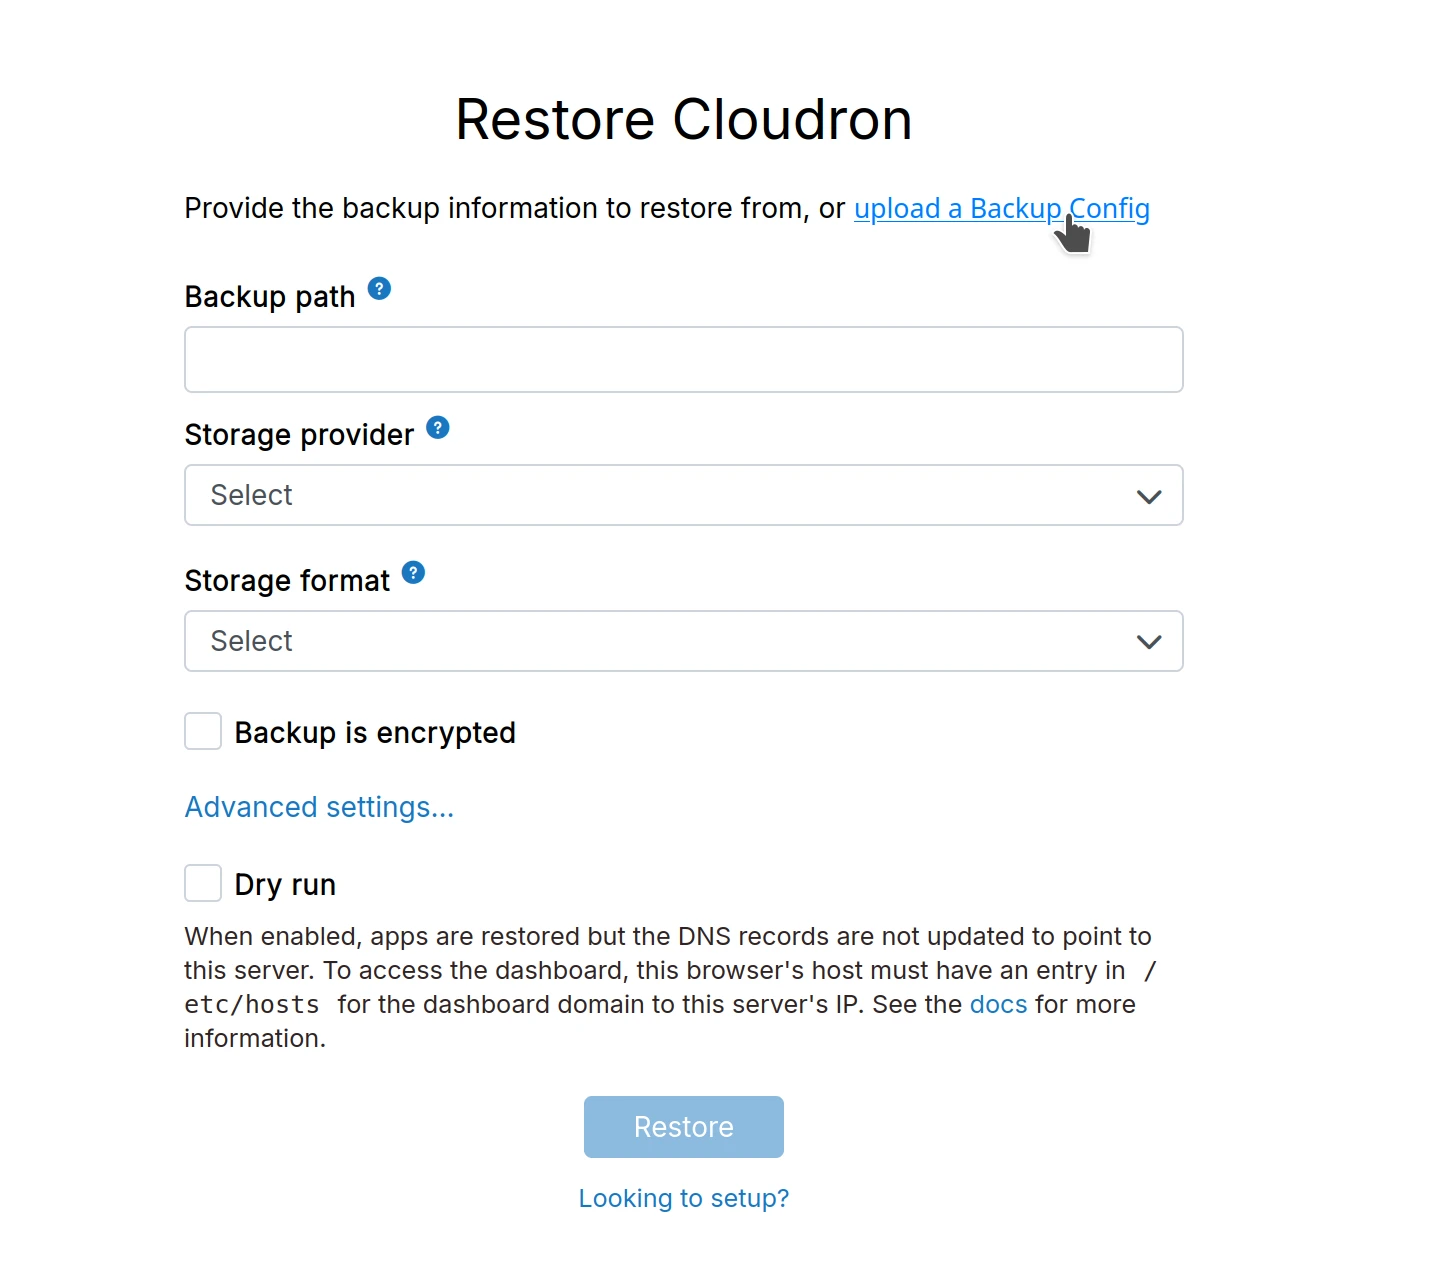
Follow the Restore Cloudron steps on the new server. Use the backup configuration file to auto-fill the restore form:
Do not delete the old server until migration is complete and you've verified all data is intact. Power it off instead.
The Cloudron version and backup version must match for the restore to work. To install a specific version, pass the version option: cloudron-setup --version 3.3.1.
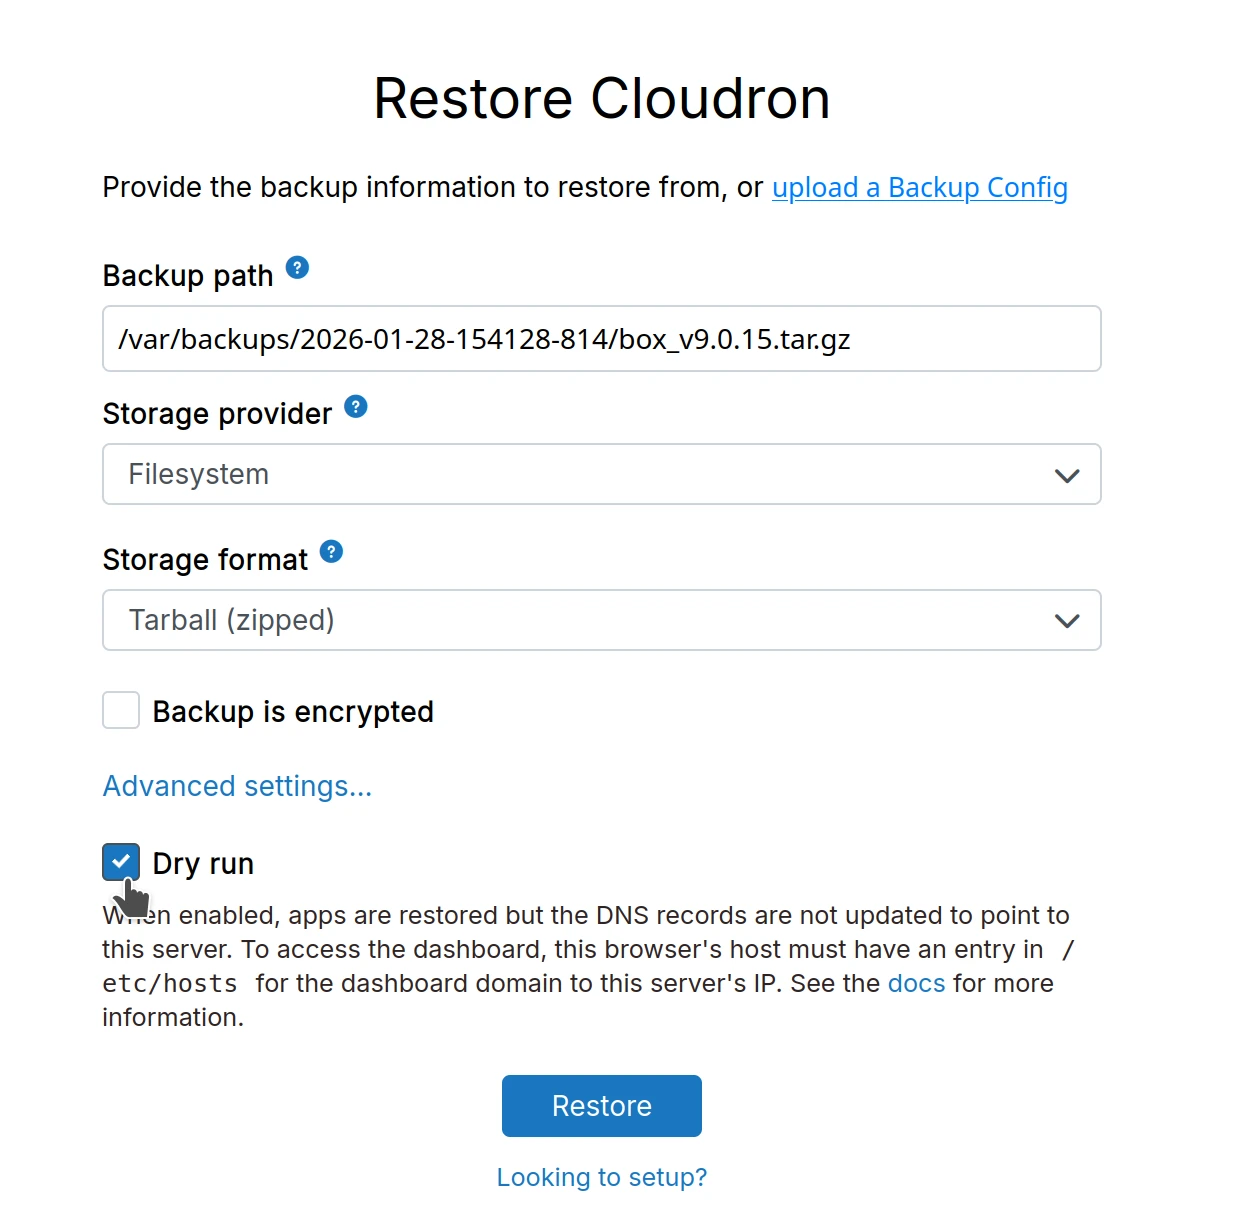
Dry run restore
Use dry run to test your backups and verify everything works before switching to the new server. This lets you restore to a new server without affecting your current installation.
Dry run skips DNS updates. The new server won't be publicly accessible - you access it using /etc/hosts entries on your local machine.
Steps
- Add entries to
/etc/hostson your PC/Mac (not on the server). Replace1.2.3.4with your new server IP:
# Dashboard access
1.2.3.4 my.cloudrondomain.com

# App access (add for each app you want to test)
1.2.3.4 app1.cloudrondomain.com
1.2.3.4 app2.cloudrondomain.com
- Follow Restore Cloudron steps and check the
Dry runcheckbox:
- After restore, verify you're accessing the new server by checking the IP in
Networkview:

If the IP shows your old server, clear browser cache or use private browsing mode.
- When ready to switch permanently, go to
Domainsview and clickSync DNS:

- Remove
/etc/hostsentries and shut down the old server.