Import email
Overview
This guide explains how to import existing email from an external provider to Cloudron Mail. The import process fetches email via IMAP from the external provider and pushes it to Cloudron Mail via IMAP.
Tools like imapsync, OfflineIMAP, and isync can perform this task. This guide uses imapsync.
Add domain
- Add the domain in the
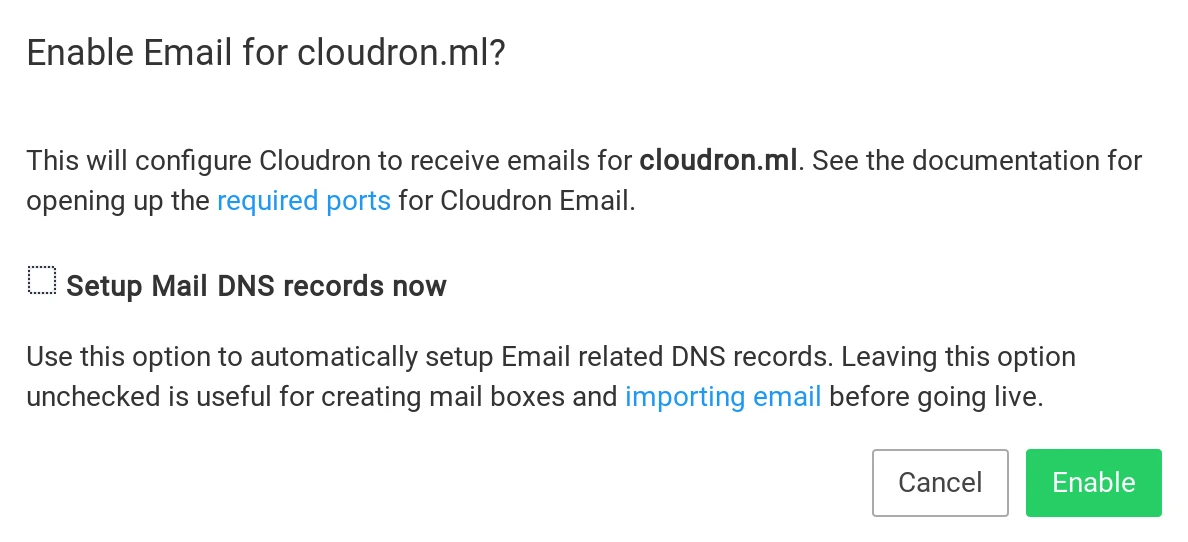
Domainview. - In the
Emailview, select the domain and clickEnablein theIncomingsection. - Uncheck
Setup Mail DNS records nowto continue using email with your current provider during import.
Create mailbox
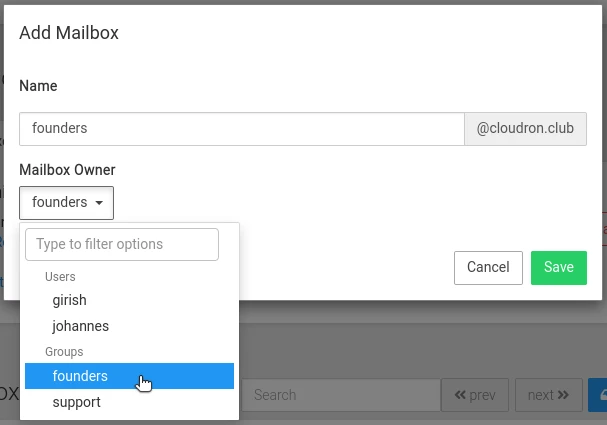
Add the mailbox(es) you want to import in the Email view.
Imapsync
Download imapsync to your PC. imapsync performs incremental and recursive transfers from one mailbox to another.
To import founders@cloudron.club:
imapsync \
    --host1 imap.external.server --user1 founders@cloudron.club --password1 externalmailboxpassword \
    --host2 my.cloudron.club --user2 founders@cloudron.club --password2 cloudronmailboxpassword
Repeat the above command for each mailbox on the external server.
For Gmail imports, see the Gmail FAQ. Example Gmail import:
imapsync --gmail1 --user1 founders@cloudron.club --password1 MASKED \
    --host2 my.cloudron.club --user2 founders@cloudron.club --password2 MASKED \
    --maxbytespersecond 20000 --useheader=X-Gmail-Received --useheader Message-Id --automap --regextrans2 s,\[Gmail\].,, --skipcrossduplicates   --folderlast [Gmail]/All Mail --exclude "\[Gmail\]/Spam"
Verify
Verify the imported emails in the app using apps like SnappyMail or Roundcube.
Finish
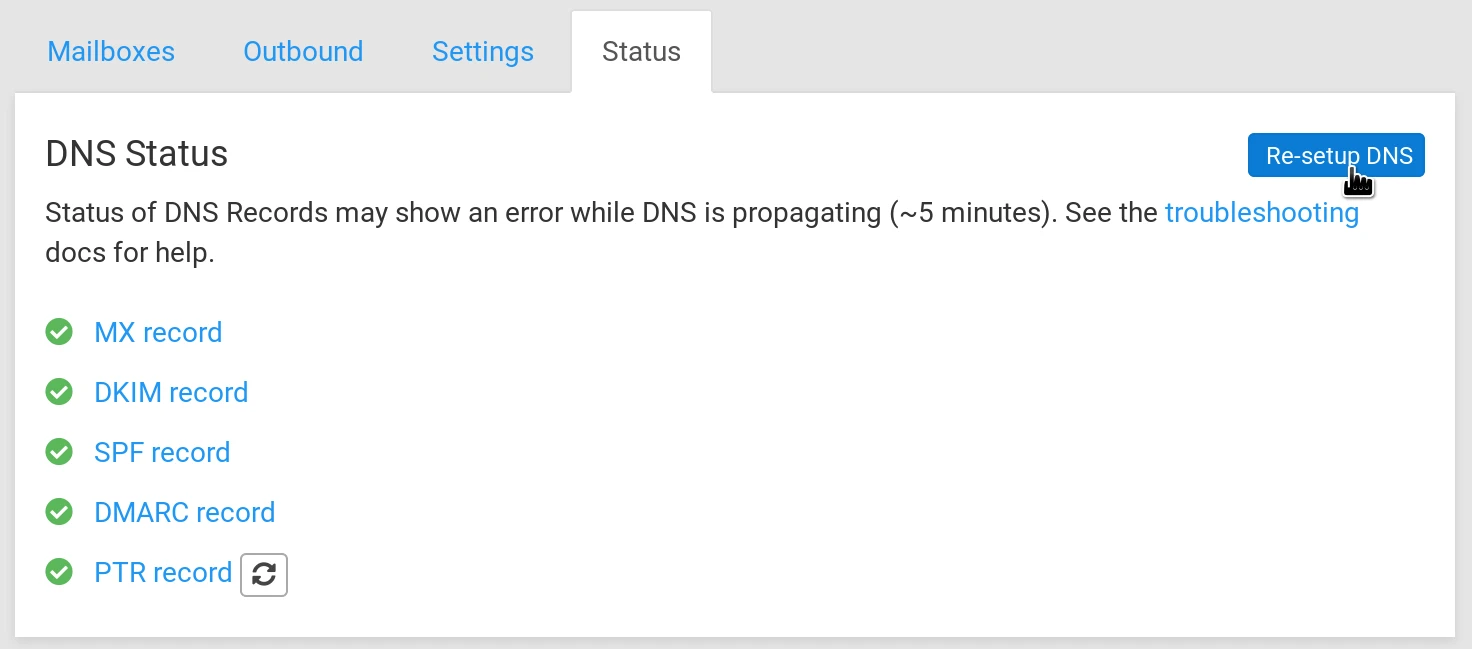
Switch the domain's DNS to use the mail server by clicking the Re-setup DNS button in Email -> Select domain -> Status.